How to Replace a Grohe Bathroom Faucet Cartridge
Replacing a Grohe bathroom faucet cartridge is a relatively straightforward process that can be tackled by most homeowners with basic DIY skills. A worn-out cartridge can lead to leaks, drips, and inconsistent water flow, making the bathroom faucet unusable. Fortunately, Grohe faucets are known for their quality and ease of repair, and replacing the cartridge is often the solution to these issues. This article will guide you through the steps of replacing a Grohe bathroom faucet cartridge.
Tools and Materials
Before embarking on the replacement process, gather the necessary tools and materials. These include:
- New Grohe cartridge: Ensure you choose a cartridge compatible with your specific faucet model. Refer to the user manual or the Grohe website for the correct part number.
- Adjustable wrench: Used for loosening and tightening nuts and fittings.
- Channel lock pliers: These are useful for gripping and turning difficult-to-reach parts.
- Phillips screwdriver: For removing screws securing the faucet handle and cover.
- Flathead screwdriver: May be needed to pry off decorative caps or covers.
- Small basin or bucket: To catch excess water during the process.
- Teflon tape: For sealing threads on new fittings.
- Cleaning cloths: For wiping away debris and cleaning the faucet.
- Work gloves: For protection during the repair.
Step-by-Step Replacement Guide
Once you have the necessary tools and materials, follow these steps to replace the cartridge:
- Turn off the water supply: Locate the shut-off valves for the hot and cold water lines to your bathroom faucet. Turn both valves completely clockwise to stop the water flow.
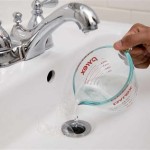
- Drain the faucet: Open the faucet spout to drain any remaining water inside the lines.
- Remove the faucet handle: Depending on your faucet model, the handle may be secured by a screw or a decorative cap. Use the appropriate screwdriver to remove the handle. You might need to gently pry off the cap with a flathead screwdriver, taking care not to damage the finish.
- Remove the retaining nut: Underneath the handle, locate the retaining nut that holds the cartridge in place. Use an adjustable wrench to loosen and remove this nut, taking care not to overtighten or damage the surrounding parts.
- Remove the old cartridge: Once the retaining nut is removed, the worn-out cartridge should come out easily. If it's stuck, gently wiggle it with your fingers or use pliers to remove it.
- Clean the housing: Use a cleaning cloth to wipe away any debris or sediment inside the cartridge housing. This ensures the new cartridge has a clean environment to work in.
- Install the new cartridge: Take the new cartridge and carefully align it with the housing. Gently push the cartridge into place until it's fully seated. Some cartridges may have a rubber o-ring around the base; ensure it's in place for proper sealing.
- Install the retaining nut: Place the retaining nut back on the cartridge and tighten it securely with the adjustable wrench. Do not overtighten, as it can damage the cartridge.
- Replace the handle: Put the handle back on the faucet and secure it with the screw or cap.
- Turn the water supply back on: Slowly turn the shut-off valves counterclockwise to restore the water flow.
- Test the faucet: Turn the faucet handle to test for leaks and proper water flow. If you see a leak or have problems with the flow, check that the retaining nut is properly tightened and the new cartridge is installed correctly.
Common Cartridge Issues and Solutions
While replacing a Grohe bathroom faucet cartridge is often a simple solution, there may be other issues that could cause leaks or problems with the faucet. Here are some common cartridge-related issues and their solutions:
- Leaking after installation: If the faucet leaks after replacing the cartridge, check the retaining nut for proper tightness. If it's loose, tighten it gently. Also, ensure the new cartridge is properly seated and that the o-ring (if present) is in good condition and properly installed.
- Inconsistent water flow: This could indicate a problem with the valve stem or the faucet itself, not just the cartridge. If replacing the cartridge doesn't resolve the issue, consider calling a professional plumber to diagnose the problem.
- Difficult handle movement: If the faucet handle is stiff or difficult to turn, check for debris or mineral buildup within the cartridge housing. Clean this area thoroughly and re-install the cartridge.
Replacing a Grohe bathroom faucet cartridge is a simple and effective way to repair leaks, drips, and inconsistent water flow. By following these steps and addressing common issues, you can restore your faucet to optimal functionality.

How To Take Apart A Grohe Bathroom Faucet Mr Kitchen Faucets

Change A Grohe Basin Mixer Cartridge

Disassembling Grohe Ohm Cartridge Basin Mixer

How To Take Apart A Grohe Bathroom Faucet Mr Kitchen Faucets

Parts For Grohe Tenso Bath And Shower Fixtures

Parts For Grohe Kensington Series Bath S

Disassembling Grohe Ohm Cartridge Basin Mixer

Grohe 19 419 000 3 4 Thermostatic Shower Trim Complete With Cartridge

Grohe 34270en1 Brushed Nickel Concetto Single Handle Hole Bathroom Faucet With Silkmove Ceramic Disc Cartridge Free Metal Drain Assembly Purchase Com

How To Take Apart A Grohe Bathroom Faucet Upgradedhome Com
Related Posts