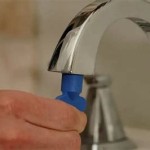
How to Replace a Pfister Bathroom Faucet Cartridge
A bathroom faucet cartridge is the internal mechanism that controls the flow of water. Over time, mineral deposits, wear and tear, or even just regular use can cause the cartridge to wear out. This can manifest in a variety of issues, including leaking, dripping, or difficulty in controlling water temperature or flow. When these issues arise, it is typically necessary to replace the cartridge. This guide will explain how to replace a Pfister bathroom faucet cartridge.
Step 1: Gather Necessary Tools and Materials
Before beginning, ensure you have the correct tools and materials. These include:
- A Phillips-head screwdriver
- Adjustable wrench
- Channel-lock pliers (optional)
- New Pfister faucet cartridge (ensure compatibility with your faucet model)
- Teflon tape
- A small bucket or bowl
- Towels or rags
- Optional: Cartridge removal tool (for some models)
It is important to note that the exact tools and materials needed may vary depending on the specific Pfister faucet model. Refer to the user manual for your faucet for specific instructions if required.
Step 2: Turn off the Water Supply
For safety, turn off the water supply to the faucet. This is typically achieved by turning the shut-off valves located beneath the sink or on the wall. Once the water supply is turned off, confirm that the water has stopped flowing by turning on the faucet.
Step 3: Drain the Faucet
To prevent water spillage, drain the faucet. Open the faucet handles to allow any remaining water in the pipes and the faucet body to drain out. You can use a small bucket or bowl to collect the water.
Step 4: Remove the Faucet Handles
The next step is to remove the faucet handles. Locate the screws that secure each handle to the faucet body. These screws are usually located on the underside or at the side of the handle. Use a Phillips-head screwdriver to loosen and remove these screws. Once removed, carefully lift the handles off the faucet base.
Step 5: Remove the Escutcheon Plate
The escutcheon plate is the decorative cover that surrounds the faucet handles. It may be held in place by screws or simply snap-fitted. If screws are present, use a Phillips-head screwdriver to remove them. If the plate is snap-fitted, use a flat-blade screwdriver to pry it off gently, being careful not to scratch the surrounding finish.
Step 6: Remove the Old Cartridge
Now locate the old cartridge. It is typically housed beneath the faucet spout or within the body of the faucet. The cartridge may be held in place by a retaining nut, a clip, or a spring. Refer to the user manual for your faucet model to identify the specific method used to secure the cartridge.
If a retaining nut is present, use an adjustable wrench to loosen and remove it. If a clip is present, use a channel-lock plier or a dedicated cartridge removal tool (if available) to carefully remove it. If a spring mechanism is present, it may be necessary to use a combination of tools or techniques to remove the cartridge.
Step 7: Clean the Faucet Body
Before installing the new cartridge, clean the faucet body to remove any debris or mineral deposits. This helps ensure a secure fit and prevents potential clogging issues. Use a toothbrush or a small brush to scrub the faucet body and any openings. Rinse thoroughly with water to remove any remaining debris.
Step 8: Install the New Cartridge
Once the faucet body is cleaned, install the new cartridge. Ensure that the new cartridge is compatible with your Pfister faucet model. Align the cartridge with the faucet body, paying close attention to any alignment marks or grooves.
If a retaining nut is present, use an adjustable wrench to tighten it securely. Ensure that the nut is tightened firmly, but avoid overtightening as this can damage the cartridge or the faucet body. If a clip is present, use a channel-lock plier or a dedicated cartridge removal tool (if available) to secure the clip in place. If a spring mechanism is present, carefully install the spring and ensure that the cartridge is securely in place.
Step 9: Reassemble the Faucet
After installing the new cartridge, reassemble the faucet. Replace the escutcheon plate, making sure it is properly secured. Then, replace the faucet handles and tighten the screws.
Step 10: Turn on the Water Supply
After reassembling the faucet, turn the water supply back on. Check for any leaks at the connections. If any leaks are present, carefully retighten the connections as needed.
Step 11: Test the Faucet
Finally, test the faucet to ensure that it is functioning correctly. Turn on the faucet and check the flow of water, temperature control, and the overall functionality. If any issues arise, you may need to revisit the installation steps or consult the user manual for further guidance.
By following these steps, you can successfully replace a Pfister bathroom faucet cartridge and restore your faucet to proper functioning. Remember to consult the user manual for your specific faucet model for additional instructions and specific details. If you are unsure about any aspect of the replacement process, it is advisable to consult with a qualified plumber.

Bathroom My Single Handle Faucet Is Leaking Or Dripping

How To Replace A Pfister Faucet Stem 910 024 025

How To Replace Hot And Cold Cartridges On A Pfister Widespread Bathroom Faucet

Maintenance How To Remove And Replace A Cartridge On Wide Spread

What Is A Faucet Cartridge Dripping Pfister Replacement In 15min How To

Pfister Faucet Repair How To Fix A Spout Leak And Modify The Replacement Cartridge Assembly

How To Replace Hot And Cold Cartridges On A Pfister Widespread Bathroom Faucet

Bathroom Uninstall Faucet Or Removing Quick Connector

Hot And Cold Pfister Cartridge Replacement On A Bathroom Faucet

Pfister Bathroom Faucet Leaking Handle Cartridge Repair
