Moen Bathroom Faucet Clean Aerator: A Guide to Maintaining Your Faucet
Moen bathroom faucets are known for their durability and stylish designs. However, like any plumbing fixture, they require regular maintenance to ensure optimal performance and longevity. One crucial component that often needs attention is the aerator. The aerator is a small, usually metal, part located at the end of your faucet spout. Its main function is to mix air with the water stream, creating a smooth and even flow. Over time, this aerator can become clogged with mineral deposits, debris, and other contaminants, leading to a reduced water flow, an uneven spray pattern, and even a noisy faucet. This article will guide you through the process of cleaning your Moen bathroom faucet aerator, restoring its functionality and keeping your faucet running smoothly.
Understanding the Importance of a Clean Aerator
A clean aerator significantly improves your bathroom faucet's performance and lifespan. Here's why:
- Improved Water Flow: A clogged aerator restricts water flow, forcing you to run the faucet longer to achieve the desired water pressure. Cleaning the aerator will restore the optimal water flow, conserving water and saving you money on your water bills.
- Enhanced Water Pressure: A clean aerator ensures a consistent, even spray pattern, delivering a satisfying water experience. This is especially important for tasks like washing hands or brushing teeth.
- Reduced Noise: Mineral deposits and debris trapped in the aerator can cause a rattling or sputtering sound as water flows. Cleaning the aerator eliminates these noise-producing impurities.
- Prevents Faucet Damage: A clogged aerator can put undue strain on your faucet's internal components. This strain can lead to leaks, drips, and eventually, more significant damage to the faucet itself. Regular aerator cleaning helps prevent these problems.
Steps to Clean Your Moen Bathroom Faucet Aerator
Cleaning your Moen bathroom faucet aerator is a simple DIY project that doesn't require any special tools. Here are the steps:
- Turn off the Water Supply: Before you start, locate the shut-off valve for the faucet and turn off the water supply. Be sure to turn off the water to the entire bathroom if necessary.
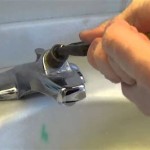
- Remove the Aerator: The aerator usually screws onto the end of the faucet spout. Grip the aerator firmly with your fingers or a wrench (if required) and unscrew it counterclockwise. If you encounter resistance, use a wrench to gently loosen the aerator.
- Disassemble the Aerator: Some aerators are simple, consisting of a single piece. Others have multiple parts, including a screen, a washer, and a rubber O-ring. Carefully separate the aerator components and remove any visible debris.
- Clean the Aerator Parts: Fill a bowl or container with a mixture of white vinegar and water (50/50 ratio). Submerge the aerator parts in the solution for 30 minutes to an hour. The vinegar will help dissolve mineral deposits and loosen any stubborn debris.
- Rinse and Dry: After soaking, rinse the aerator parts thoroughly with clean water to remove the vinegar solution and any remaining debris. Use a soft-bristled toothbrush to gently scrub any remaining sediment. Allow the parts to dry completely.
- Reassemble and Reinstall: Once the parts are dry, reassemble the aerator, ensuring all components are properly aligned. Screw the aerator back onto the faucet spout, turning it clockwise until it is securely tightened.
- Turn on the Water Supply: After reassembling the aerator, turn the water supply back on and check for leaks. If there are no leaks, test the water flow and spray pattern. You should notice a significant improvement in both.
Tips for Keeping Your Moen Bathroom Faucet Aerator Clean
To keep your Moen bathroom faucet aerator clean and functioning optimally, follow these tips:
- Regular Cleaning: Clean your aerator every 3-6 months or more frequently if you live in an area with hard water. This routine cleaning will prevent mineral deposits from building up and clogging the aerator.
- Use a Water Filter: Installing a water filter for your entire house or just for your bathroom faucet can help reduce the amount of minerals and contaminants that enter your water supply, thereby reducing the frequency with which you need to clean your aerator.
- Avoid Using Harsh Chemicals: When cleaning your aerator, avoid using harsh chemicals like bleach or drain cleaner, as these can damage the aerator's components. Stick to vinegar-based solutions or a mild soap and water mixture.
- Replace Worn-Out Aerators: If you find that your aerator is frequently getting clogged or shows signs of wear and tear, consider replacing it with a new one. Replacing the aerator will restore the faucet's performance and ensure a smooth and efficient water flow for years to come.
By diligently following these steps and implementing these tips, you can easily maintain your Moen bathroom faucet aerator, ensuring a long-lasting and efficient performance from your faucet. Remember, a clean aerator not only enhances your bathroom's functionality but also saves you money on water bills and prevents future problems.
What Is The Best Way To Clean A Faucet Aerator Quora

How To Remove A Moen Kitchen Faucet Aerator

How To Install A Water Saving Aerator In Your Moen Bathroom Faucet

Moen Faucet Sean Moenkhoff

How To Remove An Aerator From A Moen Kitchen Faucet Mr Faucets

Remove Aerator From Moen Faucet Non Threaded

How To Clean A Faucet Aerator And Sink Sprayer Dummies

Moen Faucet Aerator Key Flat Head Driver Remove Low Flow Filter Kitchens Diy

Moen 6410bn Eva 1 2 Gpm Centerset Bathroom Faucet Valve Build Com

Cleveland Faucet Group Part 180158 1 2 Gpm Moen Aerator Kit Includes Key Inserts Home Depot Pro
Related Posts


