How To Attach a Bathroom Sink to a Wall
Attaching a bathroom sink to a wall, often referred to as a wall-mounted sink installation, is a plumbing and carpentry task requiring careful planning and execution. A securely mounted sink is critical for safety, functionality, and aesthetics within a bathroom. Improper installation can result in damage to the sink, the wall, or the plumbing, and potentially lead to water damage throughout the bathroom and adjacent areas. This article will outline the necessary steps involved in properly attaching a bathroom sink to a wall, encompassing preparatory considerations, mounting techniques, and essential plumbing connections.
Planning and Preparation: A Foundational Step
Before commencing any physical work, meticulous planning is essential. This stage involves several distinct activities: assessing the wall structure, gathering the appropriate tools and materials, determining the appropriate sink height, and understanding the local plumbing codes.
Wall Structure Assessment: The wall's structural integrity is paramount. Wall-mounted sinks place significant stress on the wall, particularly when filled with water or subjected to leaning pressure. Identify the wall studs behind the finished surface. These vertical framing members provide the necessary support for the sink mounting hardware. Utilize a stud finder to accurately locate the studs. Walls constructed with drywall alone are unlikely to support a wall-mounted sink without reinforcement. If the existing stud configuration is insufficient, additional framing may be required within the wall cavity to provide adequate support. The addition of horizontal blocking between studs is a common method. Consider consulting with a structural engineer or experienced contractor if unsure about the wall's load-bearing capacity.
Tools and Materials Acquisition: The right tools and materials streamline the installation process and contribute to a more secure and professional result. Essential tools include a stud finder, level (bubble or laser), measuring tape, pencil, drill with various drill bits (including masonry bits if necessary), screwdriver (Phillips and flathead), adjustable wrench, pipe wrench, basin wrench, safety glasses, and gloves. Necessary materials consist of the wall-mounted sink, mounting hardware (typically supplied with the sink but may need to be upgraded for heavy sinks), sink drain assembly, P-trap, supply lines, shut-off valves (if replacements are needed or if not already present), plumber's putty, Teflon tape, silicone caulk, and appropriate fasteners (lag bolts, screws, and anchors) for the wall type.
Determining Sink Height: Standard bathroom sink height is typically between 30 and 36 inches from the floor to the top rim of the sink. However, specific needs and preferences should be considered. For example, individuals with mobility impairments may benefit from a higher sink placement. Measuring the height of existing sinks in the home or taking measurements from comfortable standing positions can aid in determining the optimal height for the new sink. Consider the height of the faucet and its reach relative to the sink bowl when making this determination. Mark the desired sink height on the wall, using the level to ensure a straight, horizontal line. This line will serve as a reference point for mounting the sink.
Local Plumbing Codes: Adhering to local plumbing codes is crucial for ensuring the installation is compliant and safe. These codes often dictate specific requirements for pipe sizes, venting, and backflow prevention. Contact the local building department or consult with a licensed plumber to understand the applicable codes in the area. Failure to comply with plumbing codes can result in fines and require rework of the installation.
Mounting the Sink to the Wall: The Critical Execution Phase
Once the planning phase is complete, the physical mounting of the sink begins. This process involves several key steps: marking and drilling pilot holes, attaching the mounting hardware, test-fitting the sink, and making final adjustments to ensure secure and level installation.
Marking and Drilling Pilot Holes: Using the mounting bracket or the sink itself as a template, mark the locations for the mounting holes on the wall. Precisely mark the hole locations, ensuring they align with the wall studs. A level should be used to verify that the marked lines are horizontal. Drill pilot holes at the marked locations using a drill bit appropriate for the wall material. For wood studs, a wood drill bit is suitable. For masonry walls, a masonry drill bit is required. The pilot holes should be slightly smaller than the diameter of the fasteners being used to secure the mounting hardware. Ensure that the pilot holes are drilled deep enough to accommodate the length of the fasteners.
Attaching the Mounting Hardware: Attach the mounting hardware to the wall using appropriate fasteners. For wood studs, lag bolts or screws are typically used. For masonry walls, masonry anchors are required. Tighten the fasteners securely, ensuring that the mounting hardware is firmly attached to the wall. Avoid overtightening, as this can damage the wall or the mounting hardware. The mounting hardware should be level and aligned with the previously marked height line. Double-check the alignment with a level after tightening the fasteners.
Test-Fitting the Sink: Before permanently attaching the sink, perform a test fit to ensure proper alignment and fit. Carefully lift the sink onto the mounting hardware, ensuring that it is properly seated and supported. Check the level of the sink and make any necessary adjustments to the mounting hardware. Verify that the drain opening aligns with the existing drain pipe in the wall. Also, confirm that the faucet supply lines will reach the shut-off valves. If any adjustments are needed, remove the sink and adjust the mounting hardware accordingly. Repeat the test fit until the sink is properly aligned and supported.
Final Adjustments and Securing: Once the test fit is satisfactory, permanently secure the sink to the mounting hardware. Follow the manufacturer's instructions for securing the sink. Typically, this involves tightening bolts or screws that hold the sink in place. Ensure that the sink is level and that all connections are tight. Over-tightening can crack or damage the sink. Apply silicone caulk around the perimeter of the sink where it meets the wall. This will create a watertight seal and prevent water from seeping behind the sink. Smooth the caulk with a wet finger or a caulk smoothing tool for a professional finish.
Plumbing Connections: Establishing the Water Flow
After the sink is securely mounted, the plumbing connections are crucial for ensuring proper water supply and drainage. This phase includes installing the drain assembly, connecting the P-trap, and connecting the water supply lines.
Installing the Drain Assembly: The sink drain assembly consists of several components, including the drain flange, tailpiece, and stopper mechanism. Apply plumber's putty to the underside of the drain flange and insert it into the drain opening of the sink. Tighten the locknut underneath the sink to secure the drain flange. Connect the tailpiece to the drain flange. The tailpiece is a vertical pipe that connects the drain flange to the P-trap. Ensure that all connections are tight and watertight.
Connecting the P-Trap: The P-trap is a U-shaped pipe that traps water and prevents sewer gases from entering the bathroom. Connect the P-trap to the tailpiece and the drain pipe in the wall. Ensure that all connections are tight and watertight. Use Teflon tape on threaded connections to prevent leaks. The P-trap should be positioned so that it is easily accessible for cleaning and maintenance.
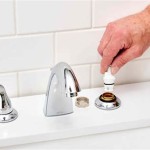
Connecting the Water Supply Lines: Connect the faucet supply lines to the shut-off valves. Ensure that the shut-off valves are in the "off" position before connecting the supply lines. Use Teflon tape on threaded connections to prevent leaks. Tighten the connections securely. Slowly turn on the shut-off valves and check for leaks. If any leaks are present, tighten the connections further. Monitor the connections for several hours after turning on the water to ensure that there are no slow leaks.
Post installation, double check all connections for leaks. Ensuring that all connections are proper and that there are no leaks will save you from future headaches and potential water damage. Test the drain and water flow to make sure everything is functioning properly.

Bathroom Sink Plumbing Installation Diy Montreal

Installing A Bathroom Sink Wall Hung Diy Family Handyman

Wall Mounted Sink New Life Jaime Costiglio

Wall Mount Bathroom Sinks A Diy Homeowner S Guide Hunker

How To Install A Sink Wall Mount 3 Minute Guide

How To Install A Veneto Bath Floating Bathroom Vanity

Fitting A Wall Hung Basin On Stud Bathroom Guru

Pros And Cons Of Wall Mount Faucets Hawaii Interior Designer Sachi Lord

Wall Mount Sinks

Pros And Cons Of Wall Mount Faucets Hawaii Interior Designer Sachi Lord
Related Posts