Keeney Lift Rod Pop-Up Bathroom Sink Drain: A Comprehensive Guide
The Keeney lift rod pop-up bathroom sink drain is a common and widely used plumbing fixture designed to control the flow of water in a bathroom sink. It provides a convenient mechanism for opening and closing the drain, allowing the user to fill the sink with water and subsequently drain it without directly reaching into the basin. This system, known for its ease of use and relatively simple installation, has become a standard in many residential and commercial bathrooms.
This article details the various aspects of the Keeney lift rod pop-up drain, including its components, functionality, installation process, troubleshooting common issues, and considerations for maintenance and longevity. The information presented is intended for homeowners, plumbers, and anyone interested in understanding the workings of this essential plumbing component.
Understanding the Key Components
The Keeney lift rod pop-up drain system consists of several interconnected parts that work together to achieve its functionality. A thorough understanding of each component is crucial for proper installation, maintenance, and troubleshooting.
1. Drain Body: The drain body is the primary housing of the drain assembly. It is typically made of brass or PVC and is the part that screws into the sink drain opening. It features threads or a compression fitting to connect to the tailpiece and eventually the P-trap. The drain body also incorporates an opening for the pivot rod and often includes a rubber gasket or O-ring to ensure a watertight seal against the sink basin.
2. Pop-Up Stopper: The pop-up stopper is the component that physically blocks the drain opening, preventing water from flowing through. It is usually made of brass or plastic and is designed to move up and down within the drain body. The stopper is connected to the pivot rod via a clevis.
3. Pivot Rod: The pivot rod is a horizontal rod that passes through an opening in the drain body. It is responsible for translating the vertical motion of the lift rod into the lateral motion required to raise and lower the pop-up stopper. The pivot rod is typically made of brass and has a ball-shaped end that fits into the clevis on the pop-up stopper.
4. Lift Rod: The lift rod is a vertical rod that extends upwards from the faucet assembly. It is the user-operated component that initiates the drain opening and closing mechanism. When the lift rod is pulled up, it moves the pivot rod, which in turn raises the pop-up stopper. Pushing the lift rod down reverses the process, closing the drain.
5. Clevis and Spring Clip: The clevis is a small, typically metal, component that connects the pivot rod to the pop-up stopper. It usually has a series of holes that allow for adjustment of the stopper's height. The spring clip secures the pivot rod to the clevis, preventing it from slipping out. The position of the spring clip significantly affects how much the stopper moves when the lift rod is activated.
6. Tailpiece: The tailpiece is a pipe that connects directly to the bottom of the drain body. It extends downwards to connect to the P-trap. The tailpiece may be made of brass or PVC and is often adjustable in length to accommodate different sink installations.
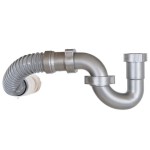
7. P-Trap: Although not part of the Keeney drain assembly itself, the P-trap is an essential component of the overall drain system. It is a U-shaped pipe that traps a small amount of water, preventing sewer gases from entering the bathroom. The P-trap connects to the tailpiece and then to the drainpipe leading to the main plumbing system.
Installation Process: A Step-by-Step Guide
Installing a Keeney lift rod pop-up drain typically involves several steps, requiring basic plumbing knowledge and tools. It is crucial to follow these steps carefully to ensure a leak-proof and properly functioning drain system.
1. Preparation: Begin by gathering the necessary tools and materials. This typically includes a pipe wrench, adjustable wrench, plumber's putty, Teflon tape (optional), a bucket, and a rag. Ensure the water supply to the faucet is turned off before starting the installation.
2. Removing the Old Drain (If Applicable): If replacing an existing drain, carefully disconnect the tailpiece from the P-trap. Loosen the nut connecting the drain body to the sink and remove the old drain assembly. Clean the sink drain opening thoroughly to remove any old plumber's putty or debris.
3. Installing the Drain Body: Apply a ring of plumber's putty around the underside of the drain flange (the part that sits inside the sink). Insert the drain body through the drain opening from above. From below the sink, attach the rubber or plastic washer and the cardboard friction ring (if applicable) followed by the mounting nut onto the drain body. Hand-tighten the mounting nut, then use a pipe wrench to tighten it further, ensuring a secure and watertight seal. Be careful not to overtighten, as this could damage the sink or the drain body.
4. Installing the Pop-Up Stopper: Insert the pop-up stopper into the drain body from above. Ensure the hole in the stopper aligns with the opening in the drain body for the pivot rod. The stopper should move freely up and down within the drain body.
5. Installing the Pivot Rod and Clevis: Insert the pivot rod through the opening in the drain body. Connect the pivot rod to the clevis on the pop-up stopper. Adjust the position of the clevis on the pivot rod to achieve the desired range of motion for the stopper. Secure the pivot rod to the clevis using the spring clip.
6. Connecting the Lift Rod: Insert the lift rod into the faucet assembly. Connect the lift rod to the pivot rod. Some faucet assemblies have an adjustable screw to fine-tune the connection between the lift rod and the pivot rod. Adjust this screw as needed to ensure the stopper opens and closes fully when the lift rod is operated.
7. Connecting the Tailpiece: Attach the tailpiece to the bottom of the drain body. Use a compression fitting or threaded connection, depending on the type of tailpiece. Ensure the connection is tight and watertight. Use Teflon tape on threaded connections for added security.
8. Connecting the P-Trap: Connect the tailpiece to the P-trap. Ensure all connections are tight and watertight. The P-trap should be properly aligned to prevent leaks and facilitate proper drainage.
9. Testing for Leaks: Turn the water supply back on and test the drain for leaks. Check all connections, including the drain flange, tailpiece, and P-trap. If any leaks are detected, tighten the connections further or disassemble and reassemble the connection with fresh plumber's putty or Teflon tape.
Troubleshooting Common Issues
Despite their relatively simple design, Keeney lift rod pop-up drains can experience various issues. Understanding these issues and how to address them is crucial for maintaining a properly functioning drain system.
1. Leaks: Leaks are a common problem with pop-up drains. They can occur at various points, including the drain flange, tailpiece connection, pivot rod opening, or P-trap. To troubleshoot leaks, first identify the source of the leak. Tighten the connections at the leak point. If tightening the connections does not resolve the leak, disassemble the connection, clean the surfaces, and reapply plumber's putty or Teflon tape before reassembling.
2. Stopper Not Sealing Properly: If the stopper does not seal properly, water will slowly drain from the sink. This can be caused by a misaligned stopper, debris trapped under the stopper, or a worn-out stopper seal. Clean the stopper and the drain opening to remove any debris. Adjust the clevis on the pivot rod to ensure the stopper seats properly in the drain opening. If the stopper seal is worn out, replace the stopper.
3. Stopper Not Moving Properly: If the stopper does not move up and down properly, it may be due to a loose or disconnected lift rod, a misaligned pivot rod, or a clogged drain. Check the connection between the lift rod and the pivot rod. Ensure the pivot rod is properly aligned and secured to the clevis. Clean the drain to remove any clogs that may be obstructing the stopper's movement.
4. Clogged Drain: A clogged drain can prevent water from draining properly. This is often caused by hair, soap scum, or other debris accumulating in the drainpipe. Use a drain snake or plunger to clear the clog. In severe cases, it may be necessary to disassemble the drainpipe and manually remove the clog.
5. Lift Rod Not Working: If the lift rod is not working, it may be disconnected from the pivot rod, or the pivot rod may be jammed. Check the connection between the lift rod and the pivot rod. Ensure the pivot rod is free to move and not obstructed by debris.
Proper maintenance, including regular cleaning and prompt attention to minor issues, can significantly extend the lifespan of a Keeney lift rod pop-up drain. Avoiding the introduction of excessive hair or grease into the drain system can prevent clogs and maintain optimal performance.

Keeney Lift N Lock Chrome Bathroom Sink Pop Up Drain In The Drains Stoppers Department At Com

Keeney Brushed Nickel Bathroom Decorative Sink Drain In The Drains Stoppers Department At Com

Keeney Lift N Lock Chrome Bathroom Sink Pop Up Drain In The Drains Stoppers Department At Com

Keeney 1 4 In Push On Bathroom Sink Drain With Overflow Brushed Nickel K820 75bn The Home Depot

Stylewise Keeney Lift Rod Pop Up Bathroom Sink Drain Amp Overflow Polished Brass

Keeney 1 4 In Push On Bathroom Sink Drain Without Overflow Brushed Nickel K820 76bn The Home Depot

Keeney Lift Rod Pop Up Bathroom Sink Drain Chrome Plastic 1 4 22070k 46224004653

Keeney Pp820 70 1 4 In Mechanical Bathroom Sink Drain With Overflow Chrome Com

Buy Keeney Lift Rod Pop Up Assembly 1 4 In

Plumb Pak 1 6 In X Sink Drain With Brushed Nickel Finish Plug K820 72bn Réno Dépôt
Related Posts


