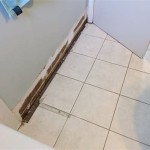
How To Tile A Bathroom Floor And Walls
Tiling a bathroom floor and walls is a significant home improvement project that can dramatically enhance the aesthetic appeal and functionality of the space. While it requires careful planning, preparation, and execution, the result is a durable, water-resistant surface that can last for many years. This article provides a comprehensive guide to tiling a bathroom, covering essential steps from initial planning to the final cleanup.
Planning and Preparation
Before any physical work begins, meticulous planning is crucial for a successful tiling project. This stage involves several key considerations, including accurate measurements, material selection, design decisions, and tool acquisition.
Accurate measurements are paramount. Measure the surface area of both the floor and the walls to be tiled. It is advisable to add an extra 10-15% to the tile quantity to account for cuts, breakages, and future repairs. Record these measurements carefully, as they will influence the amount of tile, adhesive, grout, and other materials required.
Selecting the appropriate tile type is another critical aspect. Consider the environment of a bathroom when choosing tiles. Porcelain tiles are a popular choice for both floors and walls due to their durability, water resistance, and versatility in design. Ceramic tiles are more cost-effective but may be less durable than porcelain. Natural stone tiles, such as marble or granite, offer a luxurious aesthetic but require more maintenance and sealing. For the floor, ensure that the tile is rated for floor use and has a slip-resistant finish.
Tile size is also a factor to consider. Larger tiles can make a small bathroom feel more spacious, while smaller tiles can add intricate detail. However, larger tiles require a flatter surface to avoid lippage (uneven edges). The weight of the tile is also significant, especially for wall applications. Ensure the wall structure can support the chosen tile weight.
Design considerations play a major role in the overall look of the bathroom. Consider the color scheme, pattern, and layout of the tiles. A light color palette can brighten a small bathroom, while darker colors can create a more dramatic effect. Different tiling patterns, such as straight lay, brick bond, or herringbone, can add visual interest. Use design software or graph paper to visualize the layout before starting the installation.
Finally, gather all necessary tools and materials. This includes:
- Tiles (with the extra 10-15% as mentioned)
- Tile adhesive (suitable for the tile type and substrate)
- Grout (matching or contrasting the tile color)
- Tile spacers (to ensure consistent grout lines)
- Tile cutter (manual or wet saw, depending on the tile type)
- Notched trowel (size appropriate for the tile size)
- Rubber grout float
- Grout sponge
- Buckets (for mixing adhesive and grout, and for cleaning)
- Level
- Measuring tape
- Pencil
- Safety glasses
- Gloves
- Dust mask
- Scraper
- Sealant (for sealing grout lines and corners)
Having all the tools and materials readily available will streamline the tiling process and prevent delays.
Preparing the Surface
Proper surface preparation is essential for achieving a strong and long-lasting tile installation. The substrate (the surface onto which the tiles will be applied) must be clean, level, and structurally sound. It is important to ensure a properly prepared substrate for both floor and wall tiling.
Begin by removing any existing flooring or wall coverings, such as old tiles, linoleum, wallpaper, or paint. Use a scraper, chisel, or specialized removal tools to remove these materials completely. Ensure all adhesive residue is also removed.
Inspect the substrate for any damage, such as cracks, holes, or unevenness. Repair any damage using appropriate patching compounds or leveling materials. For floors, self-leveling compound may be necessary to create a perfectly flat surface. For walls, fill any holes with spackle or joint compound and sand smooth.
Clean the surface thoroughly to remove any dust, dirt, grease, or other contaminants. Use a vacuum cleaner or broom to remove loose debris, followed by a thorough cleaning with a suitable cleaner. For greasy surfaces, a degreasing agent may be necessary. Rinse the surface thoroughly with clean water and allow it to dry completely.
Priming the surface is a crucial step in ensuring proper adhesion. Apply a suitable primer, such as an acrylic primer or a tile primer, to the substrate. The primer will improve adhesion, seal the surface, and prevent moisture from being absorbed into the substrate. Allow the primer to dry completely according to the manufacturer's instructions.
For areas prone to moisture, such as shower walls, consider applying a waterproofing membrane. This will prevent water from penetrating the substrate and causing damage. Apply the membrane according to the manufacturer's instructions, ensuring complete coverage of all seams and corners.
In some cases, particularly when tiling over existing tiles, it may be necessary to use a bonding agent to improve adhesion. Apply the bonding agent according to the manufacturer's instructions, allowing it to dry completely before proceeding with the tiling.
Laying the Tiles
Once the surface is properly prepared, the process of laying the tiles can begin. This phase involves careful planning of the layout, precise cutting of tiles, and the application of adhesive to secure the tiles in place.
Begin by planning the layout of the tiles. Find the center point of the room or wall and mark it with a pencil. Lay out a row of tiles along the center line, using tile spacers to maintain consistent grout lines. Adjust the layout as necessary to ensure that full tiles are used in the most visible areas and that cut tiles are placed in less conspicuous locations. Avoid having small slivers of tiles at the edges, as they can be difficult to cut and may not look aesthetically pleasing.
Cutting tiles accurately is essential for a professional-looking installation. Use a tile cutter (manual or wet saw) to cut the tiles to the required size and shape. For straight cuts, a manual tile cutter may be sufficient. For more complex cuts, such as around pipes or corners, a wet saw is recommended. Always wear safety glasses when cutting tiles to protect your eyes from debris. Practice cutting on scrap tiles to get a feel for the cutter and to ensure accurate cuts.
Mix the tile adhesive according to the manufacturer's instructions. Use a clean bucket and a mixing paddle to achieve a smooth, lump-free consistency. Apply the adhesive to the substrate using a notched trowel. The size of the notches on the trowel should be appropriate for the size of the tiles. Hold the trowel at a 45-degree angle and spread the adhesive in one direction, creating ridges. Only apply adhesive to a small area at a time, as it can dry out quickly. The amount of adhesive used is critical. Too little adhesive can lead to loose tiles, while too much adhesive can make it difficult to set the tiles properly.
Place the tiles onto the adhesive, pressing them firmly into place. Use tile spacers to maintain consistent grout lines. Check the level of each tile to ensure that it is flush with the adjacent tiles. Use a rubber mallet to gently tap the tiles into place if necessary. Wipe away any excess adhesive from the surface of the tiles with a damp sponge. Work methodically, laying the tiles one row at a time. Allow the adhesive to dry completely according to the manufacturer's instructions before proceeding with grouting.
For wall tiling, it may be necessary to use battens or supports to hold the tiles in place while the adhesive dries. Attach the battens to the wall using screws or construction adhesive. Place the tiles on the battens and allow the adhesive to dry completely before removing the battens.
Inspect the tiled surface for any imperfections, such as uneven tiles or gaps in the grout lines. Correct any imperfections before the adhesive dries completely. Once the adhesive has dried, it will be much more difficult to make corrections.
Grouting and Sealing
Once the tile adhesive has fully cured, typically after 24-48 hours, the next step is to apply grout. Grouting fills the spaces between the tiles, providing a waterproof seal and enhancing the aesthetic appearance of the tiled surface.
Mix the grout according to the manufacturer's instructions. Use a clean bucket and a mixing paddle to achieve a smooth, lump-free consistency. The grout should be the consistency of thick paste. Allow the grout to slake (sit) for the recommended time before remixing it. This allows the grout to fully hydrate.
Apply the grout to the tiled surface using a rubber grout float. Hold the float at a 45-degree angle and spread the grout diagonally across the tiles, forcing it into the grout lines. Ensure that all grout lines are completely filled. Remove any excess grout from the surface of the tiles with the grout float.
After the grout has had a chance to set for a few minutes, use a damp grout sponge to clean the surface of the tiles. Rinse the sponge frequently in clean water. Wipe away any excess grout from the surface of the tiles, being careful not to remove grout from the grout lines. Shape the grout lines with the sponge to create a smooth, consistent finish. Rinse the sponge frequently and continue cleaning until the tiles are clean and the grout lines are smooth.
Allow the grout to cure completely according to the manufacturer's instructions, typically 24-72 hours. During this time, protect the tiled surface from moisture and heavy traffic. Mist the grout lines with water periodically to slow down the curing process and prevent cracking.
Once the grout has cured, apply a grout sealer to protect it from stains and moisture. Apply the sealer according to the manufacturer's instructions, using a brush or applicator. Allow the sealer to penetrate the grout lines for the recommended time, then wipe away any excess sealer from the surface of the tiles. Sealing the grout helps to prolong its life and prevents it from becoming discolored or damaged.
Seal the corners and edges of the tiled surface with a flexible sealant, such as silicone caulk. This will prevent water from penetrating behind the tiles and causing damage. Apply the sealant using a caulking gun, creating a smooth, continuous bead. Smooth the sealant with your finger or a caulking tool to create a professional-looking finish.
Final Cleanup
After the grout has cured and the sealant has been applied, the final step is to clean the tiled surface and remove any remaining residue. This will ensure that the tiles look their best and that the bathroom is ready for use.
Use a clean, damp cloth to wipe down the tiled surface, removing any remaining grout haze or sealant residue. For stubborn residue, use a specialized tile cleaner or a mild abrasive cleaner. Be careful not to scratch the tiles. Rinse the surface thoroughly with clean water and dry it with a clean cloth.
Inspect the grout lines for any imperfections or gaps. If necessary, touch up the grout lines with fresh grout or sealant. Allow the touch-up grout or sealant to cure completely before using the bathroom.
Clean all tools and equipment thoroughly. Rinse buckets, sponges, and trowels with clean water. Dispose of any leftover materials properly. Store any remaining tiles, adhesive, grout, or sealant in a cool, dry place for future use.
Once the tiled surface is clean and dry, inspect it carefully for any imperfections. Correct any imperfections before using the bathroom. Ensure that all fixtures, such as toilets, sinks, and showers, are properly installed and connected. After all checks are satisfied, the bathroom floor and walls are now successfully tiled.

Bathroom Tile Idea Use The Same On Floors And Walls

Tiles Talk Mix And Match 6 Ways To Achieve Bathroom Bliss Perini

Matching Tiles Tips And Suggestions For Pairing Porcelanosa

Bathroom Tile Idea Use Large Tiles On The Floor And Walls 18 Pictures Wall Grey Marble

Tiles Talk Mix And Match 6 Ways To Achieve Bathroom Bliss Perini

4 Simple Tips For Choosing Tiles Your Bathroom Jlt Renovations

Should The Bathroom Floor And Wall Tiles Match

Laying Floor Tiles In A Small Bathroom Houseful Of Handmade

10 Bathroom Floor Wall Tile Ideas Bridport Glass Centre

Everything You Need To Know About Choosing Bathroom Tiles Italia Ceramics
Related Posts
