Turn Old Furniture Into a Bathroom Vanity
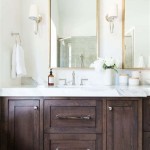
Repurposing old furniture into a bathroom vanity is a cost-effective and environmentally friendly way to add character and charm to a bathroom. This project allows for customization and the creation of a unique piece tailored to individual needs and aesthetic preferences. With careful planning and execution, a discarded dresser, desk, or even a sewing machine table can be transformed into a stylish and functional bathroom vanity.
Assessing Furniture Suitability
Not all furniture pieces are suitable for conversion into bathroom vanities. The chosen piece must be structurally sound and made of a material that can withstand the humidity and moisture inherent in a bathroom environment. Solid wood furniture is generally a good choice, although some engineered wood products can also be used if properly sealed and protected. It is crucial to inspect the furniture for any signs of damage, rot, or insect infestation. Pieces with extensive damage or those made of particleboard are generally not recommended.
The size and shape of the furniture are also important considerations. The piece should be appropriately sized for the bathroom and offer enough storage space. The height of the furniture should be comfortable for use as a vanity, typically around 34-36 inches. The depth should also be considered, ensuring it doesn't impede movement within the bathroom.
Finally, the style of the furniture should complement the overall bathroom design. A rustic dresser might look out of place in a modern minimalist bathroom, while a sleek mid-century modern desk could be a perfect fit. Careful consideration of these factors will ensure a successful and satisfying outcome.
Preparing the Furniture
Once a suitable piece of furniture has been selected, the preparation process can begin. This involves thoroughly cleaning the furniture and removing any existing hardware, such as drawer pulls or knobs. If the furniture has a previous finish, it may need to be stripped using a chemical stripper or sanded down. This creates a clean surface for the new finish to adhere to.
Any necessary repairs should be made at this stage. This might include filling cracks or holes with wood filler, reinforcing weak joints, or replacing damaged sections. If the piece requires significant structural repairs, consulting a professional carpenter may be advisable.
If the furniture has drawers or doors, assess whether they will be retained or removed to accommodate the sink and plumbing. If removing drawers, the drawer fronts can often be repurposed as decorative panels or cabinet doors.
Finally, a coat of primer should be applied to the entire piece. This helps to seal the wood and provide a better surface for the paint or stain to adhere to. Choose a primer specifically designed for use on furniture and in bathrooms, ensuring it offers protection against moisture and mildew.
Installing the Sink and Plumbing
One of the most crucial steps in converting furniture into a bathroom vanity is installing the sink and plumbing. The type of sink will determine the modifications required to the furniture. A vessel sink sits on top of the furniture and requires only a hole for the drainpipe. An undermount sink requires a cutout in the furniture top to accommodate the sink basin.
Accurate measurements are essential for cutting the sink opening. Using a template provided by the sink manufacturer is highly recommended. The plumbing connections for the water supply and drain lines should be carefully planned and executed. If unfamiliar with plumbing, consulting a professional plumber is advisable to ensure proper installation and prevent leaks.
After the sink is installed, the faucet can be mounted. Choose a faucet that complements the style of the vanity and the overall bathroom design. Ensure the faucet is compatible with the sink and the existing plumbing.
The final step is connecting the water supply lines and the drainpipe. Thoroughly test all connections for leaks before using the vanity. Applying a bead of silicone caulk around the sink and faucet base can help prevent water damage and ensure a watertight seal.
Finishing Touches
Once the sink and plumbing are installed, the finishing touches can be applied. This might include painting or staining the vanity, installing new hardware, and adding a countertop. A variety of materials can be used for the countertop, including stone, laminate, or even repurposed wood. Choosing a material that is durable and water-resistant is crucial.
Consider adding a backsplash to protect the wall from water damage and enhance the vanity's aesthetic appeal. The backsplash can be made of tile, stone, or even the same material as the countertop.

Turn A Vintage Dresser Into Bathroom Vanity

How To Make A Dresser Into Vanity Tutorial An Oregon Cottage

Flipping Houses Home Renovation In Silicon Valley

How To Convert An Old Dresser Into A Bathroom Vanity Reinvented Delaware

A Pro Renovator S 6 Tips For Turning Dresser Into Bathroom Vanity

How To Convert An Old Dresser Into A Bathroom Vanity Reinvented Delaware

How To Turn Vintage Furniture Into A Bathroom Vanity Architectural Digest
/103058794-9279662b921c41259cb908f3cb19acd9.jpg?strip=all)
How To Turn An Old Dresser Into A Beautiful Bathroom Vanity

Mid Century Dresser Into Vanity Bright Green Door

How To Convert A Dresser Into Bathroom Vanity The Little By Home
Related Posts


