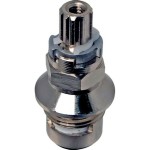
How to Change a Bathroom Tub Faucet
Replacing a bathroom tub faucet is a common DIY project that homeowners can tackle with the right tools and knowledge. Whether your old faucet is leaking, dripping, or simply outdated, upgrading to a new one can improve the functionality and aesthetics of your bathroom. This article will guide you step-by-step through the process of changing a bathroom tub faucet, providing clear instructions and helpful tips to ensure a successful and efficient replacement.
Step 1: Gather Tools and Materials
Before starting the project, ensure that you have all the necessary tools and materials readily available. This will streamline the process and prevent unnecessary delays. Here's a comprehensive list of what you'll need:
- Adjustable wrench
- Channel-lock pliers
- Phillips head screwdriver
- Flathead screwdriver
- Plumbers tape
- Pipe wrench
- New tub faucet
- Optional: Tub spout wrench
- Optional: Basin wrench
- Optional: Safety glasses and gloves
It's always advisable to have a spare set of tools, as unexpected situations can arise. Additionally, ensure that the new tub faucet is compatible with your existing plumbing system. Consult the manufacturer's instructions for specific installation requirements.
Step 2: Turn Off the Water Supply
The first step in the process is to shut off the water supply to the bathtub. Locate the shut-off valves for the hot and cold water lines. Typically, these valves are situated near the bathtub, under the sink, or in the basement. Turn both valves clockwise until they are completely closed. To confirm that the water is shut off, turn on the faucet handles and observe if water is flowing.
Step 3: Drain the Water
Once you've shut off the water supply, you need to drain the remaining water in the pipes and the tub. This will prevent water from spilling or flooding the bathroom during the replacement process. Place a drain stopper in the tub and open the tub drain to allow the water to drain completely.
Step 4: Remove the Old Faucet
Now, it's time to remove the old faucet. Begin by unscrewing the faucet handles using a Phillips head screwdriver or an Allen wrench, depending on the type of handle. Then, locate the mounting nuts that connect the faucet to the tub. These nuts are usually found under the faucet handles or behind decorative escutcheons. Use an adjustable wrench to hold the faucet body steady while loosening the mounting nuts with another wrench. Remove the handles, the faucet body, and any decorative escutcheons carefully.
Step 5: Disconnect the Water Lines
After removing the faucet body, you need to disconnect the water lines. Use a pair of channel-lock pliers to loosen the compression nuts that connect the water lines to the faucet. Once loosened, carefully pull the water lines out of the faucet. It's important to note the orientation of the hot and cold water lines as you disconnect them. This will help you connect the new faucet correctly. Remember to wipe down the water lines with a clean cloth to prevent debris from entering the new faucet.
Step 6: Install the New Faucet
With the old faucet removed, you can now install the new one. Begin by attaching the new water lines to the faucet body. Wrap the threads of the water line connections with plumber's tape to ensure a tight and leak-proof seal. Next, install the new faucet body into the tub using the mounting nuts. Gently tighten the nuts with a wrench, ensuring that the faucet body is securely in place. Be careful not to overtighten the nuts, as this could damage the faucet or the tub.
Step 7: Connect the Water Lines
Connect the water lines to the new faucet body, ensuring that the hot and cold lines are installed in the correct positions. Tighten the compression nuts using channel-lock pliers. Once the water lines are connected, turn on the water supply valves slowly and check for leaks.
Step 8: Install the Handles and Accessories
Finally, install the new faucet handles and any decorative accessories, such as escutcheons or plates. Follow the manufacturer's instructions for the specific installation process. Once the handles are attached, turn on the water supply and test the faucet for proper operation.
Changing a bathroom tub faucet is a relatively simple procedure that can be completed by most homeowners. Following these steps and taking your time will ensure a successful installation. If you encounter any difficulties or are unsure about any step, consult with a licensed plumber for assistance.

How To Fix A Leaking Bathtub Faucet Diy Family Handyman

How To Replace A Mobile Home Bathtub Faucet Parts Latest News

How To Replace A Tub Spout Project Tutorial Bob Vila

Replacing A Tub Faucet Bathtub Spout Replacement

How To Replace A Tub Spout

Learn How To Remove And Install Various Tub Spouts

How To Replace A Bathtub Spout Diy Family Handyman

Replacing Shower Tub Faucet How To Install A New

Installing A Tub Faucet Fine Homebuilding

How To Fix A Leaking Bathtub Faucet The Home Depot
Related Posts


