How To Change a Bathroom Sink Faucet: A Comprehensive Guide
Replacing a bathroom sink faucet can significantly enhance the aesthetic appeal and functionality of a bathroom. While it might seem daunting, this project is manageable for most homeowners with basic plumbing knowledge and the right tools. This article provides a detailed, step-by-step guide on how to change a bathroom sink faucet safely and effectively.
Preparing for the Faucet Replacement
Before commencing any plumbing work, meticulous preparation is crucial to ensure a smooth and hassle-free process. Gathering the necessary tools and materials, understanding the existing plumbing configuration, and taking appropriate safety precautions are paramount.
Tools and Materials: A successful faucet replacement hinges on having the right tools readily available. Essential items include:
- New bathroom faucet
- Adjustable wrench
- Basin wrench (also known as a faucet wrench)
- Pliers
- Screwdrivers (Phillips head and flathead)
- Adjustable pipe wrench
- Plumber's tape (Teflon tape)
- Plumber's putty or silicone caulk
- Bucket or container
- Towels or rags
- Safety glasses
- Gloves
- Optional: Penetrating oil (e.g., WD-40)
Shutting Off the Water Supply: This is the most critical step to prevent flooding. Locate the shut-off valves under the sink. These valves control the hot and cold water supply to the faucet. Turn both valves clockwise until they are completely closed. If the valves are old or corroded and won't close completely, it might be necessary to shut off the main water supply to the house. This is typically located in the basement, garage, or near the water meter. Once the water is shut off, open the existing faucet to relieve any remaining pressure in the pipes.
Disconnecting the Existing Faucet: Before physically removing the old faucet, place a bucket or container under the sink to catch any residual water. Use an adjustable wrench to disconnect the supply lines from the faucet tailpieces. These lines connect the shut-off valves to the faucet. If the connections are stubborn, penetrating oil can be applied to loosen them. Be prepared for a small amount of water to drain from the lines. Once the supply lines are disconnected, use a basin wrench to loosen the nuts that secure the faucet to the sink. Basin wrenches are designed to reach into tight spaces and grip the nuts effectively. Once the nuts are loose, the old faucet can be lifted out of the sink. Thoroughly clean the sink surface around the faucet holes to remove any old putty or sealant.
Installing the New Bathroom Faucet
With the old faucet removed and the area prepared, the next stage involves installing the new faucet. This requires careful attention to detail to ensure a watertight and functional installation.
Applying Plumber's Putty or Silicone Caulk: Most new faucets come with a base plate or escutcheon that covers the mounting holes. Before installing the faucet, apply a ring of plumber's putty or silicone caulk to the underside of the base plate. This creates a watertight seal between the faucet and the sink. Ensure that the putty or caulk is applied evenly and completely around the underside of the base plate.
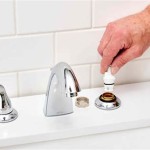
Positioning and Securing the New Faucet: Carefully insert the faucet through the mounting holes in the sink. From underneath the sink, attach the mounting hardware (washers and nuts) that came with the new faucet. Tighten the nuts until the faucet is securely attached to the sink. Avoid overtightening, as this can damage the sink or the faucet. A basin wrench can be used to reach the nuts and tighten them effectively. Ensure the faucet is properly aligned and level before completely tightening the mounting hardware.
Connecting the Water Supply Lines: Attach the water supply lines to the faucet tailpieces. Use plumber's tape (Teflon tape) on the threads of the tailpieces to create a watertight seal. Wrap the tape clockwise around the threads several times. Tighten the supply line connections with an adjustable wrench. Again, avoid overtightening. Ensure that the hot and cold water lines are connected correctly to the corresponding faucet inlets. Most faucets have markings or color coding to indicate the hot and cold water connections. If new supply lines are needed, measure the distance between the shut-off valves and the faucet tailpieces to ensure the new lines are the correct length.
Testing and Final Adjustments
After installing the new faucet, it is crucial to test for leaks and make any necessary adjustments to ensure proper functionality.
Turning on the Water Supply: Slowly turn on the shut-off valves under the sink. Watch carefully for any leaks around the faucet base, supply line connections, and drain assembly. If leaks are detected, immediately turn off the water supply and tighten the connections further. Check all connections thoroughly to ensure they are secure. Once the water is turned on, allow the water to run for a few minutes to flush out any debris or air from the pipes.
Checking for Leaks: Inspect all connections for leaks. Pay close attention to the faucet base, supply line connections, and drain assembly. If leaks persist after tightening the connections, consider reapplying plumber's tape or silicone caulk. For drain leaks, ensure the drain assembly is properly tightened and sealed. It can be beneficial to have a second person observe the connections while the water is running to help identify the source of any leaks.
Adjusting the Faucet and Aerator: Check the water flow and temperature. Ensure that the hot and cold water controls are functioning correctly. If the water flow is weak, clean the aerator (the screen at the end of the faucet spout). Mineral deposits can build up in the aerator and restrict water flow. The aerator can usually be unscrewed and cleaned with a brush or soaked in vinegar to remove mineral deposits. Adjust the faucet handle and spout alignment as needed to ensure smooth operation and a proper water stream. Ensure that the faucet handle moves smoothly and that the water stream is directed properly into the sink basin.
By following these detailed steps, homeowners can confidently replace their bathroom sink faucet and enjoy the benefits of a new and improved fixture. Careful preparation, precise installation, and thorough testing are key to a successful project. Although seemingly straightforward, this task demands attention to detail and adherence to safety protocols. If at any point, uncertainty arises, consulting a qualified plumber is advisable to avoid potential damage or plumbing issues.

Diy How To Replace A Bathroom Sink Faucet Remove Install

How To Replace A Bathroom Faucet Home Repair Tutor

Replacing A Bathroom Faucet Fine Homebuilding

How To Remove And Install A Bathroom Faucet

How Do I Replace Bathroom Sink Faucet Handles Cleaning More

How To Replace Install Bathroom Sink Faucets Easy Diy Home Upgrade

How To Remove And Install A Bathroom Faucet

How To Replace A Bathroom Faucet The Home Depot

How To Install Or Replace A Bathroom Faucet Rona

How To Replace A Bathroom Faucet The Home Depot
Related Posts