How to Remove a Bathroom Vanity Without Damaging It
Removing a bathroom vanity is a common task for homeowners, whether it's part of a renovation project, a replacement, or simply a desire for a fresh look. It's a relatively straightforward process, but improper technique can lead to damage to the vanity itself or the surrounding area. By following the right steps, you can successfully remove your vanity without compromising its integrity.
Step 1: Prepare the Area
Before starting any removal project, it's crucial to prepare the work area. Clear out any obstacles around the vanity, including towels, rugs, and toiletries. This ensures a safe and uncluttered environment for you to work in. For added protection, consider laying down a drop cloth or plastic sheeting to catch any debris or spills. It's also a good idea to remove any delicate fixtures, like mirrors, that could get damaged during the removal process.
Step 2: Shut Off the Water Supply
The first step in removing the vanity is to shut off the water supply. This is essential to prevent water damage and potential flooding. Locate the shut-off valve for the water line leading to the vanity. It's usually located under the sink or in a nearby utility area, but be sure to refer to your home's plumbing diagram if you're unsure. Turn the valve clockwise until it's completely closed, then run the faucet to confirm the water is off.
Step 3: Disconnect the Plumbing
With the water supply shut off, it's time to disconnect the plumbing. This involves removing the supply lines that connect the vanity's faucet to the water source and the drain pipe that connects the sink to the main waste line.
To disconnect the supply lines, use an adjustable wrench to loosen the nuts connecting them to the faucet and to the shut-off valve. If the nuts are stubborn, apply a penetrating oil like WD-40 to loosen them. Be careful not to overtighten, as this could damage the fittings. Once the nuts are loose, gently pull the supply lines away from the faucet and the valve.
Next, focus on the drain pipe. If the vanity has a P-trap (the curved pipe under the sink), remove it by unscrewing the nuts connecting it to the sink drain and the main drain line. The P-trap can be heavy, so it's helpful to have a helper present. If possible, use a bucket to catch any residual water in the drain pipe. Once the P-trap is removed, you can disconnect the sink drain pipe from the vanity itself.
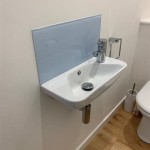
Step 4: Disconnect the Vanity Top
The vanity top is usually secured to the vanity base with screws or clips. Locate these fasteners and carefully remove them. If the vanity top is heavy, have a helper assist you to prevent damage. Once the fasteners are removed, the vanity top should be able to be lifted off the base. Be cautious as you lift the vanity top, as its weight and shape can be awkward.
Step 5: Remove the Vanity Base
With the vanity top removed, you can now focus on removing the vanity base. The base is typically secured to the wall using mounting brackets. These brackets will usually involve screws, but sometimes it's just a piece of metal hanging from the wall secured by drywall anchors. Locate these fasteners and carefully remove them. Be sure to be cautious if using a drill to remove the screws, as you don't want to puncture the drywall behind the mounting bracket.
One of the most challenging parts of removing a vanity can be getting the vanity back far enough away from the wall so that you can remove the mounting brackets and screws. This can require a bit of wiggling and maneuvering. If the vanity has a tight fit, you may have to remove the cabinet doors or drawers for more room. If the vanity is heavy or awkward to maneuver, it's best to have a helper to assist you in lifting and moving it.
Once the mounting brackets are removed, the vanity base should be free to lift off the floor. Again, use caution when lifting the vanity, as it can be heavy and bulky. It's best to have a helper or two present to assist you in lifting and moving it out of the bathroom.
Step 6: Clean Up
After removing the vanity, take some time to clean up the work area. Dispose of any debris, such as screws, nuts, and brackets, properly. Wipe down the floor and walls to remove any dust or dirt accumulated during the removal process. Once you've completed these steps, the bathroom is ready for the installation of the new vanity.

How To Remove A Bathroom Vanity Budget Dumpster

How To Remove A Bathroom Vanity Remodel

How To Remove Bathroom Vanity Cabinet Step By Guide

How To Remove A Bathroom Vanity

How To Remove A Bathroom Vanity Remodel

How To Remove A Bathroom Vanity

How To Remove A Bathroom Vanity Remodel

How To Remove A Bathroom Vanity

How To Diy Remove Replace A Bathroom Vanity Countertop What Not Do Yep I Broke It

How To Remove A Bathroom Vanity
Related Posts