Learn How To Tile A Bathroom Yourself: A Comprehensive Guide
Tiling a bathroom is a home improvement project that can drastically enhance its aesthetic appeal and functionality. While it may seem daunting, with careful planning, the right tools, and a methodical approach, tiling a bathroom can be successfully completed by a homeowner. This article provides a detailed guide on how to tile a bathroom yourself, covering essential aspects from preparation to finishing.
Preparation is Key: Assessing the Project and Gathering Materials
Before any tiles are laid, meticulous preparation is paramount. This stage involves assessing the current state of the bathroom, planning the layout, and gathering all necessary materials and tools. A poorly planned project can lead to frustration, wasted materials, and an unsatisfactory outcome.
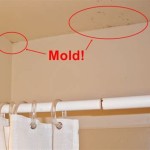
Firstly, a thorough inspection of the bathroom's current surface is crucial. This includes checking for any signs of water damage, such as mold or mildew, and identifying any uneven areas or structural issues that need addressing. Existing tiles must be removed, and the underlying surface needs to be clean, level, and structurally sound. If the substrate is damaged or unstable, it must be repaired or replaced before proceeding. This might involve patching holes, filling cracks, or reinforcing the subfloor.
Secondly, planning the tile layout is essential for achieving the desired aesthetic and minimizing waste. Consider the size and shape of the tiles, the placement of fixtures, and the overall design of the bathroom. Sketching out the layout on paper or using a digital planning tool can help visualize the final result and identify potential challenges. Factors to consider include the placement of full tiles and cut tiles, the use of decorative elements, and the alignment of grout lines.
Thirdly, accumulating the necessary materials and tools well in advance is a critical step. Essential materials include: tiles (with a surplus of approximately 10% to account for cuts and breakage), tile adhesive (thin-set mortar), grout, tile sealer, grout sealer, backer board (if needed for wall tiling), and appropriate safety gear. Necessary tools encompass: a tile cutter or wet saw, a notched trowel, a rubber grout float, sponges, buckets, a spirit level, measuring tape, pencil, safety glasses, and gloves. The type of tile adhesive and grout will depend on the type of tile used, the substrate material, and the specific environment of the bathroom (e.g., moisture levels). It is essential to consult manufacturer guidelines for optimal performance.
Choosing the right type of tile is also important. Options range from ceramic and porcelain to natural stone and glass. Each material has its own advantages and disadvantages in terms of durability, water resistance, maintenance, and cost. Porcelain tiles are generally preferred for bathroom floors due to their density and impermeability, while ceramic tiles are a more cost-effective option for walls.
The Tiling Process: From Applying Adhesive to Laying the Tiles
Once the preparation stage is complete, the tiling process can begin. This involves applying the tile adhesive, precisely laying the tiles, and ensuring proper alignment and spacing.
Firstly, the surface must be clean and dry before applying the tile adhesive. Using a notched trowel, apply a thin, even layer of thin-set mortar to a small section of the surface (approximately 2-3 square feet). The size of the notches on the trowel will determine the thickness of the adhesive layer, which is crucial for proper tile adhesion. Hold the trowel at a 45-degree angle and apply firm, consistent pressure to create uniform ridges in the adhesive. Avoid applying adhesive to a larger area than can be tiled within a reasonable timeframe (typically 15-20 minutes), as the adhesive will begin to dry.
Secondly, carefully position the first tile in the designated starting point, pressing it firmly into the adhesive. Use a twisting motion to ensure good contact between the tile and the adhesive. Subsequent tiles should be laid adjacent to the first, maintaining consistent spacing between each tile. Tile spacers are invaluable for achieving uniform grout lines and preventing tiles from shifting during the drying process. Press each tile firmly into the adhesive, ensuring that it is level with the surrounding tiles. Use a spirit level to check for any unevenness and make adjustments as needed.
Thirdly, when encountering obstacles such as pipes, corners, or fixtures, precise tile cutting is necessary. A tile cutter is suitable for straight cuts, while a wet saw is required for more intricate cuts or for cutting thicker tiles. Measure the required cut accurately and mark the tile with a pencil. Use appropriate safety glasses and ear protection when operating a tile cutter or wet saw. After cutting the tile, smooth any sharp edges with a tile file or sanding block.
Throughout the tiling process, regularly clean any excess adhesive from the tile surfaces with a damp sponge. This will prevent the adhesive from hardening and becoming difficult to remove later. Allow the tile adhesive to cure completely before proceeding to the grouting stage. The curing time will vary depending on the type of adhesive used and the ambient temperature and humidity, but typically takes 24-48 hours.
Grouting and Sealing: Finishing Touches for a Durable and Aesthetic Result
Once the tile adhesive has cured, the grouting and sealing process can begin. This involves filling the gaps between the tiles with grout, cleaning the tile surfaces, and applying sealant to protect the grout and tiles from water damage and staining.
Firstly, remove the tile spacers from between the tiles. Prepare the grout according to the manufacturer's instructions, mixing it to a smooth, consistent paste. Using a rubber grout float, apply the grout to the tile surface, pressing it firmly into the grout lines. Hold the grout float at a 45-degree angle and work diagonally across the tiles to ensure that the grout lines are completely filled. Remove any excess grout from the tile surfaces with the grout float. Allow the grout to set for approximately 15-30 minutes, or as directed by the manufacturer.
Secondly, using a damp sponge, carefully clean the tile surfaces to remove any remaining grout residue. Rinse the sponge frequently in clean water to prevent the grout from being smeared across the tiles. Be careful not to remove too much grout from the grout lines. Allow the grout to cure completely before applying sealant. The curing time will vary depending on the type of grout used and the ambient temperature and humidity, but typically takes 24-72 hours.
Thirdly, apply a grout sealer to protect the grout from water damage, staining, and mildew growth. Apply the sealer according to the manufacturer's instructions, using a brush or applicator. Allow the sealer to dry completely before using the bathroom. For added protection, apply a tile sealer to the tile surfaces. This will help to prevent water absorption and staining, especially for porous tiles such as natural stone.
Finally, thoroughly clean the entire bathroom to remove any remaining dust, debris, or residue. Inspect the tiled surface for any imperfections or areas that need touch-ups. Consider caulking along the edges where the tile meets the bathtub, shower, or walls. This will prevent water from seeping behind the tiles and causing damage. Regularly clean the tiled surfaces with a mild detergent and water to maintain their appearance and prevent the buildup of soap scum and mildew.
Tiling a bathroom is a significant undertaking that requires patience, precision, and attention to detail. By following these guidelines, homeowners can successfully complete this project and transform their bathrooms into beautiful and functional spaces. While this guide provides a broad overview, consulting with a professional tile installer or contractor can be beneficial for complex or unusual bathroom layouts.

How To Tile A Bathroom Diy Guide Beaumont Tiles

How To Tile A Floor Or Wall Beginner S Guide The Created Home

Diy Modern Master Bath Remodel Part 3 Custom Tile Shower Install Pneumatic Addict

Laying Floor Tiles In A Small Bathroom Houseful Of Handmade

The Complete Guide To Installing Tile On Shower Or Bathtub Walls

How To Grout Tile In 6 Simple Diy Steps Architectural Digest

How To Tile A Shower Get Pro Finish From This Straightforward Diy Job Real Homes

How To Install Tile In A Bathroom Shower

Bathroom Remodeling A Step By Guide Budget Dumpster

Laying Floor Tiles In A Small Bathroom Houseful Of Handmade
Related Posts


