Understanding Bathroom Sink Plumbing Parts: A Detailed Diagram and Explanation
The plumbing system beneath a bathroom sink, while often hidden from view, is a complex network of interconnected parts designed to efficiently supply water and drain wastewater. Understanding the function of each component is crucial for diagnosing plumbing issues, performing repairs, and undertaking renovations. A bathroom sink plumbing parts diagram serves as an invaluable tool for homeowners, plumbers, and DIY enthusiasts alike. This article provides a comprehensive overview of the common parts found in a typical bathroom sink plumbing system, explaining their individual roles and how they work together to ensure proper operation.
Key Components Supplying Water to the Sink
The supply lines are responsible for delivering both hot and cold water to the faucet. These lines connect the shut-off valves to the faucet tailpieces. Typically, supply lines are made of flexible materials like braided stainless steel, copper, or PEX tubing for ease of installation and to accommodate slight movements of the sink.
Shut-off valves, also known as stop valves, are essential safety features that allow the water supply to the sink to be turned off independently. These valves are usually located on the wall beneath the sink, one for the hot water supply and one for the cold. Turning off these valves is crucial before attempting any plumbing repairs or replacements to prevent flooding. Common types include angle stops and straight stops, which differ in their outlet orientation relative to the inlet.
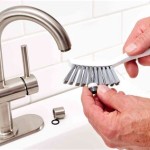
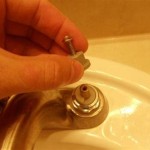
The faucet itself is the fixture that controls the flow and temperature of the water delivered to the sink. Faucets come in a variety of styles and configurations, but they all share the same basic function: to mix hot and cold water and dispense it through a spout. Internal to the faucet are components like cartridges, compression stems, or ceramic disc valves, which control the water flow and mixing process. The faucet also includes aerators, which are small screens at the spout outlet that introduce air into the water stream, reducing splashing and conserving water.
Key Components Draining Water from the Sink
The sink drain assembly is a critical component of the plumbing system, responsible for efficiently removing wastewater from the basin. It consists of several interconnected parts, each playing a crucial role in preventing leaks and maintaining proper drainage. Starting at the sink basin, the drain flange is the visible metal ring that sits flush with the sink's drain opening. It provides a secure connection point for the rest of the drain assembly.
The tailpiece is a vertical pipe that extends downwards from the drain flange. It connects the drain flange to the P-trap. Tailpieces are typically made of PVC or metal and come in various lengths to accommodate different sink configurations. A slip joint connection, utilizing a slip nut and washer, usually connects the tailpiece to both the drain flange and the P-trap, allowing for adjustments during installation.
The P-trap is a curved pipe designed to hold a small amount of water. This trapped water creates a seal that prevents sewer gases from entering the bathroom, thereby eliminating unpleasant odors. The P-trap is a vital component for maintaining a hygienic and comfortable bathroom environment. It's typically made of PVC or metal. The P-trap connects to the tailpiece on one end and the drain arm on the other.
The drain arm, also known as the horizontal drain pipe, extends from the P-trap to the wall drainpipe. It is usually slightly angled downwards to facilitate the flow of wastewater toward the main drain line. The drain arm is connected to the wall drainpipe via a fitting, such as a coupling or a sanitary tee. The length of the drain arm varies depending on the distance between the P-trap and the wall drainpipe.
The pop-up drain is a mechanism used to open and close the drain stopper, allowing the user to prevent water from flowing down the drain. It consists of a lever located behind the faucet, a pivot rod, and a stopper that sits inside the drain flange. When the lever is lifted, the pivot rod moves the stopper up, opening the drain. When the lever is lowered, the pivot rod moves the stopper down, closing the drain. The pop-up drain assembly requires periodic maintenance to ensure smooth operation and prevent clogging.
Troubleshooting Common Plumbing Issues Using a Diagram
Leaks under the bathroom sink are a common problem, and identifying the source of the leak is the first step in resolving the issue. Using a bathroom sink plumbing parts diagram, visually inspect each connection and component for signs of water damage. Common leak locations include the supply line connections to the shut-off valves and the faucet tailpieces, the slip joint connections on the drain assembly, and the base of the faucet itself. Tightening loose connections with a wrench may resolve minor leaks. However, damaged or corroded parts may require replacement.
A clogged drain can result in slow drainage or even a complete blockage of the sink. Often, clogs are caused by hair, soap scum, and other debris accumulating in the P-trap. Using the diagram to identify the P-trap, carefully disconnect it from the tailpiece and the drain arm. Clean out any accumulated debris and reassemble the P-trap, ensuring that all connections are tight. In some cases, a drain snake or plunger may be necessary to dislodge stubborn clogs located further down the drain line.
Low water pressure at the faucet can be caused by various issues, including a partially closed shut-off valve, a clogged aerator, or problems within the faucet itself. Start by checking that the shut-off valves are fully open. Next, remove and clean the aerator to remove any accumulated debris. If the water pressure is still low, the problem may lie within the faucet cartridge or valve assembly. Consult the faucet manufacturer's instructions or a plumbing professional for further assistance.
If sewer gases are detected in the bathroom, it indicates a problem with the P-trap's ability to maintain a water seal. This can happen if the sink is not used for an extended period, allowing the water in the P-trap to evaporate. Simply running water down the drain for a few minutes should replenish the water seal. However, if the problem persists, it could indicate a more serious issue, such as a cracked P-trap or a venting problem in the plumbing system. A plumbing professional should be consulted to diagnose and repair the underlying issue.
Replacing a faucet involves disconnecting the existing faucet and installing a new one. Begin by shutting off the water supply at the shut-off valves. Disconnect the supply lines from the old faucet tailpieces and remove the old faucet from the sink. Clean the sink surface thoroughly before installing the new faucet. Connect the new faucet tailpieces to the supply lines and secure the faucet to the sink according to the manufacturer's instructions. Ensure all connections are tight to prevent leaks. Turn the water supply back on and check for any leaks before using the new faucet.
Replacing a P-trap is a relatively straightforward task that can be accomplished with basic plumbing tools. Start by placing a bucket under the P-trap to catch any residual water. Loosen the slip nuts connecting the P-trap to the tailpiece and the drain arm. Remove the old P-trap and inspect the surrounding pipes for any damage or corrosion. Install the new P-trap, ensuring the slip nuts are tightened securely but not overtightened. Run water down the drain to check for leaks.
When dealing with plumbing repairs, it's crucial to use the correct tools and materials. Adjustable wrenches, pipe wrenches, slip-joint pliers, and Teflon tape are essential tools for most plumbing projects. Use Teflon tape to seal threaded connections and prevent leaks. When replacing plumbing components, be sure to use parts that are compatible with the existing plumbing system. Using incorrect parts can lead to leaks and other problems. Also, it is very important to always shut off the water to avoid flooding and further damage.
Adhering to local plumbing codes is essential for ensuring the safety and functionality of the plumbing system. Plumbing codes vary depending on the location and address specific requirements for pipe sizing, materials, and installation methods. Consult with a local plumbing inspector or a qualified plumber to ensure compliance with all applicable codes. Failure to comply with plumbing codes can result in fines and the need for costly repairs.
While many plumbing repairs can be handled by homeowners, certain situations require the expertise of a licensed plumber. Complex plumbing issues, such as those involving main drain lines or venting systems, should be left to professionals. Also, if unsure about the proper procedures or lack the necessary tools, it's best to call a plumber to prevent further damage and ensure the repairs are done correctly. A qualified plumber can diagnose and resolve plumbing problems efficiently and safely.

20 Bathroom Sink Drain Parts How They Works Stopper Plumbing

Bathroom Sink Plumbing Diagram Diy Sinks Drain Kitchen Remodel

Bathroom Sink Plumbing Diagram Drain

Bathroom Sink Drain Parts Diagram Http Www Designbabylon Interiors Com Part Plumbing Kitchen

Bathroom Sink Pop Up Stopper Parts Diagram Drain Plug

Bathroom Sink Parts Diagram Plumbing Drain Kitchen Remodel

Bathroom Sink Drain Parts Diagram Http Www Designbabylon Interiors Com Check More At Inte

What Are The Parts Of A Sink With Detailed Diagram Upgradedhome Com

How To Fit A Bathroom Sink Diy Guides Victorian Plumbing

Bathroom Sink Drain Parts Diagram Http Www Designbabylon Interiors Com Di Faucet Faucets
Related Posts
