How to Change a Bathroom Exhaust Vent
A bathroom exhaust vent is a crucial component of a healthy and comfortable home. It removes moisture, odors, and pollutants from the air, preventing mold growth, mildew, and other issues. Over time, the vent fan and its components can become worn out or damaged, requiring replacement. This article provides a detailed guide on how to change a bathroom exhaust vent, covering the essential steps, tools, and safety considerations.
1. Prepare for the Replacement
Before beginning the vent replacement, it is essential to gather the necessary tools and materials and prepare the work area. Here's what you'll need:
- New bathroom exhaust vent fan
- Screwdriver (Phillips and flathead)
- Wire cutters or strippers
- Electrical tape
- Level
- Ladder
- Safety glasses
- Work gloves
- Dust mask
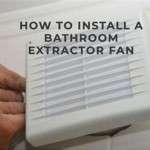
- Remove the vent cover: Use a screwdriver to remove the screws holding the vent cover in place. The cover may be held by clips, in which case you can pry it off gently with a putty knife.
- Disconnect the wiring: Carefully disconnect the electrical wires connected to the vent fan. Note the wire colors (typically black for hot, white for neutral, and green or bare copper for ground) for proper reconnection later.
- Remove the vent fan: Unscrew the vent fan from the mounting bracket. Be cautious not to damage the surrounding ceiling or wall. If there is a metal duct connected to the fan, disconnect it by loosening the clamps or screws holding it in place.
- Mount the new vent fan: Align the new vent fan with the mounting bracket and secure it in place using the screws provided. If you're replacing the metal duct, ensure it connects securely to the fan, using clamps or screws to fasten it.
- Connect the wiring: Connect the wires from the new vent fan to the wires coming from the electrical box. Ensure that the wires are properly connected according to their colors (black to black, white to white, green to green). Wrap the connections with electrical tape to secure them.
- Install the vent cover: Attach the new vent cover to the fan using the supplied screws or clips.
- Test the fan: Turn the power back on at the circuit breaker. Test the new vent fan by turning it on and verifying that it operates correctly.
Turn off the power to the bathroom vent fan at the circuit breaker. Verify that the power is off by attempting to turn on the fan. Clear the work area around the vent and protect the surrounding surfaces with drop cloths or plastic sheeting.
2. Remove the Old Vent Fan
Once the power is off and the area is prepared, proceed with removing the old vent fan. Follow these steps:
3. Install the New Vent Fan
With the old vent fan removed, you can now install the new one. Follow these instructions carefully.
Ensure that the new vent fan fits snugly in the opening and is properly sealed to prevent air leaks. Check for any gaps between the fan and the ceiling or wall, and use caulk or sealant to fill them if necessary.
This guide provides a comprehensive overview of how to change a bathroom exhaust vent. Remember to prioritize safety by turning off the power, using proper tools, and taking precautions when handling electrical wiring. If you are unsure about any step, consult a qualified electrician.

Venting A Bath Fan In Cold Climate Fine Homebuilding

Blog

Install A New Bathroom Vent Fan Light The San Fernando Valley Sun

How To Replace And Install A Bathroom Exhaust Fan From Start Finish For Beginners Easy Diy

Installing A Bathroom Fan Fine Homebuilding

How To Install A Bathroom Fan Diy Family Handyman

How To Install A Bathroom Fan Step By Guide Bob Vila

Bathroom Exhaust Fans Building America Solution Center

How To Install A Bathroom Exhaust Fan Lowe S

Bathroom Fan Venting Tips Gui