Broken Drain Plug in Bathroom Sink: Causes, Solutions, and Prevention
A malfunctioning drain plug in a bathroom sink is a common household nuisance. It can lead to water draining unintentionally, prevent the sink from holding water for tasks like shaving or washing, or even cause a complete blockage if the mechanism fails in a closed position. Understanding the potential causes of a broken drain plug, knowing how to troubleshoot the issue, and implementing preventative measures are essential for maintaining a functional bathroom sink and avoiding costly plumbing repairs.
Understanding the Anatomy of a Bathroom Sink Drain
Before attempting to fix a broken drain plug, it is helpful to understand the basic components involved. A standard lift rod drain assembly typically consists of several key parts. First, there is the drain flange, which is the metal piece that sits flush with the sink basin and surrounds the drain opening. This flange is connected to the drain body, a pipe section located beneath the sink. Inside the drain body is the pivot rod, a horizontal rod that connects to the lift rod via a clevis or retaining clip. The lift rod is the vertical rod that extends up behind the faucet, allowing the user to raise and lower the drain plug. The drain plug itself is a stopper that sits inside the drain flange, sealing the drain opening when lowered.
The mechanism works by transferring the vertical motion of the lift rod into horizontal motion of the pivot rod. This pivot rod then pushes or pulls the drain plug up or down, opening or closing the drain. A spring clip, or retaining clip, holds the pivot rod securely within its socket on the drain body, while washers provide a seal to prevent water from leaking around the pivot rod.
Different types of drain plugs exist, including pop-up drains, which use a different mechanism for raising and lowering the plug, and stopper-less drains which are designed to be always open and use a cap to close it, these are less common in residential bathrooms. This article will focus primarily on the lift rod drain, as it is the most common type.
Common Causes of Drain Plug Problems
Several factors can contribute to a malfunctioning drain plug. One of the most frequent culprits is the accumulation of hair, soap scum, and other debris within the drain assembly. These materials can gradually build up around the drain plug, the pivot rod, and the spring clip, impeding their movement and preventing the plug from sealing properly.
Corrosion is another common cause, especially in areas with hard water. Over time, mineral deposits can accumulate on the metal components of the drain assembly, causing them to rust and seize up. This is particularly problematic for the pivot rod and the spring clip, which are often made of metal that is susceptible to corrosion.
Wear and tear can also lead to drain plug problems. The rubber or plastic seals on the drain plug can deteriorate over time, causing them to crack or become brittle. This can prevent the plug from forming a tight seal, allowing water to leak through. Similarly, the pivot rod and spring clip can become worn or damaged, affecting their ability to function properly. The lift rod itself can bend or break if excessive force is applied.
Improper installation or adjustment of the drain assembly can also contribute to problems. If the pivot rod is not properly connected to the lift rod, or if the spring clip is not securely in place, the drain plug may not function correctly. Misalignment of the drain components can also cause friction and wear, leading to premature failure.
Finally, accidental damage can occur. Dropping heavy objects into the sink can damage the drain plug or other components of the drain assembly. Similarly, using excessive force when operating the lift rod can bend or break the mechanism.
Troubleshooting and Repairing a Broken Drain Plug
The first step in addressing a broken drain plug is to diagnose the problem accurately. Observe the behavior of the drain plug and lift rod to identify the source of the malfunction. If the drain plug is not sealing properly, check for debris around the plug and inside the drain opening. If the lift rod is difficult to move or does not seem to be connected to the drain plug, inspect the pivot rod and spring clip.
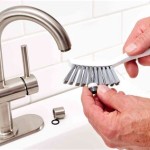
If the problem is simply due to debris accumulation, cleaning the drain assembly is often sufficient. Remove the drain plug and clean it thoroughly with soap and water. Use a small brush or a pipe cleaner to remove any debris from the drain opening and the pivot rod area. Flush the drain with hot water to remove any remaining residue.
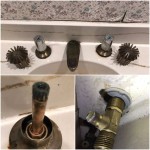
If corrosion is the issue, a descaling solution may be necessary. Commercially available descalers can be used, or a mixture of vinegar and baking soda can be applied to the affected areas. Allow the solution to sit for a few minutes to dissolve the mineral deposits, then scrub the components with a brush and rinse thoroughly with water. In severe cases of corrosion, replacing the affected parts may be necessary.
If the rubber or plastic seals on the drain plug are worn or damaged, they should be replaced. Replacement seals are typically available at hardware stores. Ensure that the new seals are the correct size and shape for the drain plug. If the pivot rod or spring clip is damaged, these components can also be replaced. Again, it is important to ensure that the replacement parts are compatible with the existing drain assembly.
If the drain plug is not functioning correctly due to improper installation or adjustment, carefully inspect the connections between the lift rod, pivot rod, and drain plug. Ensure that the pivot rod is securely connected to the lift rod and that the spring clip is properly in place. Adjust the position of the pivot rod or lift rod as needed to ensure that the drain plug moves smoothly and seals properly. The clevis which connects the vertical lift rod to the horizontal pivot rod can be adjusted to set how far up or down the stopper will go. Usually, a small screw or nut will loosen and tighten this clevis to adjust its position.
In some cases, the entire drain assembly may need to be replaced. This is often the best option if the drain assembly is severely corroded or damaged, or if individual replacement parts are difficult to find. When replacing the drain assembly, be sure to follow the manufacturer's instructions carefully. Typically, this involves disconnecting the drain pipes, removing the old drain assembly, and installing the new one. Ensure that all connections are tight and that the seals are properly in place to prevent leaks.
Preventative Measures to Extend Drain Plug Life
Preventing drain plug problems is often easier and less costly than repairing them. Regularly cleaning the drain assembly is one of the most effective preventative measures. Remove the drain plug periodically and clean it thoroughly with soap and water. Flush the drain with hot water to remove any accumulated debris.
Using a drain strainer can also help to prevent clogs. A drain strainer is a small mesh screen that fits inside the drain opening, trapping hair and other debris before they can enter the drain assembly. Clean the drain strainer regularly to prevent it from becoming clogged.
Avoid pouring harsh chemicals down the drain, as these can damage the drain plug and other components of the drain assembly. If you need to unclog a drain, try using a plunger or a drain snake instead of chemical drain cleaners.
Consider the type of soap used. Bar soaps often contain ingredients that can contribute to soap scum buildup, while liquid soaps tend to be less problematic. Using liquid soap can help to reduce the accumulation of debris in the drain assembly.
In areas with hard water, consider installing a water softener. A water softener can reduce the amount of mineral deposits that accumulate on the drain assembly, helping to prevent corrosion and extend the life of the drain plug.
Finally, avoid using excessive force when operating the lift rod. Using excessive force can bend or break the lift rod or other components of the drain assembly. If the lift rod is difficult to move, check for debris or corrosion and address the underlying issue rather than forcing the mechanism.

Repairing A Pop Up Sink Drain Pretty Handy Girl

How To Replace A Sink Stopper Quick And Simple Home Repair

Repairing A Pop Up Sink Drain Pretty Handy Girl
I Closed My Sink Drain Stopper And Now It Won T Open Again Is There Any Way That Can Repair This Without Hiring A Plumber Quora

Universal Washbasin Water Head Leaking Stopper Bathroom Sink Drain Strainer For And Bathtub Replacement Parts Silver Com
How To Get A Bathroom Sink Plug Removed When It Won T Un Quora

Universal Sink Plug 40mm Pop Up Replacement Drain Height Adjustable Made Of Brass Rubber Plastic Rust Proof And Gasket For Bathroom Fruugo No

1 2 Replacement Universal Sink Plug Bathroom 40mm Pop Up Drain

Brass Drain Plug Bathroom Sink For Bath Vanity Replacement Bolts Fruugo

Bathtub Plug Replacement Sink Drain Valve Stopper Sealing Pop Up Bathroom Accessories Temu United Kingdom
Related Posts


