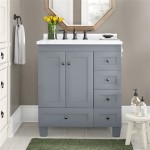
How to Build a Bathroom Vanity Base
A bathroom vanity base is the foundation of your bathroom's décor, providing storage space and a polished look. While pre-made vanities are readily available, building your own can be a rewarding project, allowing for customization and significant cost savings. This guide will provide a detailed walkthrough of the process, empowering you to create a vanity base that perfectly complements your bathroom style.
Planning and Design
Before embarking on construction, carefully consider your bathroom's layout, desired style, and storage needs.
1. Measure and Sketch: Begin with precise measurements of your bathroom's designated vanity area. Determine the desired height, width, and depth of your vanity base. You can opt for standard dimensions or tailor them to your space. Also, measure the sink you'll be using, ensuring compatibility with the vanity base.
2. Material Choice: Select materials that align with your desired aesthetic and budget. Common choices include: *
Plywood:
Offers strength and affordability. *Medium-Density Fiberboard (MDF):
Provides a smooth surface for painting or staining, but requires careful handling. *Solid Hardwood:
Offers durability and a premium appearance, but is more expensive.3. Style Considerations: Decide on the style you envision for your vanity base, including: *
Number of Drawers/Cabinets:
Consider your storage needs and available space. *Door Style:
Opt for traditional, modern, or contemporary designs to match your bathroom's aesthetic. *Finish:
Choose a finish that complements your existing bathroom fixtures and vanity top.Construction Process
Once you have a plan, gather your materials and tools and follow these steps to construct your vanity base.
1. Cut and Assemble the Base: *
Cut the Base Panels:
Using a circular saw or table saw, cut the plywood or MDF panels to the desired dimensions. *Create the Frame:
Assemble the base frame using 2x4 lumber or 2x6 lumber. Secure the frame joints with wood glue and screws. *Attach the Base Panels:
Attach the base panels to the frame, ensuring a flush and square fit. Use pocket holes for added strength and stability.2. Build Drawers and Cabinets (Optional): *
Drawer Construction:
Cut and assemble drawer boxes using plywood or MDF, and install drawer slides. *Cabinet Construction:
Construct cabinet boxes using similar techniques, incorporating doors and hinges.3. Reinforce and Secure: *
Add Bracing:
Incorporate bracing inside the base for additional support and stability. *Secure to the Wall:
Attach the vanity base to the wall using wall anchors and screws for added stability, especially for heavier countertops.4. Finishing Touches: *
Sand Smooth:
Sand all surfaces to remove any rough edges or imperfections. *Paint or Stain:
Apply the chosen finish to complete the look. *Install Hardware:
Attach drawer pulls, door knobs, and any other desired hardware.Installation and Finishing
After construction, installing your vanity base is relatively straightforward.
1. Install the Vanity Base: *
Prepare the Area:
Ensure the floor is level and clean. *Position the Vanity:
Place the vanity base in its designated location, ensuring it is centered against the wall. *Secure the Vanity Base:
Secure the base to the wall using wall anchors and screws. This helps prevent movement and tipping.2. Install the Sink: *
Follow Manufacturer Instructions:
Carefully follow the manufacturer's instructions for installing the sink. *Secure the Sink:
Use sealant and silicone to ensure a watertight seal around the sink.3. Add the Countertop (Optional): *
Choose a Countertop Material:
Consider materials such as granite, quartz, marble, or laminate based on your budget and style preferences. *Install the Countertop:
Follow the manufacturer's instructions for installing the countertop, ensuring a smooth and secure fit.Building your own bathroom vanity base is a rewarding project that can transform your bathroom space. By following these step-by-step instructions, you can create a custom vanity that perfectly complements your style and storage needs, while potentially saving a significant amount of money.
:max_bytes(150000):strip_icc()/build-something-diy-vanity-594402125f9b58d58ae21158.jpg?strip=all)
16 Diy Bathroom Vanity Plans You Can Build Today

How To Build Your Own Bathroom Vanity Fine Homebuilding

How To Build A Diy Bathroom Vanity Angela Marie Made

Diy Bathroom Vanity 12 Rehabs Bob Vila

10 Diy Bathroom Vanity Ideas The Family Handyman

How To Build A 60 Diy Bathroom Vanity From Scratch

Diy Vanity For Wall Mount Sink Jaime Costiglio

Diy Bathroom Vanity Plans Houseful Of Handmade

Diy Butcher Block Vanity Beneath My Heart

Rustic Bathroom Vanity Kreg Tool


