Moen Bathroom Faucet Repair: Addressing Leaks
Moen bathroom faucets are known for their quality and durability, but like any plumbing fixture, they can sometimes develop leaks. These leaks can range from a minor drip to a relentless stream of water, causing frustration and potentially leading to water damage. Fortunately, many common Moen bathroom faucet leaks can be repaired with basic tools and a bit of know-how.
Identifying the Source of the Leak
The first step is to pinpoint the source of the leak. This will determine the specific repair needed.
- Cartridge Leak: If water drips continuously from the spout, even when the faucet is closed, the cartridge may be worn or damaged.
- Aerator Leak: If water leaks from the spout when the faucet is turned on, the aerator may be clogged or damaged.
- Stem Leak: If water leaks from the base of the faucet handle, the stem or O-rings may be worn or damaged.
- Supply Line Leak: If water leaks from the connection between the faucet and the water supply lines, the supply lines may be corroded or damaged.
Repairing Common Moen Bathroom Faucet Leaks
Once you've identified the source of the leak, you can start the repair process. Here are some common Moen bathroom faucet leak repairs:
1. Cartridge Replacement
If the leak originates from the cartridge, replacing it is often the solution. Here's a general guide:
- Turn off the water supply to the faucet.
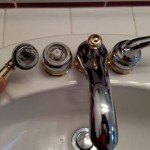
- Remove the handle by unscrewing the handle screw. Depending on the model, you may need a special tool to remove the handle.
- Remove the cap that covers the cartridge. You may need a wrench or pliers for this step.
- Carefully pull the old cartridge out. You may need to use a small tool to pry it out.
- Install the new cartridge, ensuring it is properly seated.
- Reassemble the faucet, making sure all parts are securely in place.
- Turn the water supply back on and test for leaks.
2. Aerator Cleaning or Replacement
If the leak is coming from the spout when the faucet is running, the aerator may be clogged. Here's how to clean or replace it:
- Unscrew the aerator from the spout using a wrench or adjustable pliers.
- Examine the aerator for any visible debris or mineral buildup.
- Clean the aerator by soaking it in vinegar or using a small brush.
- If the aerator is damaged or cleaning doesn't resolve the issue, replace it with a new one.
- Screw the new or cleaned aerator back onto the spout.
- Turn the water supply back on and test for leaks.
3. Stem and O-Ring Replacement
If the leak is coming from the base of the handle, the stem or O-rings may be worn or damaged. This repair typically requires disassembling the faucet handle.
- Turn off the water supply to the faucet.
- Remove the handle by unscrewing the handle screw.
- Remove the stem assembly. Depending on the faucet model, this may involve unscrewing a retaining nut or removing a cap.
- Inspect the stem and O-rings for wear or damage. Replace any worn or damaged parts.
- Reassemble the handle assembly, ensuring the O-rings are properly seated.
- Turn the water supply back on and test for leaks.
4. Supply Line Inspection and Replacement
If the leak is coming from the connection between the faucet and the supply lines, the supply lines may be corroded or damaged. This is often a sign of older supply lines.
- Turn off the water supply to the faucet.
- Inspect the supply lines for signs of corrosion, cracks, or leaks.
- If the supply lines are damaged, replace them with new ones.
- Connect the new supply lines to the faucet and water supply, ensuring a tight seal.
- Turn the water supply back on and test for leaks.
Moen Faucet Repair Tips
Here are some general tips to keep in mind when repairing Moen bathroom faucets:
- Use the Right Tools: Using the correct tools is crucial for a successful repair. Refer to the Moen faucet manual for recommended tools and procedures.
- Wear Protective Gear: Wear safety glasses and gloves to protect yourself from water, debris, and sharp objects.
- Be Gentle: Avoid excessive force when disassembling or reassembling the faucet. This can prevent damage to parts.
- Double-Check Connections: Ensure all connections are tight and secure to prevent future leaks.
- Consult a Professional: If you're unsure about a repair or the leak persists, contact a qualified plumber.
By following these tips and carefully addressing the source of the leak, you can often repair a Moen bathroom faucet leak on your own. This can save you time and money while ensuring your bathroom remains functional and leak-free.

How To Fix A Dripping Moen Faucet Howtolou Com

How To Replace Repair A Leaky Moen Cartridge In Bathroom Set Of Faucets Single Lever Tips

Fixing A Leaking Moen Bathroom Faucet

Easy Moen Bathroom Faucet Drip Repair

How To Replace A Moen Cartridge And Fix Leaky Bathtub Faucet It Tutorials

Moen Bathroom Faucet Repair 1225

How To Repair Moen Bathroom Faucet Dripping Water Cartridge Removal Replace Single Lever

Leaky Moen Kitchen Faucet Repair

Moen Brantford 8 In Widespread 2 Handle High Arc Bathroom Faucet Trim Kit Oil Rubbed Broe Valve Included T6620orb 9000 The Home Depot

How To Fix Moen Single Handle Faucets
Related Posts


