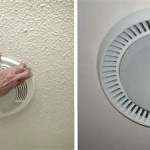
Bathroom Fan Vent Through Brick Wall
Installing a bathroom fan that vents through a brick wall is a common practice, particularly in older homes. It offers an effective way to remove moisture and odors from the bathroom, preventing issues like mold and mildew growth. However, proper installation and ventilation are crucial to ensure the fan operates efficiently and safely. This article will delve into the key aspects of venting a bathroom fan through a brick wall, providing insights into the process, potential challenges, and best practices.
1. Choosing the Right Fan and Vent
Selecting the appropriate bathroom fan and vent is the first step. Factors to consider include:
- Bathroom size: A larger bathroom requires a more powerful fan to effectively remove moisture.
- CFM (cubic feet per minute): This rating indicates the fan's air-moving capacity. A higher CFM rating is generally preferable for larger bathrooms or those with high humidity levels.
- Noise level: Some fans operate more quietly than others. Consider the noise level, especially if the bathroom is near bedrooms.
- Vent type: Brick walls often utilize rigid PVC or metal vent pipes. These materials are durable and resistant to moisture.
- Vent size: The vent size should match the fan's outlet size for optimal airflow.
It's generally advisable to consult with a qualified electrician or HVAC professional for recommendations on the appropriate fan and vent for your bathroom.
2. Planning and Preparation
Before starting the installation, careful planning and preparation are essential. These steps will ensure a smooth and efficient installation process:
- Determine the vent location: Choose a location on the exterior wall that allows for unobstructed airflow and minimizes the vent's visibility. Avoid positioning the vent near windows, doors, or other obstructions.
- Check for existing vents: If an existing vent is present, it might be possible to reuse the existing pipe and hole. Inspect the vent for damage or blockage. If the vent is in good condition, you might be able to connect the new fan to it.
- Measure the distance to the vent: Accurately measure the distance between the fan's outlet and the exterior wall to determine the necessary vent pipe length.
- Obtain necessary materials and tools: Gather the required materials, including the fan, vent pipe, clamps, sealant, and any additional tools needed for cutting, drilling, and securing the vent.
- Consider safety precautions: This project might require working with electricity. Disconnect the power to the bathroom circuit before working on electrical components. Always wear safety glasses and gloves.
3. Installing the Fan and Vent
The installation process involves several steps, including:
- Installing the fan: Mount the fan securely to the bathroom ceiling or wall, ensuring it's properly aligned. Connect the fan's wiring to the bathroom's electrical circuit. Double-check the wiring connections for proper polarity.
- Connecting the vent pipe: Connect the vent pipe to the fan's outlet using appropriate clamps. Ensure the connection is secure and leak-proof.
- Routing the vent pipe: Route the vent pipe through the attic or crawl space, if applicable, to the exterior wall. Use a level to ensure the vent pipe is properly sloped toward the exterior, preventing moisture buildup.
- Drilling the hole in the brick wall: Using a masonry drill bit, drill a hole in the brick wall to accommodate the vent pipe. The hole's diameter should slightly exceed the vent pipe's diameter for a snug fit.
- Sealing the vent pipe: Secure the vent pipe into the hole in the brick wall using sealant. Seal around the pipe with appropriate sealant to prevent air leaks and moisture intrusion.
- Installing the exterior vent cover: Attach the exterior vent cover to the vent pipe, ensuring it's securely fastened and weatherproof. The vent cover should be designed to prevent rain and debris from entering the vent.
- Testing the fan: Turn on the fan and check for proper operation. Ensure the fan operates smoothly and effectively removes moisture and odors from the bathroom.
If you're unsure about any aspect of the installation, it's always recommended to seek assistance from a qualified electrician or HVAC professional.

Installing An Exhaust Fan During A Bathroom Remodel Greenbuildingadvisor

Dryer Vent Through Brick Tips

Installing An Exhaust Fan During A Bathroom Remodel Greenbuildingadvisor

Dryer Vent Through Brick Tips

Provent Wall Style Bathroom Fan Vent Kit Installation Dundas Jafine

Installing An Exhaust Fan During A Bathroom Remodel Greenbuildingadvisor

Everbilt 6 In Louvered Exhaust Hood White Blh6whd The Home Depot

Air Bricks Great For Ventilation Waterleak Co

Gable End Vent Thisiscarpentry

How To Vent A Bathroom With No Outside Access
Related Posts


