Installing a Bathroom Exhaust Fan Through the Roof
Installing a bathroom exhaust fan through the roof is a relatively simple DIY project for homeowners with basic construction skills. This process involves routing ductwork from the fan to the roof, ensuring proper ventilation and preventing moisture buildup within the bathroom. By following the steps outlined below, you can effectively install a bathroom exhaust fan that promotes a healthy and comfortable environment.
Step 1: Planning and Preparation
Before starting the installation process, it’s crucial to plan and prepare the workspace. This includes selecting the optimal location for the fan and determining the most efficient route for the ductwork. Consider factors such as the proximity of existing plumbing and electrical wiring, as well as the structural integrity of the roof. It’s also advisable to consult local building codes and regulations to ensure compliance with safety standards.
Gather the necessary tools and materials, including:
- Bathroom exhaust fan
- Ductwork (PVC or metal)
- Duct tape
- Roof flashing kit
- Screws and nails
- Safety glasses and work gloves
- Level
- Measuring tape
- Utility knife
- Drill with appropriate bits
- Saw (for cutting ductwork)
It's essential to disconnect the power supply to the bathroom circuit before working on electrical components.
Step 2: Installing the Bathroom Exhaust Fan
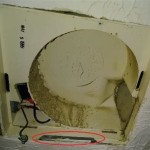
Begin by installing the exhaust fan unit inside the bathroom. This involves attaching the fan to the ceiling using screws or brackets provided by the manufacturer. Ensure the fan is positioned correctly and level using a level tool. Connect the electrical wiring according to the manufacturer's instructions, making sure to use appropriate wire connectors and grounding techniques.
After connecting the fan to the electrical wiring, test its functionality by turning it on. Verify that it operates smoothly and at the desired speed.
Step 3: Routing the Ductwork
Next, route the ductwork from the exhaust fan to the roof vent. The ductwork can be made of either PVC or metal, depending on your preferences and budget. For a more efficient system, minimize bends and transitions in the ductwork, as each bend can reduce airflow.
If the ductwork needs to pass through walls or ceilings, use appropriate cutting tools and ensure the ductwork is securely fastened to the structure. To prevent noise transmission, consider using duct mufflers or insulation sleeves around the ductwork.
Step 4: Installing the Roof Vent
Select a location for the roof vent that allows for a direct path from the ductwork to the outside air, preferably on a flat section of the roof. Cut a hole in the roof using a jigsaw or circular saw, ensuring the hole is slightly larger than the roof vent.
Install the roof vent according to the manufacturer's instructions. This typically involves attaching the vent to the roof using screws and flashing. The flashing helps create a watertight seal around the vent, preventing leaks and moisture damage.
Step 5: Connecting the Ductwork to the Roof Vent
Connect the ductwork to the roof vent using a secure connection method, such as a duct collar. Ensure a tight fit to prevent air leakage and maintain efficient ventilation. Secure the ductwork using duct tape to ensure a proper seal.
It is important to ensure that the ductwork is properly insulated to prevent condensation from forming within the ductwork. Insulation can be achieved by using foam insulation sleeves or wrapping the ductwork in insulation material.
Step 6: Final Adjustments and Testing
Once the ductwork is connected to the roof vent, inspect the entire installation for any gaps or leaks. Ensure all connections are sealed appropriately using duct tape. Turn on the exhaust fan and check for proper ventilation and airflow. Listen for any unusual noises or air leaks.
If the installation is satisfactory, restore the power supply to the bathroom circuit and test the fan again. Ensure it runs smoothly and effectively removes moisture from the bathroom.

Installing A Bathroom Fan Fine Homebuilding

Bathroom Exhaust Fans Building America Solution Center

Blog

How To Replace And Install A Bathroom Exhaust Fan From Start Finish For Beginners Easy Diy

How To Install A Bathroom Exhaust Fan Lowe S

Venting A Bath Fan In Cold Climate Fine Homebuilding

Venting A Bathroom Through Sips Fine Homebuilding

How To Use An In Line Exhaust Fan Vent Two Bathrooms Diy Family Handyman

Roof Flashing For Bathroom Fans

I Am Stuck On A Bathroom Exhaust Vent Installation Doityourself Com Community Forums
Related Posts


