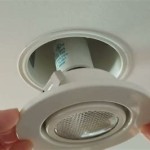
How to Fit a Bathroom Extractor Fan Using a Light Switch
Installing a bathroom extractor fan is a relatively simple DIY project that can significantly improve the ventilation and air quality in your bathroom. By connecting the fan to a light switch, you ensure that the fan automatically turns on when the light is switched on, maximizing its effectiveness in removing moisture and odors. This article will guide you through the steps of fitting a bathroom extractor fan, including how to wire it to a light switch.
Understanding the Necessary Components
Before starting the installation, ensure you have gathered all the necessary components. These include:
- Bathroom extractor fan: Choose a fan suitable for your bathroom size and ventilation needs.
- Switchplate: A new switchplate is usually recommended to accommodate the new wiring.
- Junction box: A junction box is essential for connecting the wiring from the fan, light switch, and existing wiring.
- Electrical wire: Use appropriate electrical wire (T&E, or twin and earth) with the correct gauge for the fan's power requirements.
- Cable clips: These are used to secure the electrical wires to the wall or ceiling.
- Screwdrivers: Use a variety of screwdrivers to install the fan, junction box, and switchplate.
- Wire strippers: Used to remove the insulation from the electrical wires.
- Wire connectors: These are used to join the different wires together safely.
- Drilling tools: Needed if you need to make new holes for the fan, switch, or junction box.
- Safety goggles and gloves: Always wear safety gear when working with electricity.
Preparing for Installation
Before starting the installation process, ensure you have taken the following steps:
- Turn off the power supply: Locate the circuit breaker controlling the bathroom lighting and turn it off. Always confirm power is off by testing with a voltage tester.
- Choose the location: Determine the best location for the extractor fan, considering its proximity to the shower or bath. You can find instructions in the fan's manual.
- Mark the installation points: Use a pencil to mark the installation location for the fan, junction box, and new switch plate.
- Install the fan: Mount the fan to the ceiling using the provided brackets or screws. The fan usually needs to be installed with a minimum distance from the light fitting.
- Mount the junction box: Install the junction box in a suitable location, ensuring it is easily accessible. It is best practice to conceal this in the ceiling or wall for aesthetics.
Connecting the Wiring
This is the critical step in connecting the fan to the light switch, requiring careful attention and understanding of electrical wiring standards:
- Connect the fan to the junction box: Run the electrical wire from the fan to the junction box. Strip the ends of the wires and connect them to the terminals in the junction box using wire connectors. The fan will usually have three wires: live, neutral, and earth (green/yellow).
- Connect the light switch to the junction box: Run a separate electrical wire from the existing light switch to the junction box. Strip the ends of these wires and connect them to the junction box. The light switch will also have three wires: live, neutral, and earth.
- Connect the junction box to the existing wiring: Connect the wires from the junction box to the existing wiring for the bathroom light. This is typically done in the existing junction box connected to the light fixture. The live wire from the junction box should be connected to the live wire from the existing wiring. The neutral wire from the junction box should be connected to the neutral wire from the existing wiring. The earth wire from the junction box should be connected to the earth wire from the existing wiring.
- Ensure all wires are securely connected: Double-check that all the wire connections are tight and secure. Ensure each wire is connected to the correct terminal and is not touching any other wires.
Installing the Switchplate and Testing
Once the wiring is complete, you can finish the installation process:
- Install the switchplate: Attach the new switchplate to the wall or ceiling, covering the wiring in the junction box.
- Turn on the power supply: Carefully switch the power back on at the circuit breaker.
- Test the fan: Switch on the light in the bathroom. The extractor fan should automatically turn on. Use the light switch to test the fan, ensuring it functions as intended.
Remember to consult the manufacturer's instructions for your specific extractor fan model. If you're unsure about any aspect of the installation process, it's always best to seek professional help from a qualified electrician.

Extractor Fan Wiring Diywiki

How To Fit A Bathroom Extractor Fan Using Light Switch Installation Xpelair Dx100

Extractor Fan Wiring Diywiki

How To Wire A Bathroom Extractor Fan With Timer Diy Doctor

Wiring A Bathroom Extractor Fan With An Isolator Switch Exhaust Ventilation Light

Extractor Fan Wiring Diywiki

Replacing A Bathroom Light Fan Switch Connections Diynot Forums

How To Fit A Bathroom Extractor Fan Using Light Switch Installation Xpelair Dx100

Extractor Fan Wiring Diywiki

How To Wire Bathroom Fan Extractor Light
Related Posts

