How To Clean a Delta Bathroom Sink Drain
A clogged bathroom sink drain is a common household problem. Hair, soap scum, toothpaste, and other debris can accumulate over time, restricting water flow and eventually leading to a complete blockage. Delta bathroom sink drains, while generally durable and well-designed, are not immune to this issue. This article provides a comprehensive guide on how to effectively clean a Delta bathroom sink drain, outlining various methods and tools to restore proper drainage.
Before starting any cleaning procedure, it is crucial to assess the severity of the clog and determine the appropriate method. Minor clogs may be resolved with simple solutions, while more stubborn blockages might require disassembly and more aggressive techniques. Safety should always be prioritized. Wear appropriate protective gear, such as gloves, to avoid contact with potentially contaminated water and cleaning agents. Ensure proper ventilation in the bathroom, especially when using chemical drain cleaners.
Initial Assessment and Preparation
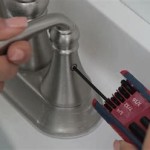
The first step is to visually inspect the drain opening and the surrounding area. Look for any obvious obstructions, such as hair tangled around the drain stopper or visible build-up. Remove the drain stopper, if possible, to gain a clearer view of the drainpipe. Some stoppers can be lifted directly out, while others may need to be twisted or unscrewed. Delta drains commonly employ a pop-up stopper mechanism, which can be accessed and manipulated from beneath the sink. Consult the drain's installation manual, if available, for specific instructions on stopper removal.
Once the stopper is removed, examine it for any accumulated debris and clean it thoroughly. This alone may resolve minor clogs. Run the faucet to observe the water flow and gauge the extent of the blockage. If the water drains slowly or not at all, proceed to the next steps. Gather the necessary tools and materials based on the chosen cleaning method. These might include a plunger, baking soda, vinegar, boiling water, a drain snake, a pipe wrench, and a bucket.
Protect the area around the sink by placing a towel or mat to catch any spills. Ensure that the water supply to the faucet is accessible and that the area under the sink is clear of obstructions. Good lighting is essential for proper visibility. A flashlight or headlamp can be helpful when working in the dimly lit space beneath the sink. Having a helper can also be beneficial, especially for tasks that require simultaneous actions.
Non-Chemical Cleaning Methods
For minor clogs or as a first attempt, non-chemical methods are often effective and environmentally friendly. These approaches generally involve mechanical action or natural cleaning agents to dislodge the blockage.
Plunging: A plunger is a simple yet effective tool for dislodging many common drain clogs. Ensure there is enough water in the sink to cover the cup of the plunger. Create a tight seal by pressing the plunger firmly over the drain opening. Use a rapid up-and-down motion to create suction and pressure, which can dislodge the clog. Repeat this process several times, and then remove the plunger to check if the water drains more freely. If the clog persists, repeat the plunging process or try a different method.
Baking Soda and Vinegar: This combination creates a natural chemical reaction that can help dissolve organic matter and loosen clogs. Pour about one cup of baking soda down the drain, followed by one cup of vinegar. Let the mixture fizz for about 30 minutes. The fizzing action helps break down grime and debris. After 30 minutes, flush the drain with boiling water. The hot water helps to further dissolve the clog and clear the drainpipe. Repeat this process if necessary. For best results, avoid using the sink during the soaking period.
Boiling Water: For simple clogs caused by grease or soap build-up, boiling water alone can be effective. Carefully pour a kettle of boiling water down the drain. The hot water can melt away grease and soap, allowing the drain to flow freely. Use caution when handling boiling water to avoid burns. This method is most effective for clogs that are relatively close to the drain opening. Avoid using boiling water on PVC pipes, as the high temperature can potentially damage the plastic.
Mechanical Removal with a Drain Snake
If non-chemical methods fail to clear the clog, a drain snake (also known as a plumbing snake) can be used to physically break up or retrieve the obstruction. Drain snakes are flexible tools that can be inserted into the drainpipe to reach deeper clogs.
Using a Drain Snake: Insert the drain snake into the drain opening, pushing it gently down the pipe. Rotate the snake as it progresses to help it navigate bends and curves in the drainpipe. If you encounter resistance, continue rotating the snake to try to break through the clog. Avoid forcing the snake, as this could damage the drainpipe. Once you feel the snake engage with the clog, continue rotating it to break it up or snag it. Carefully pull the snake back out of the drain, bringing with it any debris that was caught. Dispose of the debris properly. Run water down the drain to check if the clog has been cleared. Repeat the process if necessary.
Delta bathroom sink drains often have a P-trap located beneath the sink, which is a curved section of pipe designed to trap debris and prevent sewer gases from entering the bathroom. The drain snake needs to be maneuvered through this P-trap to reach the clog. Patience and careful technique are essential to avoid damaging the pipes. Different types of drain snakes are available, including hand-cranked snakes and motorized snakes. Choose a snake that is appropriate for the size and type of drain.
After using the drain snake, clean it thoroughly with soap and water to remove any debris and prevent the spread of bacteria. Dry the snake completely before storing it to prevent rust and corrosion. Inspect the drain snake regularly for any signs of damage, such as kinks or breaks in the cable. Replace the snake if it is damaged.
Disassembling the Drain for Thorough Cleaning
For stubborn clogs that cannot be resolved with other methods, disassembling the drain may be necessary. This allows for a thorough cleaning of the individual drain components and removal of any accumulated debris.
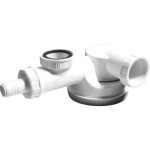
Drain Disassembly: Before disassembling the drain, turn off the water supply to the faucet to prevent flooding. Place a bucket under the drain to catch any water that may be trapped in the pipes. Loosen the slip nuts that connect the drainpipes using a pipe wrench. Be careful not to overtighten the nuts when reassembling the drain. Start by disassembling the P-trap, as this is a common location for clogs. Remove the P-trap and inspect it for any blockages. Clean the P-trap thoroughly with soap and water. Check the drain tailpiece (the vertical pipe that connects the sink to the P-trap) for any debris. Remove the tailpiece and clean it if necessary. If the clog extends further up into the drainpipe, you may need to disassemble additional sections of the drain.
Delta bathroom sink drains often have a pop-up stopper mechanism connected to the drainpipes. This mechanism can be disassembled for cleaning. Carefully disconnect the linkage that connects the stopper to the lift rod. Remove the stopper and clean it thoroughly. Inspect the drain opening for any debris and remove it. Reassemble the drain in the reverse order, ensuring that all connections are tight. Turn on the water supply to the faucet and check for leaks. If any leaks are present, tighten the connections until the leaks stop.
When reassembling the drain, ensure that all parts are properly aligned and that the slip nuts are tightened securely but not overtightened. Over tightening can damage the plastic pipes. Use plumber's tape (PTFE tape) on threaded connections to help create a watertight seal. Wrap the tape around the threads in a clockwise direction before assembling the pipes. Ensure the P-trap is properly aligned and positioned to prevent water from backing up into the drainpipe. After reassembly, test the drain by running water to ensure that it drains freely and that there are no leaks at any of the connections.
Proper preventative maintenance is crucial for avoiding future clogs. Regularly flush the drain with hot water after each use to help prevent the build-up of soap scum and grease. Avoid pouring grease or oil down the drain. Use a drain strainer to catch hair and other debris before they enter the drainpipe. Clean the drain stopper regularly to remove any accumulated debris. Periodically flush the drain with a mixture of baking soda and vinegar to help prevent clogs from forming. By taking these preventative measures, it is possible to maintain a clean and free-flowing Delta bathroom sink drain and avoid the need for more extensive cleaning procedures.

How To Remove A Delta Sink Stopper Step By

How To Unclog A Sink Drain Toilet In Seconds Delta Declogger
Install A Drain Stopper So The Is Removable

Simple Ways To Fix A Leaky Delta Bathroom Sink Faucet

Bathroom Sink Popup And Stopper Problems

How To Remove A Delta Bathroom Sink Pop Up Stopper Hunker

Worry Free Sink Drain Catch Delta Faucet

How To Rebuild A Delta Single Handle Faucet

How To Get The Gunk Out Of Your Faucet

How To Repair Leaking Dripping Delta Faucet Diyplumbing Serviceplumbing Tappplumbing
Related Posts


