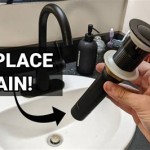
Removing A Bathroom Vanity And Sink: A Comprehensive Guide
Removing a bathroom vanity and sink is a common home improvement task, often undertaken to renovate a bathroom, replace outdated fixtures, or repair damage. While seemingly straightforward, this task requires careful planning and execution to avoid potential plumbing issues, damage to surrounding surfaces, and safety hazards. This article provides a detailed guide to safely and effectively removing a bathroom vanity and sink, covering the necessary tools, preparation steps, and the removal process itself.
Essential Tools and Materials
Before commencing the removal process, it is crucial to gather the necessary tools and materials. This ensures a smooth and efficient workflow, minimizing potential delays and complications. The following list outlines the essential items required for this project:
*Safety Glasses:
Protects eyes from debris and potential splashes. *Work Gloves:
Safeguards hands from sharp edges and potential contaminants. *Adjustable Wrench:
Used to loosen and tighten plumbing connections. *Basin Wrench:
Specifically designed for accessing hard-to-reach faucet nuts. *Pliers:
Useful for gripping and manipulating small parts. *Screwdrivers (Phillips and Flathead):
Required for removing screws securing the vanity and sink. *Utility Knife:
For cutting through caulk or adhesive. *Putty Knife or Scraper:
Used to remove stubborn caulk or adhesive residue. *Bucket:
To catch water drained from the plumbing lines. *Towels or Rags:
For cleaning up spills and protecting surrounding surfaces. *Trash Bags:
For disposing of old fixtures and debris. *Pencil:
To mark stud locations or other relevant measurements. *Stud Finder:
To locate wall studs behind the vanity for potential mounting considerations. *Level:
To ensure proper alignment during re-installation (if applicable). *Measuring Tape:
To measure dimensions and clearances. *Hacksaw (optional):
May be needed to cut stubborn plumbing connections. *Multi-Tool (optional):
Can be helpful for various cutting and scraping tasks. *Dust Mask:
To avoid inhaling dust and particles during demolition. *Plumber’s Putty (optional):
For sealing drain connections during re-installation. *Caulk (optional):
For sealing around the new vanity and sink after installation.Preparation: Shutting off Water Supply and Disconnecting Plumbing
The most critical step in preparing for vanity and sink removal is to shut off the water supply to the fixture. Failure to do so will result in significant water damage and potential flooding. The shut-off valves are typically located under the sink, on the supply lines leading to the faucet.
To shut off the water supply, first locate the hot and cold water shut-off valves. Turn both valves clockwise until they are completely closed. Once the valves are closed, test them by turning on the faucet. If water continues to flow, the valves may be faulty and the main water supply to the house needs to be shut off. The main water shut-off valve is typically located near the water meter or where the water supply enters the house.
Once the water is shut off and verified, the next step is to disconnect the plumbing. Place a bucket under the sink to catch any remaining water in the pipes. Use an adjustable wrench to carefully loosen the supply lines connected to the faucet. Slowly disconnect the supply lines, allowing the water to drain into the bucket. Be prepared for a small amount of residual water to leak out.
Next, disconnect the drainpipe. This usually involves loosening a slip nut that connects the drainpipe to the sink drain. Again, place a bucket underneath to catch any water. Once the slip nut is loosened, carefully pull the drainpipe away from the sink drain. Inspect the drainpipe for any signs of damage or corrosion. If the drainpipe is in poor condition, it may be necessary to replace it during re-installation.
After disconnecting the plumbing, inspect the area for any signs of mold or mildew. If mold is present, it should be properly cleaned and treated before proceeding with the removal process. Mold remediation may require professional assistance.
Vanity Removal: Detaching and Removing the Cabinet
With the plumbing disconnected, the next step is to detach the vanity cabinet from the wall and floor. Vanities are typically secured to the wall with screws that are driven into wall studs. Start by locating the screws that secure the vanity to the wall. These screws are usually located along the top edge of the vanity, behind the countertop or inside the cabinet.
Use a screwdriver (Phillips or flathead, depending on the screw type) to remove the screws securing the vanity to the wall. If the screws are difficult to remove, try using a penetrating oil to loosen them. Apply the penetrating oil to the screw heads and allow it to sit for a few minutes before attempting to remove the screws.
Once the screws are removed, carefully detach the vanity from the wall. It may be necessary to use a utility knife to cut through any caulk or adhesive that is sealing the vanity to the wall. Run the utility knife along the edges of the vanity where it meets the wall, cutting through the caulk or adhesive.
With the vanity detached from the wall, carefully lift it away from the wall and set it aside. If the vanity is heavy, it may be necessary to have assistance to lift it safely. Once the vanity is removed, inspect the wall and floor for any damage. Repair any holes or cracks in the wall or floor before proceeding with the installation of a new vanity.
In some cases, the vanity may be attached to the floor. If this is the case, locate the screws or fasteners that secure the vanity to the floor and remove them. The vanity may also be attached to the floor with adhesive. If this is the case, use a putty knife or scraper to carefully separate the vanity from the floor. Be careful not to damage the flooring during this process.
After removing the vanity, clean the area thoroughly. Remove any debris, dust, or caulk residue. Use a vacuum cleaner to remove any loose particles. Wipe down the wall and floor with a damp cloth to remove any remaining dirt or grime. This prepares the area for the installation of a new vanity.
If you encounter any difficulties during the removal process, consult a professional plumber or contractor. Attempting to force or damage any components can lead to further problems and higher repair costs. It is always better to seek expert assistance if you are unsure about any aspect of the removal process.
Proper disposal of the old vanity and sink is also important. Check with local waste management regulations regarding the disposal of bulky items. It may be necessary to disassemble the vanity into smaller pieces for easier disposal. Consider donating the vanity to a local charity or organization if it is still in usable condition.
Following these steps ensures a safe and effective removal of the bathroom vanity and sink, setting the stage for a successful renovation or replacement project. Remember to prioritize safety and take your time to avoid any damage to surrounding surfaces or plumbing systems.
Addressing Potential Challenges
While the removal process described above is generally applicable, certain situations may present unique challenges. Addressing these challenges proactively can prevent delays and complications.
*Stubborn Caulk or Adhesive:
Over time, caulk and adhesive can become particularly difficult to remove. Applying heat from a heat gun (carefully and at a safe distance) can soften the caulk, making it easier to scrape away. Alternatively, specialized caulk removal tools can be used. For stubborn adhesive, consider using a solvent specifically designed for adhesive removal, following the manufacturer's instructions carefully. *Corroded Plumbing Connections:
Corrosion can make it difficult to loosen plumbing connections. Penetrating oil can be helpful in these situations. Apply the oil to the corroded connections and allow it to sit for several minutes before attempting to loosen them. If the connections are severely corroded, it may be necessary to cut the pipes using a hacksaw. Be sure to wear safety glasses and gloves when cutting pipes. *Difficult-to-Reach Screws:
Some vanity installations may involve screws that are located in hard-to-reach places. Using a ratchet screwdriver or a flexible extension for a screwdriver can provide better access to these screws. Alternatively, consider using a small mirror to help visualize the screw location. *Uneven Walls or Floors:
Uneven walls or floors can make it difficult to remove the vanity evenly. Using shims can help to stabilize the vanity and prevent it from tipping over during removal. Placing shims under the vanity can also make it easier to detach it from the wall or floor. *Hidden Plumbing:
Older homes sometimes have plumbing that isn't easily accessible or is hidden behind the vanity. Carefully examine the area before starting the removal process to identify any hidden plumbing lines. Taking photographs before disassembling anything is highly advised.By anticipating and preparing for these potential challenges, one can ensure a smoother and more efficient vanity removal process.

How To Remove A Bathroom Vanity Remodel

How To Remove A Bathroom Vanity Budget Dumpster

:max_bytes(150000):strip_icc()/7_remove-vanity-top-56a4a26d3df78cf772835b2d.jpg?strip=all)
How To Remove A Bathroom Vanity Cabinet

How To Remove Bathroom Vanity Cabinet Step By Guide

How To Remove Replace A Vanity Top Easy Bathroom Sink Remodel

How To Install A Bathroom Vanity And Sink

How To Remove An Old Bathroom Vanity Thrift Diving Blog

Replace Vanity Top And Faucet Diy Network

How To Remove Your Bathroom Sink And Vanity Dumpsters Com
Related Posts


