How To Clean a Bathroom Vent Fan: A Comprehensive Guide
Bathroom vent fans are essential for maintaining air quality, controlling humidity, and preventing mold and mildew growth. Over time, these fans accumulate dust, dirt, and debris, reducing their efficiency and potentially shortening their lifespan. Regular cleaning is crucial to ensure optimal performance and a healthy bathroom environment. This article provides a detailed, step-by-step guide on how to effectively clean bathroom vent fans.
Before commencing the cleaning process, safety precautions are paramount. Ensuring personal safety and preventing damage to the fan or the electrical system requires careful planning and execution. Neglecting these initial steps could lead to injury or costly repairs.
Safety First: Preparation and Precautions
Begin by turning off the power to the bathroom vent fan at the circuit breaker. This vital step prevents electrical shock during the cleaning process. Locate the appropriate breaker, usually labeled "bathroom" or "lights," and switch it to the "off" position. To double-check that the power is disconnected, turn on the bathroom light switch, which is typically wired on the same circuit as the fan. If the light does not illuminate, the power is successfully disconnected.
Gather all necessary cleaning supplies and tools. This preparation streamlines the cleaning process and prevents interruptions. The required items typically include:
- Screwdriver (Phillips and/or flathead, depending on the fan model)
- Vacuum cleaner with a brush attachment
- Soft brush or paintbrush
- Cleaning solution (mild soap and water or a specialized cleaner)
- Damp cloth or sponge
- Safety glasses or goggles
- Dust mask
- Gloves (optional, but recommended)
- Step ladder or sturdy platform (if necessary)
Having these materials readily available ensures a smooth and efficient cleaning experience. Safety glasses and a dust mask are essential for protecting the eyes and respiratory system from dust and debris dislodged during the cleaning process. Gloves can protect the hands from dirt and cleaning solutions.
Carefully assess the area around the fan. Ensure that the step ladder or platform is stable and positioned in a way that allows comfortable and safe access to the fan. Clear any obstacles or furniture that might obstruct the cleaning process. Proper planning of the workspace contributes to a safer and more efficient cleaning experience.
Disassembling the Fan: Accessing the Components
Once the power is off and the supplies are gathered, the next step involves disassembling the fan to access its internal components for cleaning. The disassembly process varies slightly depending on the fan model, but the general procedure remains consistent. It is advisable to consult the fan's user manual for specific instructions if available.
Start by removing the fan cover or grille. Most covers are held in place by spring clips, screws, or a combination of both. For spring clips, gently pull down on the cover, and it should pop out. For screw-mounted covers, use the appropriate screwdriver to loosen and remove the screws. Place the screws in a safe location to prevent them from getting lost.
With the cover removed, the fan motor and blower wheel (also known as the impeller) will be visible. Disconnect the fan motor assembly by unplugging it from its electrical receptacle. In some cases, the motor is hardwired; in this situation, avoid disconnecting the wiring unless absolutely necessary and only if comfortable doing so. If hardwired, proceed with caution and ensure the power remains off throughout the cleaning process.
Carefully remove the blower wheel. This component is typically held in place by a nut, screw, or clip. Use the appropriate tool to loosen and detach the securing mechanism. Gently pull the blower wheel away from the motor shaft. Be mindful of the wheel's delicate blades, as they can be easily damaged. Take note of how the blower wheel is oriented before removing it to facilitate reassembly.
If accessing the fan housing for a deeper clean, locate and remove any additional screws or clips that secure it to the ceiling or wall. This step is usually unnecessary for routine cleaning but may be required if significant dust and debris have accumulated within the housing.
It is important to document the disassembly process, either by taking photographs or making notes. This ensures that reassembling the fan is straightforward and prevents any uncertainty regarding the proper placement of each component.
Cleaning the Components: Removing Dust and Debris
With the fan disassembled, the individual components are now accessible for thorough cleaning. The cleaning process aims to remove dust, dirt, and other debris that have accumulated over time. The specific cleaning methods vary depending on the component's material and the level of dirt accumulation.
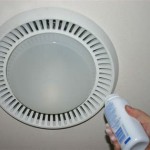
Begin by cleaning the fan cover or grille. Use the vacuum cleaner with the brush attachment to remove loose dust and debris. If the cover is heavily soiled, wash it with warm, soapy water. Use a soft brush or sponge to gently scrub away dirt and grime. Rinse the cover thoroughly with clean water and allow it to air dry completely before reassembling the fan. For plastic covers, avoid using abrasive cleaners, as they can scratch or damage the surface.
Next, focus on the blower wheel. Use the vacuum cleaner with the brush attachment to remove loose dust and debris from the blades. For stubborn dirt, gently wipe the blades with a damp cloth or sponge. If the blower wheel is made of plastic, avoid using harsh chemicals or solvents, as they can damage the material. For metal blower wheels, a mild degreaser can be used to remove grease and grime.
Carefully clean the fan motor assembly. Use the vacuum cleaner with the brush attachment to remove dust and debris from the motor housing. Avoid getting water or cleaning solutions inside the motor itself. If necessary, lightly dampen a cloth and wipe the exterior of the motor housing. Pay particular attention to the motor's ventilation slots, as these can become clogged with dust, hindering airflow and reducing motor efficiency.
Clean the fan housing, if accessible. Use the vacuum cleaner with the brush attachment to remove dust and debris from the interior of the housing. Wipe down the interior surfaces with a damp cloth or sponge. If significant dust and debris have accumulated within the housing, consider using a specialized cleaner designed for electrical components. Ensure that all surfaces are completely dry before reassembling the fan.
Once all components are cleaned and dried, inspect them for any signs of damage or wear. Replace any worn or damaged parts as needed. A clean and well-maintained fan ensures optimal performance and a longer lifespan.
Consider using compressed air to dislodge any remaining dust particles from hard-to-reach areas, such as the motor's ventilation slots or the blower wheel's intricate blade design. Exercise caution when using compressed air to avoid blowing dust and debris into the surrounding environment.
After cleaning, consider applying a thin layer of lubricant to the motor shaft to ensure smooth operation. Use a lubricant specifically designed for electric motors, such as a silicone-based lubricant. Avoid using oil-based lubricants, as they can attract dust and debris and eventually cause the motor to seize.
Reassembling the Fan: Restoring Functionality
After cleaning and inspecting all components, the final step involves reassembling the fan. This process should be performed carefully and systematically, following the reverse order of the disassembly process. Refer to the notes or photographs taken during disassembly to ensure that each component is correctly positioned and secured.
Begin by reattaching the blower wheel to the motor shaft. Align the blower wheel properly and secure it with the nut, screw, or clip that was removed during disassembly. Ensure that the blower wheel is firmly attached and rotates freely without any wobbling or binding.
Reconnect the fan motor assembly to its electrical receptacle. Ensure that the connections are secure and that the wiring is properly routed. If the motor was hardwired, carefully reconnect the wires, ensuring that they are properly insulated and secured. If unsure about the wiring, consult a qualified electrician.
Reattach the fan housing to the ceiling or wall, if it was removed. Align the housing properly and secure it with the screws or clips that were removed during disassembly. Ensure that the housing is firmly attached and flush with the ceiling or wall.
Finally, reattach the fan cover or grille. Align the cover properly and secure it with the spring clips or screws that were removed during disassembly. Ensure that the cover is firmly attached and that there are no gaps or loose edges.
Once the fan is fully reassembled, turn the power back on at the circuit breaker. Test the fan to ensure that it is operating properly. Listen for any unusual noises or vibrations. Check the airflow to ensure that the fan is effectively removing air from the bathroom. If the fan is not operating properly, turn the power off immediately and re-examine the reassembly process.
Regular cleaning and maintenance of the bathroom vent fan ensures optimal performance, reduces energy consumption, and prolongs the fan's lifespan. It also contributes to a healthier and more comfortable bathroom environment by controlling humidity and preventing mold and mildew growth.
If, after cleaning and reassembling the vent fan, the motor still produces excessive noise or fails to function properly, the motor itself may be failing. Replacement motors are often available for purchase and can be installed relatively easily, following the same disassembly and reassembly procedures described above.
Consider implementing a regular cleaning schedule for the bathroom vent fan. A recommended frequency is at least twice a year, or more often if the bathroom is heavily used or prone to high humidity levels. Regular cleaning prevents the accumulation of excessive dust and debris, making the cleaning process easier and more effective.

How To Clean Bathroom Ceiling Fans Simple Method

How To Clean Bathroom Exhaust Fan

How To Clean Bathroom Vent Fans Crafting In The Rain

How To Clean Bathroom Exhaust Fan Duct Ace Sydney Electricians

How To Clean A Bathroom Exhaust Fan Practically Functional

Bathroom Exhaust Fan Lint Is A Fire Hazard Mini Mops House Cleaning

How To Clean A Bathroom Exhaust Fan

Instructions For Cleaning Ventilation Fans Ensure Safety And Properly

How To Clean Bathroom Ceiling Fans Simple Method

How To Clean The Bathroom Exhaust Fan Metropolitan Electrical Contractors Local Technicians
Related Posts


