How to Seal a Wood Bathroom Vanity Top With Sink
A wood bathroom vanity top with a sink offers a classic and elegant touch to any bathroom. However, wood is susceptible to water damage, making proper sealing essential. A well-sealed wood vanity top will not only protect the wood from the elements but also enhance its longevity and aesthetic appeal. This article will guide you through the process of sealing a wood bathroom vanity top with a sink, ensuring you understand the importance of each step for a successful outcome.
Preparing the Wood Surface
The success of sealing a wood bathroom vanity top hinges on proper surface preparation. Thorough preparation ensures that the sealant penetrates the wood effectively and creates a durable barrier against water damage.
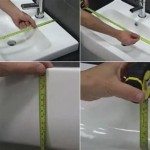
Begin by cleaning the wood surface using a mild soap and water solution. Remove any dirt, grime, or residue. Allow the surface to dry completely before proceeding to the next step. Once dry, use a fine-grit sandpaper (120-150 grit) to lightly sand the surface, removing any imperfections or raised grain. Sanding helps create a smooth surface for the sealant to adhere to. Wipe away sanding dust with a damp cloth and allow the surface to dry completely before applying the sealant. This thorough cleaning and sanding process ensures a smooth, clean surface that will optimize the sealant's effectiveness.
Choosing the Right Sealant
Selecting the appropriate sealant is crucial to ensure the longevity and protection of your wood vanity top. Two leading sealants for wood surfaces are polyurethane and epoxy. Each sealant has unique properties and benefits, so the best choice depends on your specific needs and preferences.
Polyurethane sealant is a popular choice for wood vanity tops due to its durability, water resistance, and forgiving application. It forms a hard, protective coating that resists water, stains, and scratches. Polyurethane comes in both oil-based and water-based formulations. Oil-based polyurethane is known for its durability and high gloss finish, while water-based polyurethane is easier to clean up and dries faster. However, it's important to choose a polyurethane sealant specifically designed for bathroom use, as these formulations are equipped to withstand the high humidity and moisture levels typical of bathrooms.
Epoxy sealant is another durable option for wood vanity tops. It is known for its exceptional water resistance, chemical resistance, and ability to fill in cracks and crevices. Epoxy sealant is more difficult to apply than polyurethane but provides superior protection. However, epoxy can yellow over time, so it is recommended to choose a clear or tinted version to maintain the natural color of the wood.
Applying the Sealant
Once you've chosen the sealant, carefully apply it to the wood surface. Ensure the application area is well-ventilated and free from dust and debris.
For polyurethane sealant, apply thin, even coats using a brush, roller, or spray applicator. Allow each coat to dry completely before applying the next. Two to three coats are typically sufficient for optimal protection. For epoxy sealant, mix the two components according to the manufacturer's instructions and apply using a brush or roller. Ensure a smooth, even application, as epoxy sealant can be difficult to smooth out once applied.
During application, avoid applying a sealant to areas where it may come into contact with the sink or other fixtures. This ensures the sealant remains intact and effective without interfering with the function of the sink. After applying the sealant, allow it to cure completely according to the manufacturer's instructions. Once the sealant has cured, test its effectiveness by applying a small amount of water to the surface. The water should bead up and roll off without being absorbed. If the water is absorbed, additional coats of sealant may be needed to ensure adequate protection.
By following these steps, you can effectively seal your wood vanity top and protect it from the damaging effects of water and humidity. By carefully preparing the wood surface, selecting the appropriate sealant, and applying it correctly, you can extend the life of your vanity top and ensure its continued beauty and functionality.

How To Build Protect A Wood Vanity Top Houseful Of Handmade

How Do Wooden Countertops Really Hold Up Exquisitely Unremarkable

How To Build Protect A Wood Vanity Top Houseful Of Handmade

The Foolproof Guide To Diy Wood Countertops For A Bathroom

How To Finish A Wood Bathroom Countertop And Vanity South House Designs

Diy Wood Bathroom Countertop An Easy Way To Change Your Vanity In 1 Weekend Noting Grace

How To Build Protect A Wood Vanity Top Houseful Of Handmade

Diy Wood Bathroom Countertop An Easy Way To Change Your Vanity In 1 Weekend Noting Grace

Finish For A Bathroom Vanity The Wood Whisperer

How To Finish A Wood Bathroom Countertop And Vanity South House Designs
Related Posts