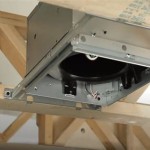
How To Install A Bathroom Fan Vent In The Roof
Installing a bathroom fan vent in the roof is a crucial step in maintaining a healthy and moisture-free bathroom environment. Proper ventilation helps to remove excess humidity, prevent mold growth, and improve air quality. This guide provides a comprehensive step-by-step process for installing a roof vent for your bathroom fan, ensuring efficient and effective air circulation.
1. Planning and Preparation
Before embarking on the installation process, careful planning and preparation are essential.
- Determine the location: Choose a suitable spot on the roof for the vent, considering factors such as proximity to the bathroom, roof pitch, and potential obstructions like chimneys or skylights. Ideally, the vent should be installed in a section of the roof with a slope of at least 4/12 to ensure proper water runoff.
- Select the right fan and vent: The size and power of the bathroom fan should align with the bathroom’s size and ventilation requirements. Consider factors like cubic feet per minute (CFM) rating and noise level. The vent should be compatible with the fan and have a width and length appropriate for the roof’s pitch.
- Gather tools and materials: Assemble all necessary tools, including a circular saw, drill, screwdriver, tape measure, level, safety goggles, and a ladder. Materials required include roofing shingles, flashing, sealant, and screws.
- Consult local building codes: Ensure the installation complies with local building codes and regulations.
2. Cutting the Roof Opening
- Mark the roof: Use a tape measure and pencil to mark the desired location of the vent on the roof. Ensure the marking aligns with the fan’s dimensions.
- Cut the opening: Using a circular saw, carefully cut the roof opening following the marked outline. Make sure the cut is clean and precise.
- Install flashing: Position the flashing around the vent opening, ensuring a tight seal. Secure the flashing using screws or nails.
3. Installing the Fan and Vent
- Mount the fan: Secure the bathroom fan to the ceiling, following the manufacturer’s instructions.
- Connect the ductwork: Connect the fan to the vent pipe, ensuring a snug fit. Use duct tape or sealant to secure the connection.
- Install the vent: Slide the vent into the roof opening, ensuring it is properly aligned and centered.
- Seal the vent: Apply a sealant around the vent to create a watertight seal between the vent and the roof.
- Secure the vent: Secure the vent to the roof using screws or nails. Ensure the vent is firmly attached.
4. Checking and Finishing
- Test the fan: Turn on the bathroom fan and test its functionality. Ensure the fan operates smoothly and effectively exhausts air.
- Check for leaks: Inspect the area around the vent for any leaks. Ensure the vent is properly sealed and watertight.
- Clean up: Remove any debris or excess sealant from the roof.
Installing a bathroom fan vent in the roof is a complex process that requires specific skills and safety precautions. If you are unsure about completing the task yourself, it is advisable to contact a qualified professional for professional installation. Proper ventilation is essential for a healthy and comfortable bathroom environment. By following these steps carefully, you can ensure the efficient and effective removal of moisture and improve air quality in your bathroom.

Installing A Bathroom Fan Fine Homebuilding

How To Install A Bathroom Exhaust Fan Lowe S

Venting A Bath Fan In Cold Climate Fine Homebuilding

Blog

How To Install A Bathroom Fan Diy Family Handyman

Roof Flashing For Bathroom Fans

I Am Stuck On A Bathroom Exhaust Vent Installation Doityourself Com Community Forums

How To Replace And Install A Bathroom Exhaust Fan From Start Finish For Beginners Easy Diy

Cincinnati Nky Louisville Roof Ventilation Deer Park Roofing Llc

Bathroom Exhaust Fans Building America Solution Center
Related Posts


