How To Change Bathroom Vanity Doors and Windows
Renovating a bathroom can significantly enhance a home's value and improve the homeowner's daily experience. Two frequently updated elements in a bathroom remodeling project are the vanity and the windows. Replacing bathroom vanity doors and bathroom windows can dramatically change the aesthetic appeal and functionality of the space. While these projects might seem daunting, with careful planning and execution, they can be successfully completed by a homeowner. This article provides a comprehensive guide on how to change bathroom vanity doors and bathroom windows, covering essential aspects from initial planning to final installation.
Planning and Preparation
Before embarking on any renovation project, meticulous planning is crucial. This initial phase involves assessing the existing condition, setting a budget, selecting appropriate materials, and gathering the necessary tools. Failure to plan adequately can lead to unexpected expenses, project delays, and unsatisfactory results.
Assessing the Existing Condition: Begin by thoroughly inspecting the current vanity doors and windows. Note any signs of damage such as warping, rotting, or cracking. For vanity doors, check the hinges and hardware for wear and tear. For windows, evaluate the condition of the frames, glass, and seals. This assessment will help determine the scope of the project and inform material selection.
Setting a Budget: Determine the maximum amount you are willing to spend on the project. Consider the cost of materials, tools (if any need to be purchased), and potential professional assistance. Allocate a contingency fund for unforeseen expenses. This budget should be realistic and reflect the desired quality of materials and the complexity of the installation.
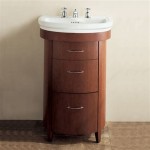
Selecting Materials: Choose replacement vanity doors and windows that complement the bathroom's overall design. For vanity doors, consider factors such as material (wood, laminate, MDF), style (shaker, raised panel, slab), and finish (paint, stain). Ensure the new doors are compatible with the existing vanity cabinet dimensions and hinge placement. For windows, select a style that suits the bathroom's needs (e.g., privacy, ventilation, natural light). Common window types for bathrooms include awning, hopper, and frosted glass windows. Consider energy efficiency ratings and materials that resist moisture and mold.
Gathering Tools: Ensure you have all the necessary tools readily available. This may include a screwdriver set, measuring tape, level, drill, safety glasses, gloves, putty knife, caulk gun, utility knife, and shims. Having the right tools will streamline the installation process and minimize the risk of damage or injury.
Changing Bathroom Vanity Doors
Replacing bathroom vanity doors is a relatively straightforward project that can significantly update the bathroom's appearance. Careful measurement and precise installation are key to achieving a professional-looking result.
Removing Existing Doors: Begin by removing the existing vanity doors. Use a screwdriver to detach the hinges from the cabinet frame. Be careful not to strip the screw heads. If the doors are difficult to remove, apply a penetrating oil to the hinges and screws. Once the hinges are detached, carefully remove the doors.
Measuring for New Doors: Accurately measure the opening of the vanity cabinet. Measure the height, width, and thickness of the existing doors to ensure the new doors are the correct size. If the existing doors are not standard sizes, consider ordering custom-made doors. Double-check all measurements before ordering or purchasing the new doors.
Preparing the New Doors: Before installing the new doors, pre-drill holes for the hinges. Use the existing doors as a template to mark the hinge locations on the new doors. This will ensure the new doors align correctly with the cabinet frame. If using new hinges, carefully measure and mark the appropriate locations.
Installing the New Doors: Attach the hinges to the new doors using the pre-drilled holes. Align the doors with the cabinet frame and attach the hinges to the frame. Ensure the doors are level and aligned correctly. Adjust the hinges as needed to achieve a proper fit. If necessary, use shims to fine-tune the alignment.
Installing New Hardware: Once the doors are installed and aligned, install new hardware such as knobs or pulls. Use a template to ensure consistent placement. Tighten all screws securely and test the operation of the doors. Make any necessary adjustments to ensure smooth and quiet operation.
Changing Bathroom Windows
Replacing bathroom windows requires more skill and precision than replacing vanity doors. It is essential to take necessary safety precautions and follow proper installation techniques to prevent leaks and ensure energy efficiency.
Removing the Old Window: Before removing the old window, protect the surrounding area with drop cloths. Score the caulk around the window frame with a utility knife. Use a pry bar to carefully remove the window trim. With the trim removed, detach the window frame from the wall. Use a reciprocating saw to cut through any remaining nails or screws that are holding the frame in place. Carefully remove the old window from the opening.
Preparing the Opening: Inspect the window opening for any signs of damage or rot. Repair any damaged areas before installing the new window. Ensure the opening is clean, level, and square. Use shims to level the bottom of the opening if necessary. Apply a layer of flashing tape around the perimeter of the opening to create a weatherproof seal.
Installing the New Window: Carefully position the new window in the opening. Use shims to level and plumb the window. Ensure the window is properly aligned with the opening. Secure the window frame to the wall using screws or nails. Use a level to ensure the window remains level during installation.
Insulating and Sealing: After the window is securely installed, insulate the space between the window frame and the wall. Use spray foam insulation to fill any gaps. This will help prevent air leaks and improve energy efficiency. Once the insulation is cured, trim any excess foam with a utility knife. Apply caulk around the exterior of the window to create a weatherproof seal. Smooth the caulk with a wet finger or a caulking tool.
Finishing Touches: Reinstall the window trim to cover the gap between the window frame and the wall. Use finishing nails to secure the trim in place. Fill any nail holes with wood filler. Sand the wood filler smooth and paint or stain the trim to match the bathroom's decor. Clean the window glass and surrounding area. Inspect the installation for any leaks or imperfections and address them as needed.
Safety Considerations
Safety should be a top priority throughout the entire renovation process. Adhering to safety guidelines can prevent injuries and ensure a safe working environment for everyone involved.
Personal Protective Equipment (PPE): Always wear appropriate PPE when working on renovation projects. This includes safety glasses to protect your eyes from debris, gloves to protect your hands from cuts and abrasions, and a dust mask to protect your lungs from dust and fumes. When using power tools, wear hearing protection to prevent hearing damage.
Working with Power Tools: Exercise caution when using power tools. Read and follow the manufacturer's instructions carefully. Ensure the power tools are in good working condition and properly grounded. Use extension cords that are rated for the amperage of the power tools. Never use power tools in wet or damp conditions.
Ladder Safety: If using a ladder, ensure it is placed on a stable and level surface. Use a ladder with a weight capacity that is appropriate for your weight and the weight of the materials you are carrying. Never reach too far while on a ladder. Move the ladder as needed to stay within a safe reach zone.
Handling Hazardous Materials: Be aware of any hazardous materials that may be present in the bathroom, such as lead paint or asbestos. If you suspect the presence of hazardous materials, consult with a professional for proper removal and disposal. Properly dispose of all construction debris according to local regulations.
Electrical Safety: When working near electrical wiring, turn off the power at the circuit breaker. Use a non-contact voltage tester to verify that the power is off. Never work on electrical wiring while standing in water or on a wet surface. If you are not comfortable working with electrical wiring, consult with a licensed electrician.
Changing bathroom vanity doors and windows is a project that requires careful planning, execution, and adherence to safety guidelines. By following the steps outlined in this article, homeowners can successfully update their bathrooms and enhance the value and functionality of their homes.

How To Install A Bathroom Vanity

How To Install A Vanity Forbes Home

Updating A Bathroom Vanity

Window Ideas For Your Bathroom Remodel Pella

Bathroom Vanity Styles To Fit Your Space Forbes Home

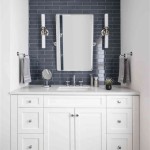
A Window Above The Bathroom Sink Feature Or Flaw

Updating A Bathroom Vanity

Vanities Furniture Style Vs Traditional Cabinet Toulmin Kitchen Bath Custom Cabinets Kitchens And Bathroom Design Remodeling In Tuscaloosa Birmingham Alabama

How To Add Glass Cabinet Doors Confessions Of A Serial Do It Yourselfer

How To Paint A Bathroom Vanity For Custom Look