Removing a Bathroom Sink Drain Plug: A Comprehensive Guide
Bathroom sink drain plugs are essential for filling the basin with water. However, over time, hair, soap scum, and debris can accumulate, causing slow drainage or even complete blockage. Removing the drain plug is a crucial first step in addressing these issues. This guide provides detailed instructions for removing various types of bathroom sink drain plugs, enabling effective cleaning and maintenance.
Before beginning any work, it is essential to gather the necessary tools. Pliers, a wrench, a screwdriver, and a bucket are commonly required. The specific tools needed will depend on the type of drain plug. Having all necessary equipment readily available streamlines the process and minimizes interruptions.
Understanding the type of drain plug installed in the sink is the first step to successful removal. There are several common types, including push-down, lift-and-turn, trip-lever, and pop-up drain plugs. Identifying the specific type will determine the appropriate removal method.
Push-Down Drain Plugs: Push-down drain plugs are typically removed by pressing down firmly on the plug to release it from its sealed position. A slight rocking motion may be necessary. Once loosened, the plug can be lifted out of the drain opening. Inspect the plug and the drain opening for any debris or damage.
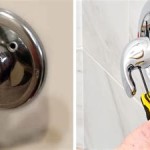
Lift-and-Turn Drain Plugs: These plugs feature a small knob on top. To remove them, simply grip the knob and turn it counterclockwise. The plug should lift out of the drain opening. If the knob is stuck, pliers can be used to provide additional grip, but caution should be exercised to avoid damaging the finish.
Trip-Lever Drain Plugs: Trip-lever drain plugs operate using a lever located behind the faucet. The removal process for this type usually involves accessing the clevis strap, a small metal strap connected to the lever and the drain plug. This often requires reaching under the sink and locating the horizontal connecting rod and the clevis strap. Disconnecting the clevis strap, typically by unscrewing a nut, allows for the removal of the drain plug through the drain opening.
Pop-Up Drain Plugs with a Pivot Rod: These plugs are operated by a vertical rod located behind the faucet. This rod, connected to the drain stopper, lifts and lowers the stopper. To remove this type of plug, the pivot rod needs to be disconnected. This usually involves loosening a nut located behind the pivot rod nut, allowing the pivot rod and the stopper to be removed.
Once the drain plug is removed, it's an ideal time to clean the drain and the plug itself. Hair and debris can be removed manually or with the assistance of pliers. A cleaning solution can be used to remove soap scum and other buildup. Thoroughly rinsing the drain and the plug with hot water ensures a clean and functional drain assembly.
Reinstalling the drain plug is generally the reverse of the removal process. Ensure all components are properly aligned and secured. For trip-lever drain plugs, ensure the clevis strap is correctly reattached and the pivot rod is correctly connected and tightened for pop-up drain plugs. After reinstallation, test the drain plug by filling the sink with water and then releasing it to ensure proper sealing and drainage.
While many drain plugs can be removed and cleaned with common household tools, some situations may require professional assistance. If the drain plug is significantly corroded, damaged, or if the removal process proves too difficult, contacting a qualified plumber is recommended. A plumber has the expertise and specialized tools to handle more complex situations without causing further damage.
Regular maintenance of the bathroom sink drain can prevent clogs and ensure proper drainage. Periodically removing and cleaning the drain plug helps to remove accumulated debris. Using a drain strainer can also help to prevent hair and other debris from entering the drain in the first place. These preventative measures can significantly extend the life of the drain assembly and minimize the need for more extensive repairs.
Different sink manufacturers may employ slight variations in their drain plug designs. Consulting the manufacturer’s instructions or website for model-specific information can provide valuable guidance during the removal and reinstallation process.
Safety precautions should always be observed when working on plumbing fixtures. Turning off the water supply to the sink before beginning any work prevents accidental leaks or spills. Eye protection can also be worn to prevent debris from entering the eyes during cleaning. Taking these precautions ensures a safer and more efficient work environment.

How To Replace A Rusty Sink Drain Howtolou Com

How To Fix A Bathroom Sink Drain Stopper 4 Easy Solutions
How To Get A Bathroom Sink Plug Removed When It Won T Un Quora

How To Replace A Sink Stopper Quick And Simple Home Repair

How To Remove A Sink Stopper The Home Depot

How To Fix Or Maintain Your Sink S Pop Up Mechanism

How To Remove A Sink Stopper The Home Depot

How To Remove A Sink Stopper With These Easy Steps Phyxter Home Services

How To Remove A Sink Stopper The Home Depot

How To Remove A Sink Stopper With These Easy Steps Phyxter Home Services
Related Posts


