Understanding the Parts Under Your Bathroom Sink
The cabinet space beneath a bathroom sink often appears as a confusing collection of pipes and connections. However, understanding the purpose of each component can empower homeowners to perform basic maintenance, troubleshoot simple plumbing issues, and avoid costly repairs. This article provides a detailed overview of the various parts typically found under a bathroom sink, explaining their functions and how they contribute to the overall plumbing system.
The Sink Drain Assembly
The sink drain assembly is the collection of parts directly connected to the bottom of the sink bowl and responsible for channeling water and waste down into the larger plumbing system. Understanding its components is crucial for addressing clogs and leaks that often occur in this area.
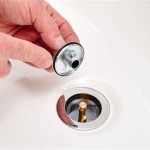
Sink Flange and Stopper: The sink flange is the visible, typically metal, ring that sits flush with the bottom of the sink bowl. It's secured to the sink with plumber's putty or silicone sealant to create a watertight seal. The stopper, also known as the pop-up drain, fits into the flange and can be lifted or lowered to open or close the drain, allowing water to accumulate in the sink or flow freely away. The stopper mechanism varies in design, but usually involves a lever or knob that manipulates a rod linked to the stopper itself.
Drain Body: Attached directly beneath the sink flange is the drain body. This is the main housing that receives the water flowing down from the sink. Often constructed of metal or plastic, the drain body connects to the tailpiece, a vertical pipe that extends downwards to the next component in the drain system.
Tailpiece: The tailpiece is a straight pipe typically made of PVC or metal that connects to the bottom of the drain body. It allows for the connection to the P-trap, and its length can sometimes be adjusted by cutting it with a saw to fit specific plumbing configurations. The tailpiece is usually secured to the drain body with a slip nut and washer, forming a watertight joint.
The P-Trap: Preventing Sewer Gases
One of the most important and easily recognizable components under the sink is the P-trap. This curved section of pipe, shaped like the letter "P" lying on its side, plays a vital role in preventing sewer gases from entering the bathroom through the drain.
Function of the P-Trap: The P-trap works by trapping a small amount of water in its curved section. This water acts as a barrier, preventing foul-smelling and potentially harmful sewer gases from rising up through the drain and into the bathroom. This is a crucial element of plumbing hygiene.
Components of the P-Trap: The P-trap typically consists of two curved sections of pipe connected with slip nuts and washers. These connections allow for easy removal of the P-trap when unclogging the drain. The inlet of the P-trap connects to the tailpiece, while the outlet connects to the drainpipe that leads to the main plumbing system.
Maintenance of the P-Trap: Because the P-trap collects debris, it's often the first place to check when a drain is clogged. Removing the P-trap involves loosening the slip nuts, allowing the trapped water and debris to drain into a bucket. The trap can then be cleaned by flushing it with water or using a small brush to remove any accumulated gunk. Reassembling the P-trap requires ensuring the slip nuts are tightened securely to prevent leaks.
Water Supply Lines and Shut-Off Valves
The water supply lines are flexible tubes that deliver hot and cold water to the faucet. These lines are connected to shut-off valves, which allow homeowners to independently control the water supply to the sink, facilitating repairs and preventing water damage.
Water Supply Lines: These flexible tubes are typically made of braided stainless steel or copper. One end connects to the shut-off valve, while the other end connects to the faucet shank. The hot water line is usually connected to the left side of the faucet, while the cold water line is connected to the right. The length of the supply lines is crucial, as they need to be long enough to reach the faucet shanks without being stretched or kinked.
Shut-Off Valves: Located on the water supply pipes underneath the sink, the shut-off valves allow homeowners to turn off the water supply to the sink without shutting off the water to the entire house. This is essential for performing maintenance or repairs on the faucet or supply lines. Shut-off valves are typically ball valves or angle stop valves. Ball valves have a lever that rotates 90 degrees to turn the water on or off, while angle stop valves have a handle that is turned to shut off the water flow. Before working on any plumbing under the sink, it is imperative to turn off the corresponding shut-off valves to prevent water from flowing and causing damage.
Checking for Leaks: Periodically inspecting the water supply lines and shut-off valves for leaks is crucial for preventing water damage. Look for any signs of moisture or corrosion around the connections. Tightening the connections might resolve minor leaks. However, if leaks persist, replacing the supply lines or shut-off valves might be necessary.
The Faucet Connections
The faucet itself is connected to the water supply lines and the drain assembly. Understanding these connections is essential for replacing or repairing a faucet.
Faucet Shank Connections: The faucet shanks are the threaded pipes extending from the bottom of the faucet body. These shanks connect to the water supply lines using compression fittings or threaded connections. The hot and cold water supply lines are connected to the corresponding shanks, ensuring proper water temperature control.
Drain Control Rod: Many faucets have a drain control rod that operates the pop-up drain stopper. This rod connects to a linkage located behind the tailpiece. The linkage consists of a pivot rod and a clevis strap that moves the stopper up and down. Adjusting the linkage can improve the stopper's functionality.
Mounting Hardware: The faucet is secured to the sink using mounting hardware, which typically includes a mounting plate, washers, and nuts. This hardware ensures the faucet is stable and does not move during use. Proper installation of the mounting hardware is crucial for preventing leaks and ensuring the faucet functions correctly.
Overflow Tube (if applicable)
Some sinks are equipped with an overflow tube, designed to prevent water from overflowing the sink if the drain is blocked and the faucet is left running. The overflow tube connects to an opening near the top of the sink bowl and allows excess water to drain into the drainpipe.
Function of the Overflow Tube: The overflow tube provides a secondary drainage path in case the main drain is blocked. It helps to prevent water from spilling over the edge of the sink and causing water damage to the surrounding area. The overflow tube is especially useful in bathrooms used by children or individuals who might accidentally leave the faucet running.
Maintenance of the Overflow Tube: Over time, the overflow tube can become clogged with soap scum and other debris. This can reduce its effectiveness and potentially lead to mold growth. Cleaning the overflow tube regularly is recommended. This can be done by pouring a solution of vinegar and baking soda down the overflow opening or by using a small brush to remove any accumulated debris.
Understanding the Vent System (Indirectly Related)
While not directly located under the sink, the vent system plays a crucial role in proper drainage. The vent system allows air to enter the drainpipes, preventing a vacuum from forming and ensuring that water flows freely. A properly functioning vent system is essential for preventing slow draining and sewer gas odors.
How Vents Work: Vent pipes typically extend upwards through the roof, allowing air to enter the plumbing system. These vents are strategically located throughout the house to ensure proper airflow to all the drains. In some cases, especially in island sinks or locations where running a traditional vent is impractical, an Air Admittance Valve (AAV) may be used.
Air Admittance Valves (AAVs): An AAV is a one-way valve that allows air to enter the drainpipe when negative pressure is detected, but prevents sewer gases from escaping. AAVs are often installed under sinks as a convenient alternative to traditional venting. They require occasional inspection and replacement as they can fail over time.
Troubleshooting Venting Problems: Symptoms of a venting problem include slow draining, gurgling sounds from the drain, and the presence of sewer gas odors. If you suspect a venting problem, it's best to consult with a qualified plumber to diagnose and resolve the issue. Blocked or improperly installed vents can lead to significant plumbing problems.
Addressing Common Issues
Understanding the components beneath the sink enables informed troubleshooting of common plumbing issues. A clogged drain is often the result of debris accumulating in the P-trap or drainpipe. A leaky connection typically involves tightening the slip nuts or replacing worn washers. Knowing the parts allows for targeted repairs and preventative maintenance.
Clogged Drains: Addressing clogged drains often begins with removing and cleaning the P-trap. If the clog persists, a plumber's snake can be used to reach further down the drainpipe and dislodge any obstructions. Chemical drain cleaners should be used with caution, as they can damage pipes and pose health risks. Prevention is key; avoid pouring grease or large food particles down the drain.
Leaky Connections: Leaks are frequently found at the slip nut connections of the drain assembly or the water supply lines. Tightening the slip nuts might resolve minor leaks. However, if the leak persists, replacing the washers or O-rings might be necessary. If the pipes themselves are corroded or damaged, replacing them is the best solution.
Replacing Parts: When replacing parts under the sink, it's important to choose components that are compatible with the existing plumbing system. Take accurate measurements and consult with a plumbing supply store if needed. Applying Teflon tape to threaded connections and using plumber's putty or silicone sealant where appropriate will help to ensure watertight seals.

Parts Of A Sink The Home Depot

Parts Of A Sink The Home Depot

Parts Of A Sink The Home Depot

Bathroom Sink Plumbing Diagram Diy Sinks Drain

How To Fit A Bathroom Sink Diy Guides Victorian Plumbing

Kitchen Sink Drain Parts Diagram Decorating Ideas On A Budget Check More At Http Www Entropiad Bathroom Plumbing

Bathroom Sink Plumbing Drain Diagram

Bathroom Sink Parts Diagram Plumbing Drain

How To Install Bathroom Sink Drain Queen Bee Of Honey Dos

Installing A Bathroom Sink Drain Efficient Plumber
Related Posts