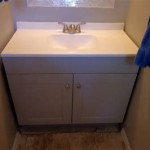
How To Replace a Countertop on a Bathroom Vanity
Replacing a bathroom vanity countertop can significantly enhance the aesthetic appeal and functionality of the bathroom. This project is achievable for a moderately skilled DIY enthusiast and offers a cost-effective alternative to replacing the entire vanity. This article provides a comprehensive guide on how to remove an old countertop and install a new one, encompassing the necessary tools, preparation steps, and installation techniques.
### Gathering the Necessary Tools and MaterialsBefore commencing the project, assembling the right tools and materials is crucial for a smooth and efficient workflow. This initial preparation phase minimizes interruptions and ensures that the task can be completed effectively.
Essential tools include:
*Safety Glasses:
Eye protection is paramount when dealing with dust, debris, and potential flying fragments. *Respirator or Dust Mask:
Protecting the respiratory system from dust particles is necessary for a safe working environment. *Utility Knife:
Used for scoring caulk and sealant. *Putty Knife or Scraper:
Aids in separating the old countertop from the vanity cabinet. *Adjustable Wrench or Basin Wrench:
Required to disconnect the plumbing fixtures. *Pliers:
Useful for gripping and manipulating small components. *Screwdrivers (various types and sizes):
Needed for removing screws securing the countertop to the cabinet. *Level:
Ensures the new countertop is installed evenly. *Measuring Tape:
Accurate measurements are critical for proper alignment and fit. *Caulk Gun:
For applying sealant around the countertop and backsplash. *Caulk Smoothing Tool or Finger:
Used to create a neat and professional caulk line. *Shop Vacuum:
Essential for cleaning up dust and debris.Drill/Driver (optional):
May be required for installing certain types of countertops or securing mounting clips.Essential materials include:
*New Countertop:
Select a countertop that fits the vanity cabinet and matches the desired aesthetic. *Construction Adhesive:
Used to secure the countertop to the vanity cabinet. *Silicone Caulk:
Provides a waterproof seal between the countertop, backsplash, and walls. *Shims:
Used to level the countertop if the vanity cabinet is not perfectly even. *Cleaning Supplies:
For cleaning the vanity cabinet top before installing the new countertop. *Plumber's Putty (optional):
May be needed to reseal the drain assembly. ### Removing the Existing CountertopThe removal process necessitates careful steps to avoid damaging the vanity cabinet or surrounding fixtures. The sequence outlined below provides a systematic approach to removing the old countertop effectively.
1.
Shut Off Water Supply:
Locate the shut-off valves under the sink and turn them off to prevent water leakage during faucet disconnection.2.
Disconnect Plumbing:
Use an adjustable wrench or basin wrench to disconnect the water supply lines from the faucet. Place a bucket underneath to catch any residual water. Disconnect the drainpipe from the sink drain. If the drain assembly is old or corroded, consider replacing it.3.
Remove Faucet and Drain Hardware:
Remove the faucet and drain hardware from the existing countertop. This typically involves unscrewing mounting nuts or clips from underneath the countertop.4.
Score the Caulk:
Use a utility knife to carefully score along the edges of the countertop where it meets the backsplash and the vanity cabinet. This will help break the caulk seal and facilitate easier removal.5.
Remove the Countertop:
Use a putty knife or scraper to gently pry the countertop away from the vanity cabinet. Work slowly and carefully to avoid damaging the cabinet. If the countertop is heavily adhered, use a rubber mallet to tap the putty knife to help break the bond. Look for screws or clips that may be securing the countertop from underneath and remove them.6.
Clean the Vanity Cabinet Top:
Once the old countertop is removed, thoroughly clean the top of the vanity cabinet. Remove any remaining adhesive, caulk, or debris using a scraper and appropriate cleaning solutions. Ensure the surface is clean and dry before proceeding with the installation of the new countertop. ### Installing the New CountertopThe installation process requires meticulous attention to detail to ensure a secure and level installation. The following steps provide a detailed guide to installing the new countertop correctly.
1.
Dry Fit the Countertop:
Place the new countertop on the vanity cabinet to ensure a proper fit. Check for any gaps or inconsistencies. Use shims to level the countertop if the vanity cabinet is not perfectly even. Identify areas where the countertop may need slight adjustments and make any necessary corrections before applying adhesive.2.
Apply Construction Adhesive:
Apply a bead of construction adhesive to the top edges of the vanity cabinet where the countertop will make contact. Use a high-quality construction adhesive that is compatible with the countertop material and the cabinet surface. Apply the adhesive evenly to ensure a strong bond.3.
Position and Secure the Countertop:
Carefully lower the new countertop onto the vanity cabinet, aligning it properly with the edges. Press down firmly to ensure the adhesive makes good contact. Use shims to maintain the level if needed while the adhesive cures. If the countertop is designed to be secured with screws or clips, install them according to the manufacturer's instructions.4.
Install Faucet and Drain Hardware:
Install the faucet and drain hardware into the new countertop according to the manufacturer's instructions. Ensure all connections are tight and properly sealed. Use plumber's putty around the drain flange to create a watertight seal.5.
Reconnect Plumbing:
Reconnect the water supply lines to the faucet and tighten the connections with an adjustable wrench. Reconnect the drainpipe to the sink drain. Turn on the water supply and check for leaks. Tighten any connections as needed to eliminate leaks.6.
Caulk the Countertop:
Apply a bead of silicone caulk along the back edge of the countertop where it meets the backsplash, and along the sides where it meets the walls. Use a caulk smoothing tool or your finger to create a neat and professional caulk line. Remove any excess caulk with a damp cloth.7.
Allow to Cure:
Allow the adhesive and caulk to cure according to the manufacturer's instructions. This typically takes 24-48 hours. Avoid using the sink during this time to allow the materials to fully set.By following these steps diligently, replacing a bathroom vanity countertop becomes a manageable DIY project. Proper preparation, careful removal of the old countertop, and precise installation of the new one will result in a refreshed and functional bathroom space.

Replace Vanity Top And Faucet Diy Network

How To Remove Replace A Vanity Top Easy Bathroom Sink Remodel

How To Replace A Bathroom Countertop Homeadvisor

Replace Granite Countertops Transform Your Bathroom S Look

How To Replace A Vanity Top And Save Craving Some Creativity

How To Remove A Countertop From Vanity Decor Adventures

Diy Replace Vanity Top

How To Get Replacement Countertops For Your Bathroom Vanity Trubuild Construction

Install A Solid Surface Bathroom Vanity Top Replace Countertop

Diy Vanity Tops For Your Bathroom
Related Posts