How To Remove Countertop From Bathroom Vanity
Removing a countertop from a bathroom vanity can be a necessary task for various reasons, such as replacing a damaged countertop, upgrading to a new style, or simply wanting to revamp the bathroom's aesthetic. While it may seem daunting, this project is achievable with the right tools, safety precautions, and a systematic approach. This guide will walk you through the steps involved in removing a countertop from a bathroom vanity, providing a clear and concise understanding of the process.
1. Gather Tools and Materials
Before embarking on the countertop removal process, it is crucial to gather the necessary tools and materials. This will ensure a smooth and efficient operation, minimizing the risk of accidents or delays. The following items are essential:
- Work gloves
- Safety glasses
- Utility knife
- Putty knife
- Screwdriver
- Wrench
- Hammer
- Pry bar
- Caulk remover or scraper
- Shop vacuum
- Heavy-duty trash bags
- Drop cloths or tarps
Having these tools readily available will allow you to tackle the countertop removal process with confidence and precision.
2. Prepare the Work Area
Creating a safe and organized work area is crucial for a successful countertop removal. Before starting, it is essential to clear the surrounding area of any potential obstructions. Remove all items from the vanity, including toiletries, accessories, and decorative elements. Cover the floor with drop cloths or tarps to protect it from dust, debris, and potential damage. This step ensures a clean and unobstructed workspace, minimizing the risk of accidents and facilitating smooth operation.
Next, turn off the water supply to the vanity. This step is crucial to prevent water damage during the removal process. Locate the shutoff valve for the bathroom sink and turn it clockwise until it is completely closed. Once the water supply is shut off, drain the sink to eliminate any remaining water. This step ensures a dry and safe work environment, allowing for efficient removal of the countertop without causing water damage.
3. Remove the Faucet and Sink
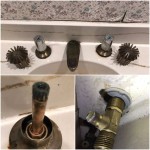
Before attempting to remove the countertop, detach the faucet and sink. This step is necessary to avoid damage to these components and facilitate easier countertop removal. Using a wrench, unscrew the nuts holding the faucet to the sink. Once the nuts are removed, gently lift the faucet from the sink. Disconnect the supply lines from the faucet, taking care not to damage the pipes. Finally, unscrew the retaining clips or screws holding the sink to the vanity top. Once removed, carefully lift the sink from the vanity, ensuring that it is not connected to any other components. These steps will ensure that the sink and faucet remain intact while enabling the countertop removal process to proceed smoothly.
4. Detach the Countertop from the Vanity
With the faucet and sink removed, the countertop is now ready for detachment. Begin by examining the edges of the countertop for any visible seams or fasteners. These may include screws, clips, or adhesives. Using a screwdriver or a pry bar, carefully detach any visible fasteners. If the countertop appears to be glued or caulked to the vanity, use a utility knife or a putty knife to loosen the sealant. Work slowly and carefully to avoid damaging either the countertop or the vanity.
Once the fasteners and any sealant have been removed, carefully lift the countertop from the vanity. This step may require assistance, especially if the countertop is large or heavy. Ensure that the countertop is being lifted evenly to prevent damage or breakage. Once the countertop is completely detached, carefully set it aside, ensuring that it is resting on a stable surface to prevent it from falling or getting damaged.
Once the countertop is detached, it is crucial to inspect the vanity for any underlying support structures or bracing that may be connected to the countertop. If any such structures are present, carefully detach them from the vanity using a screwdriver or a pry bar. This step ensures that the countertop is completely detached from the vanity, providing a clean and safe work environment for future renovation or installation.
5. Dispose of the Countertop
Once the countertop is detached from the vanity, it is time to dispose of it. The disposal process will vary depending on the material of the countertop and local regulations. For instance, some countertops, such as laminate or solid surface materials, may be suitable for disposal in regular trash bins. However, others, such as stone countertops, may need to be taken to a recycling center or a specialized waste facility. It is crucial to consult local waste disposal guidelines and regulations before attempting to dispose of the countertop. Ensure that the disposal process is carried out safely and responsibly, minimizing environmental impact.
These steps will ensure a smooth and efficient removal of the countertop from the bathroom vanity. By following this guide, you can successfully complete this task with minimal risk and effort.

How To Remove A Countertop From Vanity Decor Adventures

How To Remove Replace A Vanity Top Easy Bathroom Sink Remodel

How To Remove A Countertop From Vanity Decor Adventures

How To Diy Remove Replace A Bathroom Vanity Countertop What Not Do Yep I Broke It

Replace Vanity Top And Faucet Diy Network

Replace Granite Countertops Transform Your Bathroom S Look

How To Remove A Countertop From Vanity Decor Adventures

How To Remove A Countertop From Vanity Decor Adventures

How To Remove Replace A Vanity Top Easy Bathroom Sink Remodel

How To Remove A Countertop Ditch The 90s Look Diy Danielle
Related Posts


