How To Change A Tap On A Bathroom Sink
Changing a tap on a bathroom sink is a common plumbing task that many homeowners can undertake themselves. While it may seem daunting, with the right tools, preparation, and careful execution, replacing a faulty or outdated tap is achievable. This article provides a comprehensive guide to ensure a successful tap replacement, covering essential steps from initial assessment to final installation and testing.
Preparing for the Tap Replacement
Before commencing any work, proper preparation is crucial. This involves identifying the problem, selecting a suitable replacement tap, gathering necessary tools, and ensuring a safe working environment.
Firstly, accurately diagnose the reason for tap replacement. Common issues include leaks, reduced water flow, mineral buildup, or aesthetic preferences. Pinpoint the exact problem area to confirm that a full tap replacement is necessary. Minor issues, such as a worn-out washer, may only require a simple repair instead of a complete replacement.
Next, choose a replacement tap that is compatible with the existing sink and plumbing system. Consider the tap’s mounting configuration, water connection types, and overall style to ensure it complements the bathroom decor. Measure the existing tap's dimensions and the distance between the water supply pipes to avoid purchasing an incompatible model. Research different tap brands and models, paying attention to customer reviews and warranty information. Opt for a reputable brand known for quality and durability to minimize future replacements.
Gather all the necessary tools before starting the replacement process. Essential tools include:
- Adjustable wrench
- Basin wrench (also known as a tap wrench)
- Pliers (slip-joint and needle-nose pliers are helpful)
- Screwdrivers (both flathead and Phillips head)
- Utility knife
- Penetrating oil
- Plumber's putty or silicone sealant
- New flexible tap connectors (if necessary)
- Clean cloths or towels
- Bucket or container
- Work light
- Safety glasses
- Gloves
Ensuring a safe working environment is paramount. Before initiating any work on the plumbing system, it is imperative to isolate the water supply. Locate the shut-off valves, typically situated under the sink or near the main water meter. Turn off both the hot and cold water supplies to prevent water from flowing during the tap removal and installation process. Test the shut-off valves by turning on the existing tap to confirm that the water flow has ceased. If the shut-off valves are faulty, it may be necessary to turn off the main water supply to the entire house. Exercise extreme caution when working around water and electrical connections. Keep the work area well-lit and dry to prevent slips and falls.
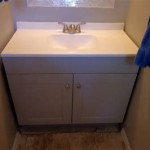
Removing the Old Tap
The removal process requires careful attention to avoid damaging the sink, plumbing, or surrounding fixtures. Follow these steps:
Start by placing a bucket or container under the sink to catch any residual water that may be present in the pipes. Use cloths or towels to protect the sink and surrounding surfaces from scratches or damage during the removal process. Disconnect the existing tap's water supply lines. Use an adjustable wrench to loosen the nuts connecting the flexible tap connectors to the tap's tails. If the nuts are corroded or difficult to loosen, apply penetrating oil and allow it to sit for a few minutes before attempting to loosen them again. Once the nuts are loosened, carefully detach the flexible tap connectors from the tap. Be prepared for a small amount of water to spill out.
Next, disconnect the tap from the sink. This typically involves loosening the retaining nuts or clips that secure the tap to the sink. Access to these retaining mechanisms is usually located beneath the sink. Use a basin wrench to loosen the retaining nuts. A basin wrench is specifically designed for accessing hard-to-reach areas under sinks. Turn the wrench counterclockwise to loosen the nuts. If the nuts are heavily corroded, apply penetrating oil and allow it to sit before attempting to loosen them. Once the retaining nuts are removed, carefully detach any hoses or wires connected to the tap, such as those for pull-out sprayers or electronic features. With the retaining nuts and connections removed, gently lift the old tap from the sink. If the tap is stuck, carefully use a utility knife to break any sealant or plumber's putty that may be bonding the tap to the sink.
After removing the old tap, clean the sink surface thoroughly to remove any old sealant, plumber's putty, or debris. Use a scraper or utility knife to remove stubborn residue, taking care not to scratch the sink surface. Wipe the area clean with a damp cloth and allow it to dry completely before proceeding to the installation of the new tap.
Installing the New Tap
The installation process requires careful attention to detail to ensure a watertight and secure fit. Follow these steps:
Begin by preparing the new tap for installation. Refer to the manufacturer's instructions for specific guidance on assembling the tap components. This may involve attaching flexible tap connectors, O-rings, or other fittings to the tap body. Ensure that all connections are properly tightened according to the manufacturer's specifications. Apply plumber's putty or silicone sealant around the base of the tap where it will contact the sink. This will create a watertight seal and prevent leaks. Use a generous amount of sealant to ensure complete coverage, but avoid applying excessive amounts that could squeeze out during installation.
Carefully position the new tap into the sink mounting holes. Ensure that the tap is aligned correctly and that the spout is centered over the sink basin. From beneath the sink, secure the tap in place using the retaining nuts or clips provided with the new tap. Tighten the retaining nuts evenly to ensure a secure and level installation. Avoid overtightening the nuts, as this could damage the sink or the tap. Connect the flexible tap connectors to the water supply pipes. Ensure that the hot and cold water connections are properly aligned. Tighten the nuts securely using an adjustable wrench, but avoid overtightening to prevent damage to the connectors or pipes. If new flexible tap connectors are required, ensure they are the correct length and type for the existing plumbing system.
Once the tap is installed and the connections are secure, carefully inspect all connections for any signs of leaks. Turn on the water supply slowly and observe the tap and its connections for any drips or leaks. If leaks are detected, immediately turn off the water supply and tighten the connections further. If the leaks persist, disconnect the connections and inspect the fittings for damage or improper seating. Reapply sealant or plumber's putty if necessary and repeat the connection process. Once all leaks are resolved, run the tap for a few minutes to flush out any debris or air from the plumbing system. Check the water flow and temperature to ensure that the tap is functioning correctly. Inspect the drain for any leaks as well. Remove any excess sealant or plumber's putty from around the base of the tap. Clean the sink and surrounding area to remove any dirt or debris accumulated during the installation process.
Testing and Final Checks
After installation, thorough testing is essential to confirm the tap is functioning correctly and there are no leaks. Turn on both the hot and cold water taps and observe the water flow. The water should flow smoothly and consistently without any sputtering or irregularities. Check the water temperature to ensure that the hot and cold water supplies are properly connected. Verify that the hot water is indeed hot and the cold water is cold. Inspect all connections, including the flexible tap connectors, retaining nuts, and drain connections, for any signs of leaks. Use a dry cloth to wipe around the connections and check for moisture. If leaks are detected, tighten the connections further or reapply sealant as necessary. Repeat the testing process until all leaks are resolved.
Check the tap's functionality to ensure that it operates smoothly and effortlessly. The tap handles should turn easily and without any resistance. The spout should swivel smoothly if it is designed to do so. If the tap has any special features, such as a pull-out sprayer or electronic controls, test these features to ensure that they are functioning correctly. Examine the overall appearance of the installed tap. Ensure that it is properly aligned and that all components are securely attached. Clean any fingerprints or smudges from the tap and sink to restore their shine. Dispose of the old tap and any waste materials properly. Follow local regulations for disposing of plumbing fixtures and materials.

How To Easily Replace Basin Taps Step By

Diy How To Replace A Bathroom Sink Faucet Remove Install

How To Change Bathroom Taps Everything You Need Know

How To Replace A Bathroom Faucet Home Repair Tutor

How To Install Basin Taps Replacing A Bathroom Sink Tap

Diy How To Replace A Bathroom Sink Faucet Remove Install

How To Remove And Install A Bathroom Faucet

Leaking Tap Learn How To Change A Washer

Bathroom Faucet Replacement For Beginners Making Maanita

How To Change A Washer On Mixer Tap Living By Homeserve
Related Posts