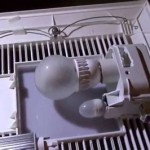
How to Replace an Extractor Fan in a Bathroom Ceiling
A bathroom extractor fan is an essential component for maintaining a healthy and comfortable environment. It removes moisture, odors, and pollutants, preventing mold growth, mildew, and unpleasant smells. Over time, extractor fans can become noisy, inefficient, or even stop working altogether. Replacing a faulty extractor fan is a relatively straightforward DIY project that can be accomplished with basic tools and some patience.
1. Preparing for the Replacement
Before you begin, it is crucial to ensure your safety and minimize disruption. This involves disconnecting the power supply to the fan, preparing the workspace, and gathering the necessary tools.
First, turn off the power to the bathroom circuit at the breaker box. Locate the correct breaker by flipping switches until the bathroom light and fan cease functioning. To confirm the power is off, test the fan with a non-contact voltage detector. Once the power is safely disconnected, switch off the water supply to the bathroom, particularly if the fan is close to any plumbing fixtures.
Next, clear the workspace around the fan. Remove any obstructions, such as shelves, towel racks, or decorative items. Lay down a drop cloth to catch debris or water leaks that might occur during the replacement. Put on safety goggles and gloves to protect yourself from dust and potential electrical hazards.
The tools needed for this project include a screwdriver, a drill, wire strippers, a voltage detector, a new extractor fan, and any necessary mounting hardware. If you are working with a new fan that has a different size or configuration than the old one, you may also need a new electrical junction box or mounting bracket.
2. Removing the Old Fan
Once the workspace is prepared and the power is off, you can start removing the existing fan. This involves detaching the fan from its mounting bracket and disconnecting the electrical wiring.
Begin by carefully removing any decorative covers or grilles surrounding the fan. You may find screws or clips holding these in place. Next, locate the screws securing the fan to the ceiling. These screws may be visible on the fan housing or concealed behind the surrounding trim. Unscrew these carefully, and gently lower the fan away from the ceiling. While doing so, be cautious not to put pressure on the electrical wires.
With the fan loose, disconnect the electrical wiring. First, use the voltage detector to confirm that the wires are indeed de-energized. Then, carefully disconnect the wires from the fan terminals. Use wire strippers to expose a small portion of the wires if necessary. Label the wires for proper reconnection. If the fan has a ground wire, note its color and position.
Once all the wires are detached, the old extractor fan is ready to be removed. Dispose of it responsibly, considering local recycling regulations.
3. Installing the New Fan
Installing the new fan is the reverse process of removing the old one. It involves connecting the electrical wiring, securing the fan to the ceiling, and reinstalling the decorative covers.
Start by attaching the new fan to the ceiling using the provided mounting hardware. If necessary, adjust the mounting bracket or install a new one to accommodate the new fan size. Ensure the fan is securely fastened to the ceiling.
Next, connect the electrical wires. Reconnect the wires to the fan terminals, matching them to the labels you made earlier. If you’re unsure about the wiring configuration, consult the installation instructions for the new fan. Double-check that all wire connections are secure and properly insulated. Remember to reconnect the ground wire if applicable.
Finally, reinstall the decorative covers and grilles surrounding the fan. Secure them with the screws or clips provided. Test the fan by turning on the power at the breaker box. Observe the fan to ensure it operates smoothly, without excessive noise or vibrations.
After the installation is complete, check for any leaks around the fan housing or mounting bracket. If necessary, apply a sealant or caulk to prevent moisture from entering the ceiling cavity.

How To Install A Bathroom Fan Step By Guide Bob Vila

Tips For Installing Or Replacing A Bathroom Fan Forbes Home

Bathroom Extractor Fans A Diy Guide

How To Install A Bathroom Fan Step By Guide Bob Vila

How To Fit An Extractor Fan In The Ceiling Homebase

How To Fit A Bathroom Extractor Fan Using Light Switch Installation Xpelair Dx100

Installing An Exhaust Fan During A Bathroom Remodel Energy Vanguard

Bathroom Exhaust Fans The Complete Guide By Fanco

What Parts Do I Need To Install An Inline Fan In My Bathroom

Why You Should Install An Extractor Fan In Your Bathroom
Related Posts


