Can You Use a Dresser As Bathroom Vanity Units?
Repurposing furniture is a growing trend in interior design, driven by both a desire for unique aesthetics and a commitment to sustainability. One popular example is transforming a dresser into a bathroom vanity. The appeal lies in the potential to create a statement piece that deviates from standard, mass-produced vanities, offering a truly customized bathroom space. However, the process is not without its considerations, and a successful transformation requires careful planning and execution.
The feasibility of using a dresser as a bathroom vanity unit hinges on several factors, primarily relating to the dresser's size, construction, and the intended plumbing configuration. A thorough assessment of these aspects is crucial before embarking on the project. Furthermore, understanding the modifications required to accommodate a sink, faucet, and associated plumbing is essential for a functional and aesthetically pleasing result.
Key Considerations Before Conversion
Before purchasing or repurposing a dresser for use as a bathroom vanity, it is critical to evaluate several key aspects. These considerations range from size and structural integrity to moisture resistance and plumbing compatibility. Failing to address these factors adequately can lead to future problems such as water damage, structural failure, or plumbing issues that could complicate the project and lead to costly repairs.
Dresser Size and Dimensions: The size of the dresser is paramount. It must be appropriately proportioned to the bathroom space. A dresser that is too large will overwhelm the room, while one that is too small might look disproportionate and offer insufficient storage. In addition to the overall footprint, the height of the dresser is a critical consideration. Standard bathroom vanity height typically ranges from 30 to 36 inches. If the dresser is significantly shorter, it may require modification to raise its height, which can add complexity to the project. Conversely, a dresser that is too tall may need its legs or base trimmed down. Measuring the available space in the bathroom and carefully comparing it to the dimensions of the dresser is an essential first step.
Structural Integrity and Material: The structural integrity of the dresser is also of utmost importance. A dresser used as a vanity will be subjected to moisture and potential water spills, which can weaken compromised structures over time. Inspect the dresser for signs of rot, warping, or insect damage. The material of the dresser dictates its suitability for a bathroom environment. Solid wood dressers are generally more robust and can withstand moisture better than particleboard or MDF, which are prone to swelling and disintegration when exposed to water. If the dresser is made of a less water-resistant material, sealing it with a high-quality waterproof sealant is absolutely necessary.
Plumbing Compatibility: The internal structure of the dresser must be compatible with the requirements of the plumbing system. Consider the location of the drainpipe, water supply lines, and any necessary shut-off valves. Dressers with drawers positioned directly in the path of these components may require significant modification, potentially involving cutting into drawer boxes or removing them altogether. Drawers located at the top of the dresser are often the most problematic, as they typically interfere with the sink basin and drain. The clearance required for the sink drain and faucet installation should be meticulously measured to ensure a proper fit. Opting for a vessel sink that sits on top of the dresser can simplify plumbing installation, as it minimizes the need for extensive modifications to the dresser's interior.
Modifying the Dresser for Plumbing and Sink Installation
Once a suitable dresser has been selected, the next phase involves modifying it to accommodate the plumbing and the sink. These modifications are often the most challenging part of the project, requiring precision and careful planning to avoid damaging the dresser or compromising its structural integrity. The type of sink chosen significantly influences the modification process, as different sink styles require different installation approaches.
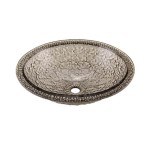
Sink Type and Installation Requirements: The choice of sink is crucial, influencing the complexity of the installation process. Undermount sinks, which are installed beneath the countertop, require a precise cutout in the dresser's top and careful sealing to prevent water damage. Drop-in sinks, which rest on the countertop, require a similar cutout, but the installation process is generally less demanding. Vessel sinks, as noted earlier, sit atop the dresser, minimizing the need for extensive cutouts. Consider the advantages and disadvantages of each sink type in relation to your skill level and the dresser's characteristics. A detailed plan of the sink installation, including precise measurements and cutout templates, is essential before beginning the modification process.
Creating Plumbing Access: Creating access for the plumbing involves cutting holes in the dresser's back and, potentially, the drawer boxes or interior shelves. These holes must be large enough to accommodate the drainpipe, water supply lines, and any necessary shut-off valves. Use a hole saw to create clean, precise holes, and be sure to sand the edges to prevent splintering. Consider the placement of these holes carefully to minimize their visibility and to ensure they do not interfere with the dresser's structural integrity. It's recommended to create a diagram of the plumbing layout inside the dresser before cutting any holes. This helps visualize the placement of pipes and connections, allowing for a more accurate and efficient modification process.
Reinforcing the Dresser: The removal of wood to accommodate the sink and plumbing can weaken the dresser's structure. Reinforcing the dresser is often necessary to maintain its stability and prevent sagging or warping over time. This can be achieved by adding wooden supports to the interior of the dresser, particularly around the sink cutout and plumbing access points. Metal brackets can also be used to reinforce joints and corners. Pay particular attention to the area beneath the sink, as this area will bear the weight of the sink and water. Consider adding a plywood base or a support frame to distribute the weight evenly and prevent the dresser from collapsing under the load.
Sealing and Finishing for Moisture Resistance
Bathrooms are inherently humid environments, and protecting the dresser from moisture damage is crucial for its longevity. Sealing and finishing the dresser properly will prevent water penetration, mold growth, and warping, ensuring that the vanity remains in good condition for years to come. The choice of sealant and finish depends on the type of material the dresser is made of and the desired aesthetic.
Selecting Appropriate Sealants and Finishes: For solid wood dressers, a polyurethane sealant is a good choice, as it provides a durable, water-resistant finish. Polyurethane can be applied in multiple coats, providing a thicker layer of protection. For dressers made of particleboard or MDF, an epoxy-based sealant is recommended, as it is more effective at preventing moisture penetration. Epoxy sealants create a waterproof barrier that protects the material from swelling and disintegration. When selecting a finish, consider the desired aesthetic and the level of water resistance it provides. Oil-based paints and varnishes are generally more water-resistant than water-based products. Ensure that all sealants and finishes are specifically designed for use in damp environments.
Applying Sealant and Finish: Proper application of the sealant and finish is essential for achieving optimal moisture resistance. Before applying any product, thoroughly clean and sand the dresser's surface to remove any dirt, grease, or existing finishes. Apply the sealant in thin, even coats, allowing each coat to dry completely before applying the next. Pay particular attention to the edges and corners, as these areas are most susceptible to water damage. After the sealant has dried, apply the chosen finish, following the manufacturer's instructions. Multiple coats of finish may be necessary to achieve the desired color and sheen. Be sure to allow ample drying time between coats.
Sealing Around the Sink and Plumbing: The area around the sink and plumbing is particularly vulnerable to water damage. Therefore, it is essential to seal these areas meticulously. Use a high-quality silicone caulk to seal the gap between the sink and the countertop, as well as around any plumbing fixtures. Silicone caulk is flexible and waterproof, providing a tight seal that prevents water from seeping into the dresser. Inspect the seals regularly and reapply caulk as needed to maintain their integrity. Consider using a drip tray beneath the sink to catch any leaks or spills. A drip tray will protect the bottom of the dresser from water damage and can be easily cleaned.
Transforming a dresser into a bathroom vanity unit can be a rewarding project that adds character and uniqueness to a bathroom. However, it requires careful planning, precise execution, and a thorough understanding of plumbing and material compatibility. By considering the dresser's size, structural integrity, and plumbing requirements, modifying it appropriately, and sealing it effectively, it is possible to create a functional and aesthetically pleasing bathroom vanity unit.

How To Make A Dresser Into Vanity Tutorial An Oregon Cottage

A Pro Renovator S 6 Tips For Turning Dresser Into Bathroom Vanity
/103058794-9279662b921c41259cb908f3cb19acd9.jpg?strip=all)
How To Turn An Old Dresser Into A Beautiful Bathroom Vanity

Turn A Vintage Dresser Into Bathroom Vanity

How To Make A Dresser Into Vanity Tutorial An Oregon Cottage

Repurposed Dresser Converted To Bathroom Vanity Reinvented Delaware

Stunning Bathroom Tour Dresser Into Double Vanity

Antique Dresser Turned Into Vanity Farmhouse On Boone

How To Make A Dresser Into Vanity Tutorial An Oregon Cottage

Repurposed Dresser Converted To Bathroom Vanity Reinvented Delaware
Related Posts


