How to Remove a Cartridge from an American Standard Bathroom Faucet
Replacing a cartridge in an American Standard bathroom faucet is a common plumbing task that can be accomplished with some basic tools and a little patience. Cartridges are the heart of a faucet, controlling the flow and temperature of water. Over time, they can wear out, causing leaks or difficulty in regulating the water. This article provides a comprehensive guide on how to remove a cartridge from an American Standard bathroom faucet, enabling you to troubleshoot and replace it if necessary.
1. Gather Necessary Tools and Supplies
Before embarking on the removal process, it is essential to gather the necessary tools and supplies. These include:
- Adjustable wrench
- Phillips screwdriver
- Flathead screwdriver
- Bucket or container to catch water
- Rag or towel
- Optional: Cartridge removal tool (if applicable)
Ensuring you have these tools readily available will make the removal process smoother and more efficient.
2. Turn Off the Water Supply and Drain the Faucet
The first step in removing a cartridge is to shut off the water supply to the faucet. Locate the shut-off valves under the sink or behind the wall. Turn the valves clockwise until they are completely closed. To prevent water damage, it is crucial to drain the remaining water from the faucet. This can be done by opening the faucet handles and allowing the water to drain into a bucket or container.
Once the water supply is turned off and the faucet is drained, you can proceed to the next step.
Note: If you are unsure about the location of the shut-off valves or how to operate them, it is recommended to consult a professional plumber.
3. Remove the Handle and Escutcheon
With the water supply off and the faucet drained, you can begin removing the handle and escutcheon. The escutcheon is the decorative plate that covers the faucet stem. To remove it, use a flathead screwdriver to pry off the cap or screw that holds it in place. Once the cap is removed, pull the escutcheon straight up and off the faucet.
Next, remove the handle from the faucet. Most American Standard bathroom faucets have a handle that can be loosened by turning it counterclockwise. You may need to use a Phillips screwdriver to remove a screw that secures the handle to the stem. Once the handle is loose, carefully pull it straight up and off the stem.
4. Access the Cartridge
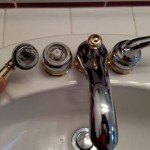
With the handle and escutcheon removed, you should now have access to the cartridge. The cartridge is typically located beneath the faucet stem. You may need to remove a retaining nut or a cap that secures the cartridge in place. Some American Standard faucets have a specific cartridge removal tool, which may be required to unscrew the cartridge.
To remove the cartridge, use an adjustable wrench to hold the stem in place while turning the cartridge counterclockwise. Use a firm grip, but avoid overtightening the wrench, as this could damage the stem. Once the cartridge is loose, carefully pull it out of the faucet.
5. Inspect and Replace the Cartridge
After removing the cartridge, you can inspect it for signs of wear or damage. Common signs of a worn cartridge include:
- Leaks around the cartridge
- Difficulty in controlling the water flow or temperature
- Reduced water pressure
- A worn-out or cracked O-ring
If you notice any of these signs, it is recommended to replace the cartridge. When purchasing a new cartridge, it is important to find one that is compatible with your specific American Standard faucet model.
To install a new cartridge, reverse the removal steps. Place the new cartridge in the faucet stem, ensuring that the O-ring is properly seated. Secure the cartridge with a retaining nut or cap.
6. Reassemble the Faucet and Test for Leaks
After installing the new cartridge, reassemble the faucet by replacing the handle and escutcheon. Ensure that all screws and nuts are securely tightened. Return the water supply to the faucet and test for leaks.
If any leaks are detected, it is recommended to re-tighten the components or consult a professional plumber for assistance.

How To Replace A Leaking Bathroom Faucet Cartridge

How To Replace The Cartridge For Monterrey Faucet

How To Flip American Standard Dual Handle Faucet Cartridge Position Doityourself Com Community Forums

Replacing A Metering Faucet Cartridge

American Standard 994053 0070a Valve Cartridge Replacement Build Com

American Standard 2 Handle Kit And Bath Cartridge 994053 0070a H The Home Depot

American Standard Cartridge 28628 0070a Noels Plumbing Supply

American Standard 994053 0070a Valve Cartridge

How To Fix A Leaky 2 Handle Faucet Low Arc Bathroom High Widespread

American Standard Faucet Repair Parts
Related Posts


