How To Turn a Dresser Into a Bathroom Vanity With Vessel Sinks
Repurposing furniture offers a sustainable and creative alternative to purchasing standard bathroom vanities. Converting a dresser into a bathroom vanity, particularly one designed for vessel sinks, allows for personalization and can result in a unique and aesthetically pleasing finished product. This project involves careful planning, modification, and attention to detail to ensure functionality, durability, and compliance with plumbing codes.
The process begins with selecting a suitable dresser. The dresser's dimensions should align with the available space in the bathroom and accommodate the desired size and number of vessel sinks. The material composition of the dresser is also a key consideration; solid wood is generally preferred over particleboard or laminate due to its moisture resistance and structural integrity. However, even solid wood requires thorough sealing and protection against water damage.
Once a dresser is selected, the subsequent steps involve preparing the dresser, modifying it to accommodate plumbing, installing the vessel sinks and faucets, and sealing the entire unit for moisture protection. Throughout the process, safety precautions should be observed, including wearing appropriate protective gear and adhering to manufacturer instructions for power tools and adhesives.
Key Point 1: Planning and Preparation
Prior to commencing any physical modifications, a detailed plan is essential. This involves accurate measurements of the bathroom space, the dresser itself, and the chosen vessel sinks and faucets. The location of existing plumbing lines (water supply and drain) must also be considered, as they will dictate the placement of the sinks and any necessary alterations to the dresser's internal structure.
The style and size of the vessel sinks are crucial determinants in the overall aesthetic and functionality of the vanity. Vessel sinks come in a variety of materials, shapes, and dimensions. The chosen sink should complement the style of the bathroom and provide adequate basin space for washing. Similarly, the faucets must be compatible with the vessel sinks, considering factors such as spout height and reach.
Creating a detailed sketch or using a design software can help visualize the final product and identify potential challenges beforehand. This planning phase also involves compiling a comprehensive list of materials and tools required for the conversion. Common materials include: sandpaper, primer, paint or stain, sealant, plumbing fittings, drain assembly components, and adhesive. Essential tools include: measuring tape, level, pencil, drill, hole saw, jigsaw (optional), sandpaper, paintbrushes, wrenches, and plumber's tape.
Surface preparation is a critical step in ensuring the longevity of the converted vanity. The dresser should be thoroughly cleaned to remove any dirt, grease, or old finishes. Existing paint or varnish should be sanded down to create a smooth and even surface for priming and painting or staining. Any imperfections, such as scratches or dents, should be filled with wood filler and then sanded smooth.
After sanding, the dresser should be wiped clean with a tack cloth to remove any remaining dust particles. A primer specifically designed for wood should be applied to create a uniform base for the paint or stain. The primer also helps to seal the wood and prevent moisture penetration. Allow the primer to dry completely according to the manufacturer's instructions before proceeding to the next step.
Key Point 2: Modifying the Dresser for Plumbing
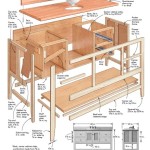
The most challenging aspect of converting a dresser into a vanity is adapting it to accommodate the plumbing. This typically involves cutting holes in the top of the dresser for the vessel sinks and faucets, as well as creating space inside the dresser for the drain pipes and water supply lines.
The size and location of the holes for the sinks should be precisely measured and marked on the dresser top. Using a hole saw of the appropriate diameter, carefully drill the holes for the drain openings. It is advisable to start with a pilot hole to ensure accurate placement. For the faucet mounting holes, smaller drill bits may be required, depending on the faucet design. When drilling, ensure proper support to prevent splintering or damage to the wood.
Inside the dresser, drawers may need to be modified or removed entirely to create sufficient space for the plumbing. The drain pipes will typically extend down from the sinks and require a clear path to connect to the existing drain line in the wall or floor. Similarly, the water supply lines will need to be routed through the dresser to reach the faucets. This may involve cutting away portions of drawer boxes or back panels.
Reinforcing the areas around the cutouts is crucial to maintain the structural integrity of the dresser. This can be achieved by attaching wooden supports to the underside of the dresser top, particularly around the sink and faucet holes. These supports will help to distribute the weight of the sinks and prevent the dresser top from sagging or warping over time. Wood glue and screws can be used to secure the supports in place.
Before installing the plumbing, it is recommended to test fit all the components to ensure proper alignment and clearance. This includes the sinks, faucets, drain pipes, and water supply lines. Adjustments may be necessary to ensure that everything fits together correctly and that there are no obstructions. It is also important to consider accessibility for future maintenance or repairs. Leave enough space around the plumbing connections to allow for easy access with wrenches and other tools.
Key Point 3: Installation and Sealing
Once the dresser modifications are complete and the plumbing has been test fitted, the next step is to install the vessel sinks and faucets. This involves carefully placing the sinks into the pre-cut holes and securing them in place according to the manufacturer's instructions. Typically, a bead of silicone sealant is applied around the rim of the sink to create a watertight seal between the sink and the dresser top.
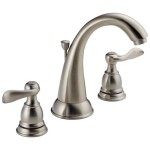
The faucets are then installed according to their respective instructions. The water supply lines are connected to the faucet inlets, ensuring that the connections are tight and leak-free. Plumber's tape should be used on threaded connections to prevent leaks. The drain assembly is then connected to the sink drain opening and to the drain pipe leading to the wall or floor. Again, ensure that all connections are tight and leak-free.
After the sinks and faucets are installed, it is essential to thoroughly test the plumbing for leaks. Turn on the water supply and observe the connections for any signs of dripping or seepage. If leaks are detected, tighten the connections or reapply sealant as necessary. Run water through the sinks for several minutes to ensure that the drain is functioning properly and that there are no clogs or obstructions.
Protecting the converted vanity from moisture is paramount to its longevity. Several layers of sealant should be applied to all exposed wood surfaces, including the inside of the dresser, the drawer fronts, and the dresser top. A polyurethane or epoxy sealant is recommended for its water resistance and durability. Apply the sealant according to the manufacturer's instructions, allowing each coat to dry completely before applying the next.
Special attention should be paid to sealing the areas around the sink and faucet holes, as these are particularly vulnerable to water damage. Apply multiple coats of sealant to these areas to ensure a watertight barrier. Consider using a flexible sealant, such as silicone caulk, to fill any gaps or cracks around the sinks and faucets.
In addition to sealing the wood surfaces, it is also recommended to apply a waterproof membrane or paint to the inside of the dresser to further protect it from moisture. This is particularly important if the dresser is made of particleboard or other moisture-sensitive materials. The waterproof membrane will create a barrier that prevents water from penetrating the wood and causing damage.
Proper ventilation is also crucial for preventing moisture buildup inside the vanity. Ensure that there is adequate airflow around the plumbing pipes and other components. This can be achieved by leaving some space between the back of the dresser and the wall, or by installing a ventilation fan inside the vanity.
Finally, regularly inspect the converted vanity for any signs of water damage, such as discoloration, swelling, or mold growth. Address any issues promptly to prevent further damage. By taking these precautions, the converted dresser vanity can provide years of stylish and functional service in the bathroom.

Stunning Bathroom Tour Dresser Into Double Vanity

How To Convert An Old Dresser Into A Bathroom Vanity Reinvented Delaware

How To Turn A Dresser Into Bathroom Vanity Oven Cleaner Wood Bleaching

Dresser Into Bathroom Vanity Vessel Sink

A Pro Renovator S 6 Tips For Turning Dresser Into Bathroom Vanity

Mid Century Dresser Into Vanity Bright Green Door

How To Convert An Old Dresser Into A Bathroom Vanity Reinvented Delaware

How To Convert An Old Dresser Into A Bathroom Vanity Reinvented Delaware

Dresser Into Bathroom Vanity Vessel Sink

How To Make A Dresser Into Vanity Tutorial An Oregon Cottage
Related Posts
