How To Remove Old Bathroom Countertops With Sinks In Them
Removing an old bathroom countertop with a sink requires a methodical approach to ensure safety and minimize damage to surrounding structures like walls, plumbing, and cabinets. This process, while potentially achievable for a capable DIY enthusiast, demands careful planning, the right tools, and a good understanding of basic plumbing and construction techniques. Before initiating any work, it is paramount to assess the existing setup and take necessary precautions.
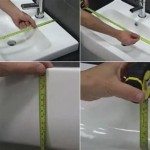
A significant part of preparation involves gathering appropriate tools. Essential items include a utility knife, adjustable wrench, basin wrench, screwdrivers (both flathead and Phillips head are typically needed), safety glasses, gloves, a pry bar, a hammer, a putty knife, a shop vacuum, and potentially a reciprocating saw. A drop cloth or protective sheet should also be laid to safeguard the floor from debris and potential damage.
Prior to beginning the physical removal, a thorough inspection of the countertop and sink connection is crucial. Identify how the sink is attached to the countertop (e.g., clips, adhesive, or a combination of both) and how the countertop is secured to the vanity cabinet. Understanding these connections will inform the removal strategy and minimize the risk of unforeseen complications. Additionally, checking for any signs of water damage or mold around the sink and countertop is advisable. Any such issues should be addressed appropriately before proceeding with the project.
Shutting Off the Water Supply and Disconnecting Plumbing
The very first step in the physical removal process is unequivocally shutting off the water supply to the sink. This is typically accomplished by locating the shut-off valves underneath the sink, one for hot water and one for cold water. Turn these valves clockwise until they are fully closed. Once the valves are shut off, turn on the faucet to relieve any remaining pressure in the lines. Should the shut-off valves be faulty or non-existent, the main water supply to the house must be shut off to prevent potential flooding. This is usually located in the basement or near the water meter.
After the water supply is secured, disconnect the water supply lines from the faucet. Place a bucket underneath the connections to catch any residual water. Use an adjustable wrench to loosen the compression nuts that connect the supply lines to the faucet tailpieces. Carefully detach the lines and ensure any remaining water drains into the bucket. Inspect the supply lines for wear and tear, and consider replacing them with new ones during the countertop replacement.
Next, disconnect the drain. This involves loosening the slip nuts that connect the P-trap to the drainpipe and the sink drain. A basin wrench can be particularly helpful for accessing the slip nuts located higher up near the sink drain. Carefully remove the P-trap and drainpipe, allowing any remaining water to drain into the bucket. Inspect the drainpipe for any clogs or corrosion, and clean or replace it as needed. Before disconnecting the drain, detach the drain stopper linkage. This usually involves removing a retaining clip or screw that connects the linkage to the drain stopper.
Detaching the Sink from the Countertop
Once the plumbing is disconnected, the focus shifts to detaching the sink from the countertop. The method for this depends largely on how the sink is installed. Undermount sinks are typically attached with clips and adhesive, while drop-in sinks are often secured with caulk or sealant.
For undermount sinks, begin by locating the clips underneath the countertop that secure the sink. These clips are usually attached with screws. Use a screwdriver to remove the screws from the clips, releasing the pressure on the sink. Once all the clips are removed, use a putty knife to carefully separate the sink from the countertop. Slide the putty knife between the sink rim and the countertop, gently working around the entire perimeter to break the adhesive bond. This process may require some patience and persistence, as the adhesive can be quite strong.
For drop-in sinks, use a utility knife to cut through the caulk or sealant that seals the sink to the countertop. Run the utility knife along the entire perimeter of the sink where it meets the countertop, ensuring the seal is completely broken. Once the caulk is cut, gently lift the sink from the countertop. It may be necessary to use a pry bar to gently pry the sink loose, but exercise caution to avoid damaging the countertop or the sink itself.
With the sink detached, carefully lift it out of the countertop opening. If the sink is heavy, enlist the help of another person to avoid straining your back or damaging the sink. Place the sink in a safe location where it will not be damaged while you work on removing the countertop. If the sink is being replaced, dispose of the old sink properly. Some municipalities have specific guidelines for disposing of plumbing fixtures.
Removing the Countertop
The final stage involves removing the countertop itself from the vanity cabinet. Countertops are typically attached to the cabinet with screws or construction adhesive, or a combination of both. Start by locating the screws that secure the countertop to the cabinet. These screws are usually located inside the cabinet, near the top corners and along the sides. Use a screwdriver to remove all the screws.
If the countertop is also attached with construction adhesive, use a putty knife or a thin pry bar to carefully separate the countertop from the cabinet. Work the putty knife or pry bar between the countertop and the cabinet, gently prying around the entire perimeter to break the adhesive bond. As with detaching the sink, this process may require some patience and persistence.
Once the screws and adhesive are removed, carefully lift the countertop from the cabinet. Countertops can be quite heavy, especially if they are made of solid surface materials like granite or marble. Enlist the help of another person to lift the countertop safely. If the countertop is too heavy to lift in one piece, it may be necessary to cut it into smaller, more manageable sections using a reciprocating saw. Use appropriate safety glasses and a dust mask when cutting countertops to protect your eyes and lungs.
With the countertop removed, inspect the vanity cabinet for any damage or signs of water damage. Repair any damage as needed before installing the new countertop. Clean the top of the cabinet thoroughly to remove any debris or adhesive residue. A shop vacuum is useful for this purpose. Ensure the cabinet surface is clean and level before proceeding with the installation of the new countertop.
Consider the disposal of the old countertop. Many municipalities have regulations regarding the disposal of construction materials. Check with your local waste management authority for guidelines on proper disposal methods. Some materials, such as granite or quartz, may be recyclable or suitable for reuse in other projects.
Following these steps provides a structured approach to removing old bathroom countertops with sinks. Adherence to safety precautions and careful execution are key to a successful outcome.

How To Remove A Bathroom Vanity Remodel
:max_bytes(150000):strip_icc()/8_remove-sink-base-cabinet-56a4a26d3df78cf772835b30.jpg?strip=all "How To Remove A Bathroom Vanity Cabinet")
How To Remove A Bathroom Vanity Cabinet

How To Remove Replace A Vanity Top Easy Bathroom Sink Remodel

How To Remove A Countertop From Vanity Decor Adventures

How To Remove A Countertop From Vanity Decor Adventures

How To Replace A Bathroom Vanity Top Complete Diy Guide

How To Replace Install Vanity Top Easy Simple Bathroom Countertop

How To Remove And Install Bathroom Vanity Diy

How To Replace A Bathroom Countertop Homeadvisor

5 Easy Steps On How To Remove A Bathroom Vanity Diy Guide
Related Posts