How to Fix a Loose Bathroom Sink Faucet Handle
A loose bathroom sink faucet handle can be a frustrating and inconvenient problem. It can make turning the water on and off difficult, and it can even lead to leaks. Fortunately, fixing a loose faucet handle is generally a simple DIY repair that can be done in a short amount of time. This article will guide you through the process of identifying the problem, gathering necessary materials, and completing the fix.
Understanding the Problem
A loose faucet handle is often caused by a worn or damaged set screw. This screw holds the handle in place on the faucet stem. The set screw can become loose due to repeated use, corrosion, or even improper installation. Sometimes, the problem might arise from a worn-out O-ring or a faulty faucet stem. To determine the source of the issue, it’s essential to inspect the faucet handle carefully.
Gathering the Necessary Materials
Before you begin the repair, you’ll need to gather the following materials:
- Phillips head screwdriver
- Flat head screwdriver
- Adjustable wrench
- New set screw (if needed, size will depend on the faucet)
- New O-ring (if needed)
- Plumber's grease or silicone sealant
- Cloth or paper towels
Step-by-Step Guide to Fixing a Loose Bathroom Sink Faucet Handle
Once you have all the necessary materials, you can follow these steps to fix the loose faucet handle:
- Turn off the water supply. Locate the shut-off valve for the sink and turn it clockwise to completely stop the water flow. To ensure you've correctly shut off the water, turn on the faucet and check if water comes out.
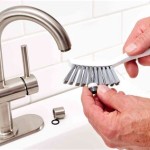
- Remove the faucet handle. Depending on the type of faucet, you’ll need to use either a Philips head or a flathead screwdriver to remove the handle. Look for the handle screw on the side or underneath the handle. Once you find it, use the appropriate screwdriver to loosen and remove the handle.
- Inspect the set screw. Look for a small set screw located near the bottom of the stem. If the screw is loose, use an adjustable wrench to tighten it. If the screw is stripped or missing, replace it with a new one of the appropriate size.
- Inspect the O-ring and faucet stem. If the set screw is tight and the handle is still loose, the problem could be with the O-ring or the faucet stem. Carefully remove the O-ring and inspect it for cracks or damage. Replace it with a new O-ring if necessary. Examine the faucet stem for any wear or damage, and replace it if needed.
- Apply plumber's grease or sealant. Apply a thin layer of plumber's grease or silicone sealant to the threads of the faucet stem and the O-ring to prevent future leaks.
- Re-attach the faucet handle. Place the handle back onto the faucet stem and tighten the set screw using a screwdriver. Make sure the handle is securely attached without overtightening.
- Turn the water back on. Slowly open the shut-off valve to allow water to flow back into the sink. Check for leaks around the handle and faucet stem.
If the faucet handle is still loose after following these steps, it may be time to call a plumber to inspect the problem. This could indicate a more serious issue with the faucet itself that requires professional attention.
By following these steps, you can easily fix a loose bathroom sink faucet handle. This will ensure your faucet operates smoothly, and prevent any further water damage or inconvenience in your bathroom.

How To Tighten Faucet Handle Homeserve Usa

Tighten A Loose Lever On Moen Brantford Faucet

How To Fix Loose Sink Faucet

Tighten A Loose Lever On Moen Brantford Faucet

Bathroom Faucet Handles Loose Wobbly Diy Fix

Sbw 8 A Loose Bathroom Faucet Handle

How To Tighten A Loose Bathroom Faucet

How To Repair A Single Handle Kitchen Faucet Diy Family Handyman
Mazz Kitchen Sink Faucet Loose Handle

How To Fix A Stripped Faucet Handle In 10 Minutes Or Less
Related Posts


