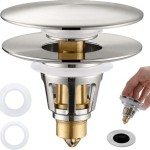
How to Replace a Bathroom Sink Drain Trap
The drain trap beneath your bathroom sink plays a crucial role in preventing sewer gases from entering your home. Over time, these traps can become clogged with hair, soap scum, and other debris, leading to slow drainage or unpleasant odors. Fortunately, replacing a bathroom sink drain trap is a relatively straightforward DIY project that can be accomplished with basic tools and a little patience.
Step 1: Gather Your Supplies
Before you begin, gather the necessary tools and materials. You will need:
- A new drain trap
- Adjustable wrench
- Channel-lock pliers
- Bucket or container
- Shop towels or rags
- Optional: plumber's putty
Choose a drain trap that matches the size and material of your existing one. You may also want to consider upgrading to a trap with a built-in strainer or a P-trap, which offers better odor protection.
Step 2: Disconnect the Drain Trap
To replace the drain trap, you'll need to disconnect it from the sink and the drain pipe. Begin by placing a bucket beneath the trap to catch any residual water. Then, carefully loosen the nut connecting the trap to the tailpiece using an adjustable wrench. Depending on your trap, you may also need to loosen the nuts connecting the trap to the drainpipe and the sink.
Once the nuts are loosened, carefully lift the trap out of the drain assembly. Take note of how the trap was connected to the drainpipe and sink. This will help you ensure the new trap is properly installed.
Step 3: Clean and Inspect the Pipes
Before installing the new trap, take the opportunity to clean the drain pipe and sink tailpiece of any debris, hair, or soap scum. Use a wire brush or a drain snake to remove any obstructions. This can prevent future clogs and ensure smooth water flow.
Inspect the tailpiece and drainpipe for any signs of corrosion or damage. If you find any, it's a good idea to replace them as well.
Step 4: Install the New Drain Trap
Now, it's time to install the new drain trap. Start by placing the trap in position, ensuring that the threaded ends align with the tailpiece and drainpipe. Hand-tighten the connecting nuts, being careful not to overtighten. Once the trap is in place, use your adjustable wrench to tighten the nuts securely.
If your new trap uses plumber's putty, apply a thin layer of putty around the base of the sink tailpiece. Then, carefully press the tailpiece into the drain opening. Wipe away any excess putty.
Step 5: Test for Leaks
After installing the new drain trap, test for leaks by turning on the faucet and letting water flow through the sink. Carefully inspect all connections for any signs of leaks. If you find any leaks, tighten the nuts connecting the trap to the tailpiece and drainpipe until the leaks stop.
If you continue to experience leaks after tightening the connections, you may need to check the trap for defects or replace the tailpiece or drainpipe.
Replacing a bathroom sink drain trap is a relatively simple task that can save you time and money. By following these steps, you can easily replace your old trap and enjoy a clean, smoothly-functioning sink.

How To Install P Trap And Bathroom Sink Drain Piping Easy Installation For Beginners

Easy Ways To Fix A Leaky Sink Trap 12 Steps With Pictures

How To Replace A Sink Drain P Trap Full Guide Fixed Today Plumbing

How To Install The P Trap Under A Sink Dummies
How To Install Bathroom Sink Drain Queen Bee Of Honey Dos

How To Replace A Sink Stopper Quick And Simple Home Repair

How To Retrieve An Item Dropped Down The Sink Drain Bathroom Plumbing Replace

Replace A Trap And Add Cleanout Fine Homebuilding

Bathroom Sink Plumbing Installation Diy Montreal

Diy Plumbing Blog How To Clean A Drain Trap
Related Posts


