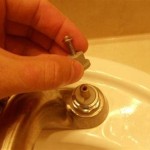
How To Replace Bathroom Sink Faucet Handles
Replacing bathroom sink faucet handles is a common plumbing task that many homeowners can undertake. Worn, damaged, or outdated handles can diminish the aesthetic appeal of a bathroom and compromise the faucet's functionality. This article provides a comprehensive guide on how to replace bathroom sink faucet handles, encompassing preparation, removal of old handles, installation of new handles, and essential considerations for a successful outcome.
Preparation: Gathering Tools and Materials
Before commencing the replacement process, it is crucial to gather all necessary tools and materials. This proactive approach minimizes interruptions during the project and ensures a smoother workflow. The following items are typically required:
- New faucet handles: Ensure these are compatible with the existing faucet stem and complement the bathroom's décor. Take the old handle with you to the store to compare the stem fitting.
- Adjustable wrench: This tool is essential for loosening and tightening various components.
- Screwdrivers (Phillips and flathead): The appropriate screwdriver type is determined by the screws securing the existing handles.
- Penetrating oil (optional): This can assist in loosening stubborn screws or connections.
- Basin wrench (optional): This specialized wrench can assist in accessing shut-off valves located in tight spaces.
- Plumber's putty: This pliable compound creates a watertight seal around the faucet base.
- Clean cloths or towels: These are necessary for wiping up spills and cleaning surfaces.
- Small container: Useful for storing small parts, like screws, preventing loss.
- Flashlight or work light: Illuminates the workspace, especially in dimly lit areas under the sink.
In addition to tools, gathering information about the existing faucet is beneficial. Identifying the faucet brand and model can simplify the handle replacement process and ensure the correct replacement parts are obtained. Reviewing the faucet's installation manual, if available, can provide specific instructions or diagrams relevant to the particular model.
Removing the Existing Faucet Handles
The first step in the replacement process is to turn off the water supply to the faucet. Locate the shut-off valves beneath the sink. Typically, there are two valves, one for hot water and one for cold water. Turn these valves clockwise until they are fully closed. After shutting off the water supply, turn on the faucet to release any residual water pressure in the lines. Place a bucket under the faucet to catch any remaining water.
The method for removing the existing handles varies based on the faucet design. Most handles are secured with either a screw located on the top or side of the handle, or they are held in place by a cap that conceals the screw. Examine the handles to determine the type of attachment mechanism.
If a screw is visible, use the appropriate screwdriver (Phillips or flathead) to loosen and remove the screw. Once the screw is removed, gently pull the handle straight up and off the faucet stem. If the handle is stuck, apply penetrating oil to the connection point and let it sit for a few minutes before attempting to remove the handle again. Avoid using excessive force, as this can damage the faucet stem or surrounding components.
If the handle has a decorative cap, use a small flathead screwdriver or a fingernail to carefully pry off the cap. Underneath the cap, there will typically be a screw. Remove the screw and then pull the handle off the stem as described above. Some faucets have a set screw that holds the handle in place. In this case, use the appropriate Allen wrench (also known as a hex key) to loosen the set screw and remove the handle.
Once the handles are removed, inspect the faucet stems for any signs of corrosion or damage. If the stems are corroded, clean them with a wire brush or steel wool. If the stems are damaged, they may need to be replaced along with the handles. This is a more involved process that may require professional assistance.
Installing the New Faucet Handles
Before installing the new handles, ensure they are compatible with the existing faucet stems. Align the handle with the stem and gently push it into place. If the handle does not fit properly, do not force it. Double-check the compatibility and consult the faucet manufacturer's specifications if necessary.
Once the handle is properly aligned, secure it with the screw that was removed from the old handle. Tighten the screw until the handle is firmly in place, but avoid over-tightening, which can damage the handle or the stem. If the handle has a decorative cap, replace the cap to conceal the screw.
Repeat the process for the second handle. Ensure that both handles are securely attached and that they turn smoothly and easily. If the handles are difficult to turn, check for any obstructions or misalignments. If necessary, apply a small amount of plumber's grease to the faucet stem to lubricate the connection point.
After installing the new handles, turn the water supply back on by slowly opening the shut-off valves beneath the sink. Check for any leaks around the base of the faucet and at the handle connections. If leaks are present, tighten the connections or apply plumber's putty to create a watertight seal. If the leaking persists, further investigation may be required, and professional assistance from a plumber is advisable.
After verifying that there are no leaks, test the faucet to ensure that it is functioning properly. Turn the handles on and off to check the water flow and temperature. Make sure that the hot and cold water are flowing from the correct sides of the faucet. If any issues are detected, troubleshoot the problem and make any necessary adjustments.
Finally, clean up the work area and dispose of any old parts or materials properly. This step ensures that the bathroom is left in a clean and organized condition after the handle replacement is complete.
Essential Considerations for Replacing Faucet Handles
Several important considerations can influence the success of a faucet handle replacement project. These include identifying faucet type, ensuring compatibility, addressing potential issues such as corrosion or leaks, and knowing when to seek professional help.
Identifying the faucet type is paramount. There are several types of bathroom sink faucets, including compression faucets, ball faucets, cartridge faucets, and ceramic disc faucets. Each type has a different internal mechanism and handle design. Understanding the faucet type is crucial for selecting the correct replacement handles and for properly disassembling and reassembling the faucet.
Ensuring compatibility of the new handles with the existing faucet is essential. Faucet handles come in various sizes and shapes, and they are designed to fit specific faucet stems. Before purchasing replacement handles, carefully measure the dimensions of the existing handles and compare them to the specifications of the new handles. Also, consider the style and finish of the handles to ensure that they complement the bathroom's décor.
Addressing potential issues such as corrosion or leaks is important for a successful replacement. Corrosion can cause the handles to stick or become difficult to remove. Applying penetrating oil and gently working the handles back and forth can help to loosen them. Leaks can occur after the new handles are installed if the connections are not properly sealed. Using plumber's putty or Teflon tape on the threads of the connections can help to prevent leaks.
Knowing when to seek professional help is a crucial aspect of any DIY plumbing project. If the faucet is severely corroded, if the stems are damaged, or if there are persistent leaks after the replacement, it is best to consult a qualified plumber. Attempting to repair complex plumbing issues without the necessary knowledge and experience can lead to further damage and more costly repairs. A professional plumber can diagnose the problem accurately and provide effective solutions.
Replacing bathroom sink faucet handles is a manageable task for many homeowners, provided they approach the project with the appropriate preparation, tools, and understanding of the process. Careful attention to detail, combined with a willingness to seek professional assistance when needed, can result in a successful and satisfying outcome.

How Do I Replace Bathroom Sink Faucet Handles Cleaning More

Diy How To Replace A Bathroom Sink Faucet Remove Install

How To Change The Handle Rotation On A Faucet

Replacing A Bathroom Faucet Fine Homebuilding

How To Install Replace A Bathroom Faucet

How To Remove And Install A Bathroom Faucet

How To Replace Bathroom Sink Faucet Handles Ehow

Tips Tricks Remove Delta 2 Handle 4 In Bathroom Sink Faucet With Bar 5 21 18

How To Tighten Faucet Handle Homeserve Usa

How To Fix A Hard Turn Bathroom Faucet Handle
Related Posts


