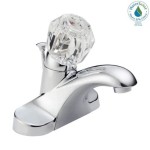
Undermount Bathroom Sink Installation: A Comprehensive Guide
Undermount bathroom sinks, characterized by their seamless integration with the countertop, offer a sleek and modern aesthetic. Installing an undermount sink requires meticulous attention to detail and proper techniques to ensure a successful and durable installation. This guide provides a comprehensive overview of the installation process, outlining the necessary steps and considerations for a professional-looking finish.
1. Tools and Materials
Before embarking on the installation, gather the essential tools and materials. These include:
- Undermount sink
- Countertop
- Sink clips or brackets
- Silicone sealant
- Caulking gun
- Measuring tape
- Level
- Utility knife
- Drill with a hole saw bit
- Screwdriver
- Safety glasses
- Work gloves
Ensure the sink and countertop are compatible and the sink clips or brackets are designed for the specific sink and countertop material. Choose a high-quality silicone sealant that is specifically formulated for bathroom applications and resists mildew and mold growth.
2. Preparing the Countertop
The countertop must be properly prepared to ensure a secure and watertight installation. Follow these steps:
-
Clean the countertop:
Thoroughly clean the countertop surface with a mild detergent and warm water to remove any debris or residue. Allow it to dry completely. -
Mark the sink location:
Use a measuring tape and pencil to mark the exact location of the sink on the countertop. Ensure the sink is centered and positioned according to your desired design. -
Cut the countertop opening:
Using a hole saw bit of the appropriate size, carefully drill multiple holes in the marked area to create a rough opening. Connect the holes with a utility knife to create a smooth, clean cut. -
Sand the edges:
Smooth out any rough edges around the opening using sandpaper to prevent damage to the sink or countertop during installation.
Be cautious during the cutting process to avoid damaging the countertop. If you are unsure about the procedure, it is advisable to consult a professional installer.
3. Securing the Sink
Once the countertop opening is ready, it's time to secure the undermount sink in place:
-
Apply silicone sealant:
Apply a bead of silicone sealant around the edges of the countertop opening. This creates a waterproof barrier and prevents leaks. -
Position the sink:
Carefully lower the sink into the countertop opening, ensuring it is centered and level. Gently press down on the sink to adhere it to the silicone sealant. -
Install clips or brackets:
Attach the sink clips or brackets to the underside of the countertop, securing the sink in place. Ensure the clips or brackets are evenly spaced and properly tightened. -
Clean up excess sealant:
Wipe away any excess silicone sealant from the countertop and sink using a damp cloth.
Allow the silicone sealant to cure completely according to the manufacturer's instructions before using the sink. This typically takes 24 hours. During the curing process, avoid placing heavy objects on the countertop around the sink.
4. Installing the Faucet
The final step is to install the faucet. This typically involves the following:
-
Drill holes for the faucet:
Drill the necessary holes in the countertop to accommodate the faucet fixtures. Be sure to use drill bits that are specifically designed for countertops. -
Connect the faucet:
Attach the faucet to the countertop using the provided installation hardware. Ensure the faucet is properly aligned and secure. -
Connect the water lines:
Connect the water supply lines to the faucet and the plumbing system. Securely tighten all connections. -
Test for leaks:
Turn on the water supply and carefully check all connections for leaks. If any leaks are detected, tighten the connections or reapply sealant as necessary.
Before installing the faucet, consult the manufacturer's instructions for specific installation procedures. It is also recommended to test the functionality of the faucet after installation to ensure it operates smoothly and efficiently.
Installing an undermount bathroom sink can be a challenging project, but with careful planning and execution, you can achieve a professional-looking result. If you are uncertain about any aspect of the installation process, consult with a qualified plumber or contractor for guidance.

How To Install An Undermount Sink

How To Install An Undermount Sink Perfect Bath

How To Install Undermount Sink Homeserve Usa

Undermount Sink Installation Tool Set

Undermount Bathroom Sink Buyer S Guide The Family Handyman

How To Install An Undermount Sink

Undermount Bathroom Sink Styles Installation Pics More

Undermount Sink Installation Fast Easy Way To Install

Undermount Sinks Badeloft

How To Install An Undermount Sink
Related Posts


