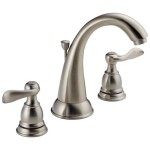
Troubleshooting a Clogged Bathroom Sink Faucet Aerator
A bathroom sink faucet aerator is a small, often overlooked component that plays a crucial role in water flow and pressure. It mixes air with water, creating a smooth, even stream and reducing splashing. However, over time, mineral deposits, debris, and other contaminants can build up inside the aerator, leading to a reduced water flow, a sputtering stream, or even a complete blockage. When faced with a clogged bathroom sink faucet aerator, understanding the causes and troubleshooting methods can help you restore optimal functionality.
Common Causes of a Clogged Bathroom Sink Faucet Aerator
Several factors can contribute to an obstructed bathroom sink faucet aerator. Here are some common culprits:
- Hard Water: Hard water contains high mineral content, such as calcium and magnesium, which can deposit and build up within the aerator's internal components. This mineral buildup restricts water flow and can eventually lead to a complete blockage.
- Sediment and Debris: Particles like sand, dirt, and rust can enter the water supply and accumulate in the small openings of the aerator. This accumulation impedes water flow and reduces the aerator's effectiveness.
- Soap Scum and Hair: Products like soap, shampoo, and hair can build up in the aerator, leading to a clog. The combination of these substances can form a sticky residue that hinders water flow.
- Calcium and Lime Deposits: Lime and calcium deposits are commonly found in areas with hard water. These deposits can build up over time, restricting water flow and eventually leading to a complete blockage.
Solutions for a Clogged Bathroom Sink Faucet Aerator
When your bathroom sink faucet aerator is clogged, you can often resolve the issue with some simple troubleshooting steps. Here are a few effective solutions:
1. Cleaning the Aerator
Cleaning the aerator involves removing it from the faucet and thoroughly cleaning its internal components. This process typically involves the following steps:
- Turn off the water supply: Locate the shut-off valve for the bathroom sink and turn it off to prevent water from flowing.
- Unscrew the aerator: Using a wrench or pliers, unscrew the aerator from the faucet spout. Be careful not to overtighten or damage the faucet.
- Disassemble the aerator: Carefully separate the aerator's components, such as the screen, the internal filter, and the housing. This may involve unscrewing or pulling apart the different parts.
- Clean the components: Use a toothbrush, a small cleaning brush, or a toothpick to remove any debris, mineral deposits, or sediment from the aerator's components. You can use a cleaning solution like white vinegar or a commercial aerator cleaner for better results.
- Rinse and reassemble: Rinse all the components thoroughly with water and reassemble the aerator. Ensure that all parts are properly aligned and secured.
- Reinstall the aerator: Hand-tighten the aerator back onto the faucet spout, ensuring it is secure but not overtightened.
- Turn on the water: Turn the water supply back on and check for any leaks or issues. If the water flow is still obstructed, repeat the cleaning process or consider replacing the aerator.
2. Using a Cleaning Agent
If cleaning with water alone is not effective, consider using a cleaning agent specifically designed for aerators. These agents can dissolve mineral deposits and other stubborn clogs. Follow the instructions on the cleaning agent's label carefully and allow sufficient time for the solution to work before rinsing and reassembling the aerator.
3. Replacing the Aerator
In cases where cleaning the aerator fails to restore proper water flow, it may be necessary to replace the aerator altogether. You can purchase a new aerator that matches your existing faucet at most hardware stores or online retailers. Follow the instructions provided with the new aerator for installation.
Preventing Future Clogging
After addressing a clogged aerator, it's essential to take steps to prevent future blockages. These steps include:
- Regular cleaning: Clean the aerator every few months to prevent the accumulation of debris and mineral deposits. This can be done by following the cleaning steps outlined above.
- Water softener: If you live in an area with hard water, consider installing a water softener to remove minerals from your water supply. This can significantly reduce the frequency of clogged aerators.
- Regular maintenance: Regularly check the aerator for any signs of deterioration or wear and tear. Replace the aerator if it shows signs of damage or if there are any signs of leaks or dripping.
- Use a strainer: Install a strainer on your faucet spout to catch larger debris, such as hair and soap scum, before they reach the aerator.

How To Clean The Clogged Aerator On A Faucet Diy Oliver

How To Unclog A Faucet Aerator For Dummies

How To Clean Faucet Aerator Simpson Plumbing Llc

Unclog A Kitchen Faucet Aerator Diy Family Handyman

How To Clean Debris Out Of A Bathroom Faucet Aerator Sbw 70 Sean Moenkhoff

How To Clean A Bathroom Sink Faucet Aerator Screen Low Water Pressure

How To Fix A Faucet Aerator Hunker

The Best Ways To Clean A Clogged Faucet Aerator

Clogged Faucet No Worries Cleaning Repairing Is Easier Than You Think Kerovit Blog

Fixing A Faucet Aerator You Can Be Diy R Too The Kim Six Fix
Related Posts


