Bathroom Vent Fan Installation Instructions
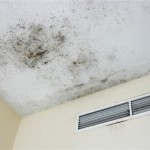
Installing a bathroom vent fan is an important home improvement project that can significantly enhance your bathroom's ventilation and overall air quality. A properly functioning vent fan helps to remove excess moisture, odors, and pollutants, preventing mold growth, mildew, and improving indoor comfort. This article provides comprehensive instructions for installing a bathroom vent fan, outlining the necessary steps and safety precautions to ensure a successful and safe installation.
1. Preparing for Installation
Before embarking on the installation process, it's essential to gather the necessary tools and materials. This includes a new vent fan, a duct adapter, duct tape, screws, a stud finder, a drill, a level, safety glasses, and a ladder. Additionally, ensure that the power is turned off to the bathroom's electrical circuit to prevent any potential electrical hazards.
Once the power is off, locate the existing vent fan and carefully remove it, disconnecting the electrical wiring and ductwork. Take note of the wiring configuration to ensure proper reconnection of the new fan. Measure the size and location of the existing vent opening and ensure the new fan's dimensions are compatible. If necessary, adjust the vent opening to accommodate the new fan.
2. Installing the Fan
Begin by attaching the new vent fan to the ceiling or wall using the provided screws or mounting brackets. Ensure the fan is level and securely fastened. Connect the electrical wiring, making sure to match the colors of the wires: black to black, white to white, and green (ground) to green. Double-check all connections for tightness and secure them with wire nuts.
Next, connect the vent fan to the ductwork. If the existing duct is compatible with the new fan, use duct tape to securely attach the duct to the fan's outlet. If the duct sizes differ, use a duct adapter to connect the two. Ensure the ductwork is free of any obstructions that might impede airflow.
3. Testing and Finishing Touches
After connecting the electrical wiring and ductwork, turn the power back on to the bathroom circuit. Test the fan to confirm that it's operating correctly. Ensure the fan runs smoothly and efficiently, and check for any unusual noises or vibrations. If the fan is not functioning properly, troubleshoot the wiring connections or consider replacing the fan.
Finally, reinstall the vent cover or grille, ensuring it's securely attached and doesn't obstruct airflow. Inspect the installation for any loose connections or leaks in the ductwork. Clean up any debris or dust resulting from the installation process.
If you are uncomfortable with any aspect of the installation process, consult with a qualified electrician or contractor for assistance. Ensuring a correctly installed bathroom vent fan promotes proper ventilation and air quality, contributing to a healthy and comfortable bathroom environment.

How To Install A Bathroom Fan Step By Guide Bob Vila

Air Sealing Bathroom And Kitchen Exhaust Fans Building America Solution Center

How To Bathroom Exhaust Fan Installation Unboxing

Utilitech 7116 02 Ventilation Fan With Edge Lit Led Light Instruction Manual

Revent Rvs130 Roomside Installation Bathroom Exhaust Ventilation Fan Guide

How To Install A Bathroom Exhaust Fan Lowe S

Costco Broan 80 Cfm Cst80sl Bathroom Fan Wiring

Fitting And Wiring Instructions Vent Axia

Ultra Quiet Bathroom Exhaust Fan W Led Light 4000k 1000lm 100 Cfm

Pin On Basement Bathroom


