Can You Paint A Laminate Bathroom Vanity Top With Sink? A Comprehensive Guide
Laminate bathroom vanity tops with integrated or drop-in sinks are ubiquitous due to their affordability and durability. However, their aesthetic appeal can wane over time, prompting homeowners to consider alternatives to full replacement. Painting a laminate vanity top offers a cost-effective and relatively simple solution to update the bathroom's appearance. While painting laminate is feasible, successful execution requires meticulous preparation, careful product selection, and proper application techniques.
The viability of painting a laminate vanity top hinges on understanding the material's properties. Laminate is a composite material consisting of multiple layers, with a decorative surface layer adhered to a substrate, typically particleboard or MDF (Medium-Density Fiberboard). The decorative layer is usually a printed paper or plastic sheet treated with resin for durability and water resistance. This surface is inherently non-porous, which presents a challenge for paint adhesion. Without proper preparation, paint will likely peel or chip, rendering the entire project ineffective and visually unappealing. Therefore, a multi-faceted approach is necessary to ensure long-lasting results.
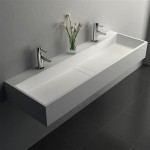
The sink, whether integrated or a drop-in model, adds another layer of complexity. Integrated sinks are typically molded as part of the laminate countertop, creating a seamless surface. Drop-in sinks, on the other hand, are installed into a pre-cut opening in the laminate. While painting the laminate surface is similar in both cases, specific considerations apply to the sink area. For integrated sinks, care must be taken to achieve a uniform finish across the entire surface. For drop-in sinks, masking and sealing around the sink edges are crucial to prevent water damage and maintain a clean, professional appearance.
Key Point 1: Essential Preparation Steps for Painting Laminate
Surface preparation is the most critical aspect of painting a laminate bathroom vanity top. Inadequate preparation will invariably lead to paint failure. The process involves thorough cleaning, sanding, and priming to create a suitable surface for paint adhesion. These steps are not merely cosmetic; they are fundamental to the paint's ability to bond effectively with the laminate.
The initial step is a deep cleaning of the vanity top. Use a degreasing cleaner, such as TSP (trisodium phosphate) or a dedicated bathroom cleaning spray, to remove soap scum, mildew, and grime. Rinse the surface thoroughly with clean water and allow it to dry completely. Any residual contaminants will compromise the paint's adhesion, leading to premature peeling or blistering.
Sanding is the next crucial step. The goal is not to completely remove the laminate's glossy finish, but rather to create a slightly roughened surface that the primer can grip. Use a fine-grit sandpaper (around 220-grit) and lightly sand the entire surface of the vanity top. Focus on areas that may have existing imperfections or areas that are particularly smooth. The sanding process should be even and consistent to ensure uniform adhesion. After sanding, thoroughly remove all sanding dust with a tack cloth or a damp rag. Residual dust particles will create an uneven surface and interfere with the primer's ability to bond properly.
Priming is an indispensable step when painting laminate surfaces. A high-quality adhesion primer is essential for creating a strong bond between the laminate and the paint. Choose a primer specifically designed for use on non-porous surfaces, such as laminate or plastic. Apply the primer in thin, even coats, following the manufacturer's instructions. Allow the primer to dry completely before proceeding to the painting stage. Multiple coats of primer may be necessary to achieve adequate coverage and adhesion, particularly on darker-colored laminates. Consider using a tinted primer that matches the chosen paint color to improve coverage and reduce the number of paint coats required.
Key Point 2: Selecting the Right Paint and Application Techniques
The choice of paint is as important as the surface preparation. Not all paints are created equal, and selecting the appropriate type is crucial for achieving a durable and aesthetically pleasing finish on a laminate bathroom vanity top. The paint must be able to withstand the humid environment of a bathroom and resist chipping, scratching, and water damage.
For laminate surfaces, acrylic latex paints are generally recommended due to their flexibility, durability, and water resistance. Consider using a paint specifically formulated for cabinets or furniture, as these paints typically offer enhanced durability and scratch resistance. Avoid using oil-based paints, as they tend to yellow over time and may not adhere as well to laminate surfaces. Alternatively, epoxy paints offer exceptional durability and water resistance, making them a suitable option for bathroom vanity tops. However, epoxy paints are typically more challenging to apply and require specific safety precautions due to their strong fumes.
The application technique also plays a significant role in the final outcome. Use high-quality brushes, rollers, or a paint sprayer to apply the paint evenly. For brushes, choose synthetic bristles suitable for latex paints. For rollers, opt for a foam roller with a short nap to minimize texture. A paint sprayer offers the most consistent and professional-looking finish, but it requires practice and proper setup. Apply the paint in thin, even coats, allowing each coat to dry completely before applying the next. Avoid applying thick coats of paint, as this can lead to runs, drips, and uneven drying. Multiple thin coats are preferable to a single thick coat.
Between coats of paint, lightly sand the surface with fine-grit sandpaper (around 320-grit) to remove any imperfections and create a smoother surface for the next coat. Be sure to remove all sanding dust before applying the subsequent coat of paint. This step, known as "between-coat sanding," is essential for achieving a professional-quality finish. Aim for at least two to three coats of paint for optimal coverage and durability. Once the final coat of paint has dried completely, consider applying a clear topcoat to protect the painted surface from scratches and water damage. Choose a clear topcoat specifically designed for use on painted surfaces and apply it according to the manufacturer's instructions.
Key Point 3: Addressing Specific Sink-Related Challenges
The presence of a sink, whether integrated or drop-in, introduces specific challenges when painting a laminate bathroom vanity top. These challenges primarily revolve around achieving a seamless finish around the sink and preventing water damage at the sink's edges. Careful planning and execution are essential to ensure a professional and long-lasting result.
For integrated sinks, the goal is to create a uniform finish across the entire surface, including the sink basin. This requires meticulous attention to detail and careful application of paint in the recessed areas. Pay particular attention to the corners and edges of the sink, ensuring that the paint is applied evenly and thoroughly. Use a small brush or a foam applicator to reach tight spaces and avoid brushstrokes. Consider using a self-leveling paint to minimize brush marks and create a smoother finish. Due to the increased water exposure in the sink basin, applying a durable, water-resistant topcoat is crucial. Consider using a marine-grade varnish or a two-part epoxy coating for added protection.
For drop-in sinks, masking is essential to protect the surrounding surfaces from paint. Use high-quality painter's tape to carefully mask off the sink's edges, ensuring a clean and straight line. It is crucial to use a tape that is specifically designed for delicate surfaces to prevent damage to the sink or the surrounding countertop. In addition to masking, consider using a sealant, such as caulk or silicone, to fill any gaps between the sink and the countertop. This will prevent water from seeping under the sink and causing damage to the underlying substrate. Apply the sealant before painting to ensure that it is properly sealed and protected by the paint. Once the paint has dried completely, carefully remove the masking tape, pulling it away at a 45-degree angle to prevent chipping the paint.
Regardless of the sink type, it is essential to allow the painted surface to cure completely before exposing it to water. Follow the manufacturer's recommendations for curing time, which can range from several days to several weeks. During the curing process, avoid using the sink and keep the area dry. This will allow the paint to fully harden and develop its maximum durability and water resistance. Once the paint has cured, regularly clean the vanity top and sink with a mild, non-abrasive cleaner to maintain its appearance and prevent the buildup of soap scum and mildew. Avoid using harsh chemicals or abrasive scrubbers, as these can damage the painted surface.
Painting a laminate bathroom vanity top with a sink is a worthwhile project for homeowners seeking an affordable and impactful bathroom renovation. By meticulously preparing the surface, selecting the appropriate paint, employing proper application techniques, and addressing the specific challenges related to the sink, a durable and aesthetically pleasing transformation can be achieved.

Paint Bathroom Vanity Countertop Sink So Easy A Piece Of Rainbow

Paint Bathroom Vanity Countertop Sink So Easy A Piece Of Rainbow
:strip_icc()/101922779-2cbc45e123c34827afb4f601723b03ca.jpg?strip=all "How To Paint Bathroom Countertops")
How To Paint Bathroom Countertops

How To Easily Spray Paint Bathroom Countertops My Homier Home

How To Refinish Laminate Counters Made By Marzipan

Painting Laminate Cabinets And Countertop Under 100 Crazy Life With Littles

How To Paint A Laminate Countertop Quick Easy Inexpensive

Paint Bathroom Vanity Countertop Sink So Easy A Piece Of Rainbow

How To Paint A Countertop Don T Make These Mistakes Blessed Beyond Crazy

Should You Be Painting Your Bathroom Countertops Caesarstone
Related Posts