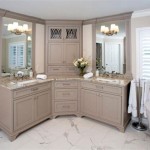
Can You Paint An Old Bathroom Vanity? A Comprehensive Guide
The bathroom vanity is often the focal point of the space, dictating the room's style and functionality. Over time, vanities can become worn, outdated, or simply clash with a desired aesthetic change. Replacing a vanity can be a costly and disruptive undertaking. Painting, however, presents a viable and often cost-effective alternative. This article will extensively explore the process of painting an old bathroom vanity, addressing key considerations, preparation techniques, painting methods, and finishing touches.
Evaluating the Vanity's Condition and Suitability for Painting
Before embarking on a painting project, it is crucial to assess the vanity's condition. The material composition of the vanity is the primary factor influencing the success of the painting endeavor. Solid wood, plywood, and MDF (Medium Density Fiberboard) are generally receptive to paint. Laminate or veneer-covered vanities can be more challenging, requiring specialized primers and techniques to ensure proper adhesion. The presence of significant damage, such as water damage, severe warping, or extensive peeling, may render the vanity unsuitable for painting and necessitate replacement.
Examine the vanity for existing coatings. Is it painted, stained, or varnished? Understanding the existing finish is critical for selecting the appropriate preparation techniques and primers. Heavily varnished surfaces will require more extensive sanding to create a suitable surface for the new paint to adhere to. Painted surfaces may need to be assessed for lead content, particularly in older homes. If lead is suspected, professional testing and abatement are essential for safety.
Consider the vanity's style. Is it a simple, modern design or an ornate, traditional piece? The style will influence the choice of paint color and finish. A modern vanity might benefit from a sleek, matte finish, while a traditional vanity could be enhanced with a more glossy or distressed finish. In addition, if the existing style is significantly outdated, painting alone may not be enough to achieve the desired transformation. Hardware upgrades, such as new knobs, pulls, and hinges, can significantly improve the overall look of the vanity.
Preparation: The Foundation for a Successful Paint Job
Proper preparation is paramount to achieving a professional and long-lasting paint finish on a bathroom vanity. Neglecting this step can lead to peeling, chipping, and an overall unsatisfactory result. The preparation process typically involves several stages: removal of hardware, cleaning, sanding, priming, and potentially filling imperfections.
Begin by removing all hardware, including knobs, pulls, hinges, and door latches. Label each piece and store them carefully to ensure easy reinstallation. If desired, this is an opportune time to replace the hardware with new, updated options. Thoroughly clean the vanity using a degreasing cleaner to remove any dirt, grime, soap scum, and mildew. A solution of trisodium phosphate (TSP) is effective for removing stubborn grime, but it is essential to wear appropriate protective gear, including gloves and eye protection, when working with TSP. Rinse the vanity thoroughly with clean water and allow it to dry completely.
Sanding is a crucial step in creating a receptive surface for the primer and paint. The goal is not to remove the existing finish entirely but to create a slightly roughened surface that promotes adhesion. Use a medium-grit sandpaper (120-180 grit) for the initial sanding, followed by a finer-grit sandpaper (220 grit) for smoothing. Sand all surfaces, paying particular attention to edges and corners. For laminate or veneer-covered vanities, use a fine-grit sandpaper (220-320 grit) and avoid excessive sanding to prevent damaging the veneer. After sanding, thoroughly remove all sanding dust with a tack cloth or damp cloth.
Priming is essential for several reasons. It seals the existing finish, prevents bleed-through of stains or colors, and provides a uniform surface for the paint to adhere to. Choose a primer that is specifically designed for the material of the vanity and the type of paint being used. For example, an oil-based primer is a good choice for sealing wood and preventing stain bleed-through, while a latex primer is suitable for MDF and painted surfaces. For laminate vanities, use an adhesion-promoting primer designed for slick surfaces. Apply the primer in thin, even coats, following the manufacturer's instructions. Allow the primer to dry completely before proceeding to the next step.
Inspect the vanity for any imperfections, such as dents, scratches, or gouges. Fill these imperfections with wood filler or spackle, depending on the size and depth of the damage. Allow the filler to dry completely and then sand it smooth with fine-grit sandpaper. Spot prime the filled areas before applying the first coat of paint.
Painting Techniques and Paint Selection
The choice of paint and the application technique will significantly impact the final appearance and durability of the painted vanity. Select a paint that is specifically formulated for cabinets or furniture, as these paints are typically more durable and resistant to moisture and wear. Oil-based paints offer excellent durability and a smooth, hard finish but require longer drying times and more complex cleanup procedures. Latex paints are easier to work with, dry quickly, and are low in VOCs (Volatile Organic Compounds). Acrylic paints offer a good balance of durability and ease of use. Consider using a paint with a mildew-resistant additive, particularly in a bathroom environment.
The choice of paint finish—matte, eggshell, satin, semi-gloss, or gloss—is a matter of personal preference. Matte finishes are good at hiding imperfections but can be more difficult to clean. Glossy finishes are easier to clean but can highlight imperfections. Satin or semi-gloss finishes offer a good compromise between durability and ease of cleaning. It is generally recommended to use a satin or semi-gloss finish for bathroom vanities, as these finishes are more resistant to moisture and are easier to wipe clean.
There are several methods for applying paint to a vanity, including brushing, rolling, and spraying. Brushing is a traditional method that is suitable for small projects or intricate details. Use a high-quality brush designed for the type of paint being used. Apply the paint in thin, even strokes, following the grain of the wood. Rolling is a faster method that is suitable for large, flat surfaces. Use a small, smooth roller designed for cabinets or furniture. Apply the paint in thin, even coats, overlapping each stroke slightly. Spraying provides the smoothest and most professional-looking finish but requires specialized equipment and a well-ventilated workspace. Use a paint sprayer designed for fine finishes and follow the manufacturer's instructions carefully.
Apply at least two coats of paint, allowing each coat to dry completely before applying the next. Lightly sand between coats with fine-grit sandpaper to remove any imperfections and create a smooth surface for the next coat. Clean the sanded surface with a tack cloth or damp cloth before applying the next coat of paint.
Finishing Touches and Reassembly
After the final coat of paint has dried completely, consider applying a clear topcoat for added protection and durability. A polyurethane topcoat is a good choice for bathroom vanities, as it is resistant to moisture and wear. Apply the topcoat in thin, even coats, following the manufacturer's instructions. Allow the topcoat to dry completely before reassembling the vanity.
Carefully reattach the hardware, ensuring that all screws are tightened securely. If desired, replace the old hardware with new, updated options. Clean the vanity thoroughly with a mild cleaner and a soft cloth. Inspect the vanity for any imperfections or missed spots and touch them up as needed.
Caulk any seams around the vanity where it meets the wall or floor. This will help to prevent water damage and create a more seamless look. Allow the caulk to dry completely before using the vanity.
Once the vanity is fully reassembled and the finishing touches are complete, the room will have an eye-catching focal point. A properly painted vanity combines with elements of the overall design aesthetic and the functional needs of the space. Regular cleaning and maintenance will ensure that the painted vanity remains beautiful and functional for years to come.

Honest Review Of My Chalk Painted Bathroom Vanities Sarah Joy

Can You Paint A Countertop Re Sick Of Absolutely Recreated Designs
Can You Paint A Countertop Re Sick Of Absolutely Recreated Designs

10 Bathroom Improvements That Only Took Paint Bob Vila

Diy Painted Bathroom Sink Countertop Bless Er House

10 Bathroom Improvements That Only Took Paint Bob Vila
Can You Paint A Countertop Re Sick Of Absolutely Recreated Designs

How To Paint Theril Cabinets Life On Virginia Street

10 Bathroom Improvements That Only Took Paint Bob Vila

Repairing A Water Damaged Bathroom Vanity
Related Posts


