Can You Use a Dresser as a Bathroom Vanity Unit? A Comprehensive Guide
Repurposing furniture is a popular trend in interior design, fueled by a desire for unique aesthetics, cost-effectiveness, and environmental consciousness. One particularly compelling repurposing idea is transforming a dresser into a bathroom vanity. This approach allows homeowners to create a personalized bathroom space with character and functionality. However, using a dresser as a vanity unit requires careful planning, preparation, and execution to ensure a successful and lasting result. This article explores the considerations, benefits, and potential challenges of converting a dresser into a bathroom vanity, providing a comprehensive guide for those considering this project.
The primary appeal of using a dresser as a vanity lies in its inherent storage capacity and aesthetic flexibility. Dressers typically offer drawers and sometimes cabinets, providing ample space for storing toiletries, towels, and other bathroom essentials. Furthermore, dressers come in a wide array of styles, sizes, and finishes, allowing homeowners to choose a piece that complements their existing bathroom decor or introduces a unique design element. Unlike mass-produced vanities from retail stores, a repurposed dresser can add a touch of individuality and vintage charm to the bathroom.
Before embarking on a dresser-to-vanity conversion, it is crucial to assess the feasibility and suitability of the chosen dresser. Factors such as the dresser's dimensions, material, structural integrity, and overall condition must be carefully considered. A successful conversion requires a dresser that can withstand the moisture and humidity prevalent in bathrooms, and that can be modified to accommodate plumbing fixtures without compromising its structural stability.
Choosing the Right Dresser
Selecting the appropriate dresser is the first and arguably most important step in this project. Several criteria should guide the selection process, ensuring that the dresser is not only aesthetically pleasing but also structurally sound and adaptable to the bathroom environment.
Dresser Dimensions:
The size of the dresser should be proportionate to the available space in the bathroom. Consider both the width and depth of the dresser, ensuring it fits comfortably without obstructing walkways or making the bathroom feel cramped. The height of the dresser is also important, as it will determine the countertop height. A standard vanity height is typically between 30 and 36 inches, so the dresser's height should be adjusted accordingly, either by adding legs or trimming the base.Material Composition:
The material of the dresser significantly impacts its suitability for a bathroom environment. Solid wood dressers are generally the most durable and aesthetically pleasing option, but they require proper sealing and protection to prevent water damage. Particleboard or MDF (Medium-Density Fiberboard) dressers are less expensive but are more susceptible to moisture damage and swelling. If choosing a dresser made from these materials, it is essential to apply a waterproof sealant to all surfaces, including the interior and edges.Structural Integrity:
The dresser must be structurally sound to support the weight of the countertop, sink, and plumbing fixtures. Inspect the dresser for any signs of damage, such as loose joints, warped panels, or insect infestations. Repair any structural issues before proceeding with the conversion. Reinforcing the dresser's frame may be necessary, especially if it is an older piece or made from weaker materials.Style and Finish:
Choose a dresser that complements the existing bathroom decor. Consider the style of the bathroom – traditional, modern, rustic – and select a dresser with a matching aesthetic. The finish of the dresser can be altered to match the bathroom's color scheme. Painting, staining, or applying a new veneer are all viable options. Remember to use paints and sealants specifically designed for high-moisture environments.Drawer and Cabinet Configuration:
Evaluate the dresser's existing drawer and cabinet configuration and consider how it can be adapted to accommodate plumbing and storage needs. Some drawers may need to be modified or removed to create space for the sink drain and water supply lines. Plan the layout carefully to maximize storage efficiency and accessibility.Preparing the Dresser for Conversion
Once the ideal dresser has been selected, the next step is to prepare it for conversion. This involves cleaning, repairing, and modifying the dresser to ensure it is ready to receive the countertop, sink, and plumbing fixtures. Thorough preparation is essential for a successful and long-lasting vanity unit.
Cleaning and Repairing:
Begin by thoroughly cleaning the dresser, removing any dust, dirt, or grime. Use a mild detergent and water solution, and ensure the dresser is completely dry before proceeding. Inspect the dresser for any damage, such as scratches, dents, or loose hardware. Repair any imperfections using wood filler, sandpaper, and appropriate tools. Replace any damaged hardware with new pieces that complement the dresser's style.Sealing and Protecting:
Apply a waterproof sealant to all surfaces of the dresser, including the interior and exterior. This is particularly important for dressers made from particleboard or MDF, as these materials are highly susceptible to moisture damage. Use a high-quality sealant specifically designed for wood or composite materials. Apply multiple coats, allowing each coat to dry completely before applying the next. Pay special attention to the edges and corners of the dresser, as these areas are most vulnerable to water penetration.Modifying for Plumbing:
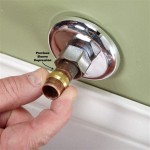
This is perhaps the most challenging aspect of the conversion process. The dresser must be modified to accommodate the sink drain and water supply lines. Carefully measure and mark the locations where the plumbing fixtures will pass through the dresser. Use a hole saw or jigsaw to cut the necessary openings, ensuring the holes are large enough to allow for easy installation and maintenance. Consider using grommets or rubber sleeves to protect the plumbing lines from abrasion and to prevent water from seeping into the dresser.Reinforcing the Structure:
Depending on the dresser's construction and the weight of the countertop and sink, it may be necessary to reinforce the structure. This can be achieved by adding additional supports to the interior of the dresser, such as plywood panels or wooden bracing. Reinforcing the frame will enhance the dresser's stability and prevent it from sagging or warping under the weight of the fixtures.Consider Wire Management:
Think about how to manage electrical wires if you plan to install lighting or outlets near the vanity. Consider drilling holes for wire passage and installing cable organizers inside the dresser to keep wires neat, safe, and accessible.Installation and Finishing Touches
The final stage involves installing the countertop, sink, and plumbing fixtures, and adding any finishing touches to complete the transformation. Careful installation is crucial to ensure the vanity is functional, leak-proof, and aesthetically pleasing.
Installing the Countertop:
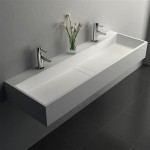
Choose a countertop material that is both durable and aesthetically appealing. Common countertop materials include granite, marble, quartz, and solid surface. Measure the dresser accurately and have the countertop cut to size. Apply a bead of silicone caulk to the top of the dresser before placing the countertop, ensuring a tight and waterproof seal. Secure the countertop to the dresser using construction adhesive or screws.Installing the Sink:
Select a sink that complements the countertop and the overall style of the bathroom. Undermount sinks are a popular choice for vanity conversions, as they create a seamless look and are easy to clean. Follow the manufacturer's instructions for installing the sink, ensuring it is properly sealed and secured to the countertop. Apply silicone caulk around the perimeter of the sink to prevent water from seeping underneath.Connecting the Plumbing:
Connect the drain and water supply lines to the sink, following standard plumbing practices. Use Teflon tape on threaded connections to prevent leaks. Check for leaks by running water through the sink and inspecting all connections. If any leaks are detected, tighten the connections or replace the fittings as necessary. It is advisable to consult with a qualified plumber if you are not comfortable performing plumbing work.
Adding Finishing Touches:
Install new hardware on the drawers and cabinets, such as knobs or pulls, to complement the vanity's style. Consider adding decorative elements, such as trim, molding, or paint accents, to enhance the vanity's visual appeal. Install a backsplash to protect the wall from water damage and to add a decorative touch. Finally, ensure the vanity is properly sealed and protected from moisture to prolong its lifespan.By carefully considering these factors and following these steps, homeowners can successfully transform a dresser into a functional and stylish bathroom vanity. This project offers a unique opportunity to personalize the bathroom space, add character and charm, and create a cost-effective and environmentally conscious alternative to traditional vanity units. The result is a bespoke bathroom feature that reflects the homeowner's individual style and adds value to the home.

How To Make A Dresser Into Vanity Tutorial An Oregon Cottage

Repurposed Dresser Converted To Bathroom Vanity Reinvented Delaware

A Pro Renovator S 6 Tips For Turning Dresser Into Bathroom Vanity

Stunning Bathroom Tour Dresser Into Double Vanity

How To Convert A Dresser Into Bathroom Vanity The Little By Home

Repurposed Dresser Converted To Bathroom Vanity Reinvented Delaware
/103058794-9279662b921c41259cb908f3cb19acd9.jpg?strip=all "How To Turn An Old Dresser Into A Beautiful Bathroom Vanity")
How To Turn An Old Dresser Into A Beautiful Bathroom Vanity

Mid Century Dresser Into Vanity Bright Green Door

Flipping Houses Home Renovation In Silicon Valley

Turn A Vintage Dresser Into Bathroom Vanity
Related Posts