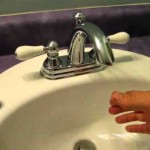
Caulking a Bathroom Vanity: A Comprehensive Guide
Bathroom vanities, serving as focal points for hygiene and aesthetics, are frequently exposed to moisture. Water, if left unchecked, can seep into gaps and crevices around the vanity, leading to mold growth, wood rot, and structural damage. Properly applied caulk acts as a crucial barrier, preventing water intrusion and extending the lifespan of the vanity and surrounding surfaces. This article provides a detailed guide on how to effectively caulk a bathroom vanity, covering preparation, application, and post-application procedures.
Key Point 1: Preparation is Paramount
Successful caulking hinges on meticulous preparation. This phase involves gathering necessary materials, preparing the surfaces, and ensuring optimal working conditions. Rushing this stage can compromise the overall effectiveness of the caulk seal, resulting in premature failure and the recurrence of water-related problems.
Gathering Supplies: The essential tools and materials include:
*Caulk: 100% silicone caulk is generally recommended for bathroom applications due to its superior water resistance and mildew resistance. Acrylic latex caulk may be used for paintability, but it’s generally less durable in high-moisture environments. Select a color of caulk that complements the vanity and surrounding surfaces. Consider white, clear, or a color matched to the vanity countertop.
*Caulk Gun: A high-quality caulk gun provides better control and consistent flow. Choose a gun with a smooth trigger action and a rotating barrel for maneuverability.
*Caulk Removal Tool: This specialized tool simplifies the removal of old caulk without damaging the surrounding surfaces. A utility knife can also be used with caution.
*Scraper: A plastic scraper helps remove any remaining residue after the old caulk has been removed.
*Cleaning Supplies: Rubbing alcohol, a clean cloth, and a vacuum cleaner are needed to thoroughly clean the surfaces before applying new caulk.
*Painter's Tape: Applying painter’s tape along the edges of the caulk line creates clean, professional-looking lines and protects adjacent surfaces.
*Smoothing Tools: A caulk smoothing tool or even just a gloved fingertip dipped in water can be used to create a smooth, concave caulk bead.
*Safety Glasses: Safety glasses protect eyes from debris during the caulk removal process.
Removing Old Caulk: The first step is to remove all traces of the old caulk. This ensures proper adhesion of the new caulk. Using a caulk removal tool or a utility knife, carefully score along the edges of the old caulk line. Then, gently pry the caulk away from the surfaces. Be cautious not to scratch the vanity, countertop, or wall. After removing the bulk of the caulk, use a scraper to remove any remaining residue. A solvent, following the manufacturer’s instructions and safety precautions, may be necessary for stubborn residue.
Cleaning Surfaces: Thoroughly clean the surfaces where the new caulk will be applied. Use rubbing alcohol and a clean cloth to remove any dirt, grease, soap scum, or mildew. Alcohol evaporates quickly and leaves a clean, residue-free surface that promotes optimal caulk adhesion. Vacuum the area to remove any remaining debris. Allow the surfaces to dry completely before proceeding.
Masking with Tape: Applying painter's tape before caulking creates clean, defined lines and protects adjacent surfaces from accidental caulk smudges. Position the tape approximately 1/8 inch from the desired caulk line on both sides. This creates a narrow channel for the caulk and ensures a professional finish. Press the tape firmly to the surfaces to prevent caulk from seeping underneath.
Key Point 2: Caulk Application Techniques
Proper caulk application is essential for creating a watertight seal and a visually appealing finish. Consistent bead size, proper gun angle, and smooth tooling are all critical factors in achieving a professional-looking result.
Preparing the Caulk Tube: Before inserting the caulk tube into the caulk gun, cut the tip of the tube at a 45-degree angle. The size of the opening will determine the bead size. Start with a small opening and gradually increase it until the desired bead size is achieved. Puncture the inner seal of the tube using a nail or wire.
Loading the Caulk Gun: Retract the plunger of the caulk gun and insert the caulk tube. Squeeze the trigger until the plunger engages the tube and caulk begins to flow.
Applying the Caulk: Hold the caulk gun at a 45-degree angle to the surface. Apply a consistent bead of caulk along the joint, moving the gun smoothly and steadily. Avoid starting and stopping abruptly, as this can create unevenness. Apply even pressure to the trigger to ensure a consistent flow of caulk. Overlap the beginning of each bead slightly to create a continuous seal. For wider gaps, multiple passes may be needed. Fill the gap completely without overfilling.
Tooling the Caulk: Immediately after applying the caulk, use a caulk smoothing tool or a gloved fingertip dipped in water to smooth the bead. This step presses the caulk into the joint, ensuring a strong bond and creating a concave profile that sheds water effectively. Wipe away any excess caulk with a clean cloth. If using a finger, keep it wet to prevent the caulk from sticking. A smooth, consistent caulk line is crucial for both aesthetics and functionality.
Dealing with Difficult Areas: Around faucets and pipes, apply caulk in small sections, carefully working around the fixtures to ensure a complete seal. In tight corners, use a smaller caulk tip opening and apply the caulk slowly and deliberately. Pay close attention to detail to ensure that all gaps and crevices are filled.
Key Point 3: Post-Application Procedures and Maintenance
Proper post-application procedures are essential for ensuring the long-term performance and appearance of the caulk. Following the manufacturer's recommendations for drying time and implementing regular maintenance practices will extend the life of the caulk seal and prevent water damage.
Removing the Tape: Carefully remove the painter's tape immediately after tooling the caulk. Pull the tape away from the caulk at a 45-degree angle to create a clean, sharp edge. Removing the tape while the caulk is still wet prevents the caulk from peeling or cracking. If any caulk is pulled away with the tape, touch it up with a wet finger or smoothing tool.
Drying and Curing Time: Allow the caulk to dry and cure according to the manufacturer's instructions. This typically takes 24 to 48 hours. Avoid exposing the caulk to water or excessive humidity during the curing process. Ensure adequate ventilation in the bathroom to promote proper drying.
Inspection and Touch-Ups: After the caulk has fully cured, inspect the seal for any gaps, cracks, or imperfections. If any are found, apply a small amount of caulk to the affected areas and smooth it with a wet finger or smoothing tool. Regular inspections can help identify and address potential problems before they escalate.
Maintenance: Regularly clean the caulk with a mild detergent and water to prevent the buildup of soap scum and mildew. Avoid using abrasive cleaners or scrubbing brushes, as these can damage the caulk. If mildew does appear, clean it with a mildew-killing solution. In areas with high water exposure, consider applying a sealant specifically designed for caulk to provide an extra layer of protection.
Addressing Issues: Over time, even properly applied caulk can deteriorate due to wear and tear. Signs of deterioration include cracking, peeling, shrinking, and discoloration. When these issues arise, it is essential to remove the old caulk and reapply new caulk as described in this guide. Addressing these problems promptly will prevent water damage and maintain the integrity of the bathroom vanity.
By following these guidelines, homeowners can effectively caulk their bathroom vanities, creating a watertight seal that protects against water damage, mold growth, and costly repairs.

Should You Caulk Around A Bathroom Vanity Bathtubber

Score Caulk That Holds The Vanity Sink To Cabinet Small Bathroom Vanities Remodel Modern

How To Caulk Or Re A Vanity

How To Caulk Like A Professional The Home Depot

Should You Caulk Around A Bathroom Vanity Bathtubber

How To Seal Vanity Top Storables

How To Caulk Bathroom Counter With Dap Remove Old Silicone Desolvit

Here S How To Caulk Around Bathroom And Kitchen Fixtures

How To Clean Remove Reapply Caulk In Kitchens And Bathrooms

Choosing The Best Caulk For Bathroom Sink Pep Up Home
Related Posts