Delta Single Knob Bathroom Faucet Repair
Delta faucets are known for their quality and durability, but even the most reliable fixtures can experience issues over time. One common problem encountered with Delta single knob bathroom faucets is the need for repair. This article will provide a comprehensive guide to troubleshooting and resolving common issues with Delta single knob bathroom faucets, empowering homeowners to tackle these repairs independently.
Common Issues and Troubleshooting
Before attempting any repairs, it's important to understand the most frequent problems encountered with Delta single knob bathroom faucets. Identifying the specific issue is crucial for pinpointing the correct solution. Here are some common problems and their potential causes:
- Leaking Faucet: A leaking faucet can be caused by a worn-out cartridge, a loose or damaged O-ring, a worn-out washer, or a clogged aerator.
- Low Water Pressure: Low water pressure can result from a clogged aerator, a partially closed shut-off valve, or a buildup of mineral deposits in the faucet's internal components.
- Stuck Knob: A stuck knob is often caused by a worn-out cartridge, a buildup of mineral deposits, or a damaged O-ring.
- Noisy Operation: Noises like rattling or screeching during faucet operation can indicate worn-out internal components, such as the cartridge or stem.
Once you've identified the issue, you can begin troubleshooting. Start with simple solutions, such as cleaning the aerator or checking the shut-off valve. If the problem persists, proceed to more complex repairs.
Repairing a Leaking Delta Single Knob Bathroom Faucet
A leaking faucet can be a frustrating and wasteful problem. Here's a step-by-step guide to repairing a leaking Delta single knob bathroom faucet:
- Turn Off the Water Supply: Locate the shut-off valve for your faucet, typically beneath the sink or in the basement. Turn the valve clockwise to completely shut off the water supply.
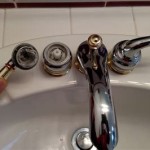
- Remove the Handle and Knob: Most Delta single knob faucets have a set screw located on the underside of the handle. Use a small Allen wrench to loosen the set screw and remove the handle. Once the handle is removed, you can typically pull off the knob.
- Remove the Cartridge: The cartridge is the primary component responsible for controlling water flow. Locate the cartridge by looking for a circular cap or cover on the faucet, and remove it using a wrench or pliers. Depending on the model, you might need to use a cartridge removal tool.
- Inspect the Cartridge, O-rings, and Washers: Examine the cartridge for cracks, wear, or damage. Additionally, check the O-rings and washers for wear or damage. Replace any worn or damaged components.
- Clean the Faucet Components: Use a toothbrush or a small brush to clean any mineral buildup from the faucet body, cartridge, and other components. Use a mild cleaning solution or vinegar for stubborn deposits.
- Reinstall the Cartridge, O-rings, and Washers: Make sure to install the cartridge, O-rings, and washers in the correct order and position. Tighten the cartridge securely but avoid over-tightening.
- Reassemble the Faucet: Replace the handle and knob, ensuring they are securely fastened.
- Turn On the Water Supply: Gradually open the shut-off valve, checking for leaks at each stage.
If you're still experiencing leaks after following these steps, the problem might be more severe. Contact a qualified plumber for further assistance.
Replacing the Cartridge
One of the most common repairs for Delta single knob bathroom faucets involves replacing the cartridge. The cartridge is the heart of the faucet, controlling both water flow and temperature. Here's a detailed breakdown of the process:
- Gather the Necessary Tools: You'll need a few basic tools for this repair, including a Phillips head screwdriver, an Allen wrench, a wrench or pliers, and a cartridge removal tool (if required).
- Turn Off the Water Supply: Locate the shut-off valve for the faucet and turn it completely off.
- Remove the Handle and Knob: Loosen the set screw on the underside of the handle and remove the handle. Then, pull off the knob.
- Remove the Cartridge Cover: Locate the cartridge cover, often a round or square piece of plastic or metal. Remove the cover by unscrewing it or using a wrench or pliers.
- Remove the Old Cartridge: The cartridge may have a retaining clip or a spring that needs to be removed before you pull the cartridge out. Use the cartridge removal tool if required.
- Install the New Cartridge: Carefully install the new cartridge, ensuring it's properly seated. Replace the retaining clip or spring, if necessary.
- Reassemble the Faucet: Replace the cartridge cover, handle, and knob, securing them tightly.
- Turn On the Water Supply: Gradually open the shut-off valve and check for leaks.
When replacing the cartridge, it's essential to choose a compatible cartridge for your Delta faucet. Consult the manufacturer's website or user manual for the correct part number.

How To Repair A Delta Tub Shower Valve

Repairing A Leaky Delta Bath Or Shower Faucet Single Lever And Setting Temp

How To Rebuild A Delta Single Handle Faucet

My 1300 1400 Series Monitor Is Leaking From The Shower Head Or Spout When Handle Off What Do I Need

Replacement Parts For Delta Bathroom Shower And Sink Knob Handle Faucets New

Old Delta Shower Faucet Repair Made Easy

Fix The Leaky Delta Bathtub Faucet A Step By Leak Repair Guide Shower Handles Kitchen

How To Replace The Cartridge In A Single Handle Delta Faucet Repair

How To Fix A Leaky Delta Style Bathroom Faucet

Replacing Delta Shower Cartridge
Related Posts
