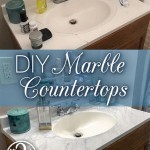
How to Caulk a Bathroom Countertop Like a Pro
Caulking a bathroom countertop is a crucial DIY project that protects against water damage and enhances the overall aesthetic. A properly caulked seam prevents water from seeping beneath the countertop, where it can cause mold, mildew, and rot. This guide provides a comprehensive walkthrough of the process, equipping homeowners with the knowledge and steps to achieve professional-looking results.
Gathering the Necessary Tools and Materials
Before beginning, assemble the following items:
- Caulk: Choose a high-quality, 100% silicone caulk specifically designed for bathrooms. Look for mildew-resistant varieties.
- Caulk Gun:
- Utility Knife or Caulk Removal Tool:
- Painter's Tape (Optional):
- Rubbing Alcohol or Mineral Spirits:
- Clean Rags:
- Putty Knife (Optional):
- Caulk Finishing Tool (Optional but recommended):
- Gloves:
Preparing the Countertop Surface
Proper surface preparation is essential for optimal caulk adhesion and longevity. Follow these steps to ensure a clean and dry working area:
- Remove Existing Caulk: Use a utility knife or caulk removal tool to thoroughly remove all traces of old caulk. Ensure a clean, smooth surface.
- Clean the Surface: Clean the countertop and backsplash area with rubbing alcohol or mineral spirits to remove any soap scum, grease, or residue. This promotes strong caulk adhesion.
- Dry the Surface: Ensure the surface is completely dry before applying new caulk. Moisture can compromise the caulk's effectiveness.
Applying Painter's Tape (Optional)
While optional, painter's tape helps create clean, straight caulk lines, especially for those less experienced with caulking.
- Apply the Tape: Carefully apply painter's tape along both sides of the seam where the countertop meets the backsplash or wall. Leave a small gap for the caulk.
- Ensure Secure Adhesion: Press the tape firmly to prevent caulk from seeping underneath.
Applying the Caulk
Applying the caulk correctly ensures a watertight seal and a professional finish.
- Cut the Caulk Tube: Use a utility knife to cut the tip of the caulk tube at a 45-degree angle. The size of the opening should match the width of the gap you need to fill.
- Load the Caulk Gun: Insert the caulk tube into the caulk gun.
- Apply Even Pressure: Apply consistent pressure on the caulk gun trigger while moving along the seam. Maintain a steady speed to create a continuous bead of caulk.
- Fill the Gap Completely: Ensure the caulk fills the gap entirely, creating a seamless seal. Avoid leaving any voids or air pockets.
- Overlap the Edges: Slightly overlap the caulk onto both the countertop and backsplash to ensure complete coverage.
Smoothing and Finishing the Caulk
Smoothing the caulk creates a professional, watertight seal. This step is crucial for achieving a polished look.
- Smooth the Bead: Use a caulk finishing tool (or a moistened finger) to smooth the applied caulk. This removes excess caulk and creates a concave shape, promoting water runoff.
- Remove Excess Caulk: Wipe away any excess caulk with a clean, damp rag.
- Remove Painter's Tape (If Used): Carefully remove the painter's tape while the caulk is still wet. This prevents pulling up the caulk.
- Allow to Dry: Let the caulk dry completely according to the manufacturer's instructions. Avoid using the countertop or getting the area wet during the drying period.
Inspecting and Maintaining the Caulk
Regular inspection and maintenance ensure the caulk remains effective in preventing water damage.
- Regular Inspections: Periodically inspect the caulk for any signs of cracking, peeling, or discoloration.
- Reapply as Needed: If any issues are detected, remove the old caulk and reapply following the steps outlined above.
- Clean Regularly: Clean the caulked areas regularly with a mild bathroom cleaner to prevent mold and mildew growth.

How To Caulk Bathroom Counter With Dap Remove Old Silicone Desolvit

How To Caulk Bathroom Countertop Wall

Best Caulking Techniques For Re A Tile Countertop

How To Seal Vanity Top Storables

Here S How To Caulk Around Bathroom And Kitchen Fixtures

Should You Caulk Around A Bathroom Vanity Bathtubber

How To Caulk Countertop Backsplash A Complete Guide Marble Com

How To Clean Remove Reapply Caulk In Kitchens And Bathrooms

How To Caulk A Kitchen Counter With Easy Steps Faqs And Abbotts At Home

Bathroom Caulk Replacement
Related Posts


