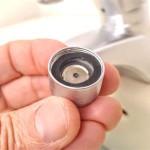
How To Change a Bathroom Sink Drain Ring
The drain ring, also known as the drain flange or strainer body, is a crucial component of a bathroom sink drain assembly. It secures the drain stopper to the sink and creates a seal to prevent water leakage. Over time, the drain ring can corrode, crack, or become damaged, leading to leaks and unpleasant odors. Replacing a faulty drain ring is a relatively straightforward plumbing task that can be completed with a few basic tools and some patience.
Before beginning the replacement process, gather the necessary tools and materials. These typically include an adjustable wrench, pliers, plumber's putty, a small container for catching water, a flathead screwdriver, and a new drain ring. Ensure the new drain ring is the correct size and style for the existing sink drain.
The first step in replacing the drain ring is to prepare the work area. Place the small container beneath the sink's P-trap to catch any residual water. Turn off the water supply valves located beneath the sink. This crucial step prevents accidental water flow during the replacement process.
Next, the old drain ring must be removed. Loosen the large nut located directly beneath the sink, using an adjustable wrench or pliers. This nut secures the drain ring to the sink basin. Once the nut is loosened, it can be removed by hand. At this point, the drain ring along with the drain stopper can be lifted out of the sink.
With the old drain ring removed, clean the sink surface around the drain opening. Remove any old plumber's putty and thoroughly clean the area to ensure a proper seal for the new drain ring. A clean surface is crucial for a watertight connection.
Now, prepare the new drain ring for installation. Roll a rope of plumber's putty, approximately ½ inch thick, and place it evenly around the underside of the new drain ring's flange. This putty creates a waterproof seal between the drain ring and the sink. Press the new drain ring firmly into the drain opening, ensuring the putty is compressed and creates a good seal.
From beneath the sink, reattach the large nut that was removed earlier. Tighten the nut securely with the adjustable wrench or pliers. Be careful not to overtighten, as this can damage the sink or the new drain ring. Hand-tighten to a snug fit, then use the wrench for an additional quarter to half turn.
After tightening the nut, check the drain stopper's operation. The stopper should move up and down smoothly. If it doesn’t, adjustments may be needed to the linkage connecting the stopper to the drain mechanism. Consult the manufacturer’s instructions for specific adjustments, as these can vary depending on the drain assembly type.
Once the drain ring is installed and the stopper is functioning correctly, turn the water supply valves back on. Check for leaks around the drain ring. If leaks are present, tighten the nut slightly. If leaks persist, it may be necessary to remove the drain ring and reapply the plumber's putty, ensuring a more even and thorough seal.
Regular maintenance of the drain assembly can prevent future issues. Periodically cleaning the drain with a mixture of baking soda and vinegar can help remove buildup and maintain proper drainage. Avoid using harsh chemical drain cleaners, as these can damage the drain components and the plumbing system.
While replacing a bathroom sink drain ring is a relatively simple DIY project, there may be instances where professional help is needed. If the drain assembly is particularly complex, or if leaks persist despite proper installation, contacting a qualified plumber is recommended. A professional plumber has the expertise and tools to diagnose and address more complicated plumbing problems.
Different types of sink drains exist, and the specific steps for replacing the drain ring may vary slightly. Always consult the manufacturer's instructions for the specific drain assembly being worked on. This ensures the proper procedure is followed and prevents potential damage to the drain assembly or the sink.
Choosing a high-quality replacement drain ring can extend its lifespan and reduce the likelihood of future leaks. Look for drain rings made from durable materials like brass or stainless steel. These materials are resistant to corrosion and provide a more reliable seal. Investing in a quality drain ring can save time and money in the long run.
Safety should always be a priority when undertaking any plumbing project. Wearing appropriate eye protection can prevent injury from debris or splashing water. Gloves can protect hands from bacteria and grime. Taking these precautions helps ensure a safe and successful drain ring replacement.

Sink Drain Replacement Bathroom

Installing A New Bathroom Sink

How To Replace A Sink Stopper Quick And Simple Home Repair
How To Install Bathroom Sink Drain Queen Bee Of Honey Dos

How To Replace A Bathroom Sink Drain

How To Fix Or Maintain Your Sink S Pop Up Mechanism
How To Install Bathroom Sink Drain Queen Bee Of Honey Dos

Bathroom Sink Drain Repair Please Help Doityourself Com Community Forums
How To Install Bathroom Sink Drain Queen Bee Of Honey Dos

Replacing A Bathroom Sink Drain Collar Ehow
Related Posts


