How To Connect a Bathroom Sink Drain: A Comprehensive Guide
Connecting a bathroom sink drain is a plumbing task that, while seemingly complex, can be successfully undertaken by a homeowner with some basic knowledge and the right tools. A properly installed drain ensures efficient wastewater removal, prevents leaks, and contributes to the overall functionality of the bathroom. This article provides a detailed guide on how to connect a bathroom sink drain, covering the necessary materials, step-by-step instructions, and important considerations for a successful installation.
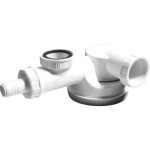
Before commencing any plumbing work, it is imperative to understand the terminology and components involved. The sink drain assembly typically consists of several key parts: the tailpiece, the drain flange, the drain body, the P-trap, and connecting pipes. Each component plays a vital role in directing water away from the sink and preventing sewer gases from entering the bathroom.
The tailpiece is the vertical pipe that extends downwards from the bottom of the sink drain opening. The drain flange is the circular, usually chrome-finished, component that sits flush against the sink basin and directs water into the drain opening. The drain body is the main housing of the drain assembly, connecting the tailpiece to the P-trap. The P-trap is a U-shaped pipe that holds a small amount of water, creating a seal to block sewer gases. Finally, connecting pipes extend from the P-trap to the drainpipe in the wall.
Understanding how these components fit together is essential for a smooth and leak-free installation. Proper preparation, including gathering the necessary tools and materials, is equally crucial.
Preparing for the Installation: Tools and Materials
A successful bathroom sink drain connection requires a specific set of tools and materials. Having these readily available will streamline the process and minimize potential delays. Here's a comprehensive list:
Tools:
- Pipe wrench: Used for tightening and loosening threaded connections.
- Basin wrench: Designed to reach and loosen nuts in tight spaces under the sink.
- Adjustable wrench: Versatile tool for various tightening and loosening tasks.
- Channel-lock pliers: Useful for gripping and turning pipes and fittings.
- Putty knife: For applying and smoothing plumber's putty.
- Screwdriver (Phillips and flathead): Depending on the type of drain assembly.
- Measuring tape: To ensure accurate pipe lengths.
- Hacksaw or pipe cutter: For cutting pipes to the required length.
- Bucket: To catch any water during disassembly and installation.
- Rags or towels: For cleaning and wiping up spills.
- Safety glasses: To protect the eyes from debris.
- Gloves: To protect the hands from dirt and chemicals.
Materials:
- New drain assembly: Including the drain flange, drain body, tailpiece, P-trap, and connecting pipes.
- Plumber's putty: To create a watertight seal around the drain flange.
- Teflon tape: To seal threaded connections and prevent leaks.
- Replacement supply lines (optional): If the existing supply lines are old or damaged.
- New shut-off valves (optional): If the existing shut-off valves are not functioning properly.
Before starting, it is highly recommended to review the instructions that come with the new drain assembly. Different models may have slightly different installation procedures. Turning off the water supply to the sink is also essential to prevent flooding during the process. Locate the shut-off valves under the sink and turn them clockwise until they are completely closed. Place a bucket under the existing drain to catch any residual water.
Step-by-Step Installation Process
The installation process can be broken down into several key steps. Carefully following these steps will ensure a secure and leak-free connection.
1. Removing the Old Drain Assembly: Begin by loosening the slip nuts connecting the P-trap to the tailpiece and the drainpipe in the wall. Use a pipe wrench or channel-lock pliers if necessary. Once the nuts are loose, carefully detach the P-trap and remove it. Be prepared for some water to spill out. Next, loosen the nut connecting the tailpiece to the drain body. Use a basin wrench if access is restricted. Finally, unscrew the drain flange from the sink basin. If the drain flange is stuck, use a putty knife to gently break the seal of the old plumber's putty. Clean the sink basin thoroughly, removing any old putty or debris.
2. Installing the New Drain Flange: Roll a rope of plumber's putty and apply it evenly around the underside of the new drain flange. Ensure there are no gaps in the putty. Press the drain flange firmly into the sink basin, centering it over the drain opening. From underneath the sink, attach the rubber washer, cardboard washer, and metal washer (in that order) to the drain flange. Secure the drain flange by tightening the locknut. Be careful not to overtighten, as this could crack the sink. Remove any excess plumber's putty from around the drain flange using a putty knife. The goal is to create a watertight seal between the drain flange and the sink basin.
3. Connecting the Drain Body and Tailpiece: Attach the tailpiece to the drain body using a slip nut and washer. Tighten the slip nut securely, but avoid overtightening. Ensure the tailpiece is aligned properly with the drain opening. The length of the tailpiece may need to be adjusted depending on the height of the P-trap. If necessary, cut the tailpiece to the appropriate length using a hacksaw or pipe cutter. Deburr the cut end to ensure a smooth connection. Apply Teflon tape to the threaded connections on the drain body to further prevent leaks.
4. Installing the P-Trap: The P-trap is designed to trap water and prevent sewer gases from entering the bathroom. Connect the P-trap to the tailpiece and the drainpipe in the wall using slip nuts and washers. Ensure the P-trap is properly aligned and that the slip nuts are tightened securely. The height of the P-trap may need to be adjusted to ensure a proper fit. Some P-traps are adjustable, allowing for easy height adjustments. Ensure the P-trap is positioned correctly so that the water seal is maintained. This is crucial for preventing sewer gas from escaping into the bathroom.
5. Checking for Leaks: Once the drain assembly is fully connected, turn on the water supply to the sink. Check all connections carefully for any signs of leaks. Pay particular attention to the drain flange, tailpiece, P-trap, and the connection to the drainpipe in the wall. If any leaks are detected, tighten the corresponding slip nut or connection. If the leak persists, disassemble the connection, inspect the washer or fitting, and reassemble with new plumber's putty or Teflon tape if necessary. It is important to address any leaks immediately to prevent water damage.
Important Considerations and Troubleshooting
While the installation process is relatively straightforward, several potential issues can arise. Being aware of these issues and knowing how to troubleshoot them can save time and frustration.
1. Drain Flange Leaks: If the drain flange is leaking, it is likely due to an inadequate seal between the flange and the sink basin. This can be caused by insufficient plumber's putty, an uneven application of putty, or overtightening the locknut. To resolve this issue, disassemble the drain flange, clean the surfaces thoroughly, reapply plumber's putty generously, and reassemble, ensuring the locknut is tightened to the correct torque. It's important to distribute the putty evenly and ensure it makes full contact with both the sink basin and the drain flange.
2. Slip Nut Leaks: Leaks at slip nut connections are often caused by loose nuts, damaged washers, or improperly aligned pipes. Tighten the slip nut securely, but avoid overtightening. If the leak persists, inspect the washer for cracks or damage and replace it if necessary. Ensure the pipes are properly aligned before tightening the slip nut. Sometimes, debris or imperfections in the pipe surface can prevent a tight seal. Clean the pipe surfaces thoroughly before reassembling.
3. Clogged Drain: If the drain is clogged, it may be due to debris or hair trapped in the P-trap. To clear the clog, disassemble the P-trap and remove any obstructions. A bent wire or a small brush can be helpful for removing stubborn clogs. Alternatively, a drain snake can be used to reach deeper into the drainpipe and dislodge any blockages. Regularly cleaning the drain with a drain cleaner can help prevent future clogs. Avoid pouring harsh chemicals down the drain, as they can damage the pipes.
4. Matching Pipe Sizes: Ensuring that all components have the correct diameter is critical. Mismatched pipe sizes will lead to leaks and improper drainage. When purchasing a new drain assembly, verify that the tailpiece and P-trap are compatible with the existing drainpipe in the wall. Adapters can be used to connect pipes of different sizes, but it is best to avoid this if possible. Using the correct size components will ensure a proper seal and prevent future problems.
5. Working in Confined Spaces: Working under a sink can be challenging due to limited space. A basin wrench is specifically designed for reaching and loosening nuts in tight spaces. Using a headlamp or flashlight can improve visibility. Consider using a small stool or cushion to make the work more comfortable. Patience and careful planning are key to successfully navigating these challenges.
By carefully following these steps, paying attention to detail, and addressing any potential issues promptly, connecting a bathroom sink drain can be a manageable DIY project. A properly installed drain ensures efficient water drainage, prevents leaks, and contributes to the overall functionality and aesthetics of the bathroom.

How To Install A Pipe From Sink Drain Wall Ehow

How To Fit A Bathroom Sink Diy Guides Victorian Plumbing
Install A Drain Stopper So The Is Removable

How To Connect A Bathroom Sink Drain
How To Install Bathroom Sink Drain Queen Bee Of Honey Dos

Bathroom Sink Plumbing Diagram Diy Sinks Drain Kitchen Remodel

How To Easily Connect The Plumbing For A New Bathroom Sink Hometips
How To Install Bathroom Sink Drain Queen Bee Of Honey Dos

Bathroom Sink Popup And Stopper Problems

How To Replace A Sink Stopper Quick And Simple Home Repair


