How to Disassemble a Kohler Bathroom Faucet
Disassembling a Kohler bathroom faucet is a relatively straightforward process that can be accomplished with the right tools and a little patience. Whether you’re looking to replace a worn-out cartridge, clean mineral deposits, or simply inspect the internal components, understanding how to disassemble and reassemble your faucet is a valuable skill for any homeowner. This article will guide you through the process step-by-step, ensuring you can tackle this task with confidence.
Gather Your Tools and Materials
Before you begin, gather the necessary tools and materials to ensure a smooth disassembly process. You will need:
- A Phillips head screwdriver: This will be used to remove the screws holding the handle and escutcheon plate in place.
- An adjustable wrench: This will be used to tighten and loosen the faucet’s supply lines and other components.
- A pair of pliers: These will come in handy for gripping and turning small parts.
- A small container or bowl: This will be helpful for collecting any loose parts or water that may drain from the faucet.
- A microfiber cloth: This will be used to wipe down and clean the faucet parts as you disassemble them.
- Optional: A digital camera: Taking photos of each step can be helpful if you need to reassemble the faucet later.
It is also recommended to have a replacement cartridge on hand if you plan to replace it during this process. Many Kohler faucets can be easily serviced using a universal cartridge, which can be purchased online or at your local home improvement store.
Step-by-Step Disassembly Guide
Follow these steps to safely and effectively disassemble your Kohler bathroom faucet:
- Turn off the water supply: Locate the shut-off valves for the hot and cold water supply lines leading to your faucet. Turn the valves clockwise to completely shut off the water flow.
- Drain the faucet: Open the faucet handles to drain any remaining water in the lines. This will prevent water from spilling during the disassembly process.
- Remove the handle(s): Locate the screws holding the handle(s) in place, usually found under the handle cap or behind the handle itself. Use a Phillips head screwdriver to remove these screws, and gently lift off the handle(s).
- Remove the escutcheon plate: The escutcheon plate is the decorative trim that covers the faucet’s mounting hole on the sink or countertop. Remove the screws holding the escutcheon plate in place, usually located at the bottom of the plate. Carefully lift off the escutcheon plate.
- Disconnect the supply lines: Use an adjustable wrench to loosen and disconnect the supply lines connected to the faucet. Be careful not to overtighten the wrench, as this could damage the pipe or faucet. Place a bucket or towel beneath the faucet to catch any water that may leak out during this step.
- Remove the faucet body: The faucet body is the central part of the faucet, containing the valve and spout. The mounting nut, typically located at the bottom of the faucet body, secures it to the sink or countertop. Use an adjustable wrench to loosen and remove the mounting nut. You may need to hold the faucet body steady with another wrench to prevent it from turning. Once the mounting nut is loose, carefully lift the faucet body off the sink or countertop.
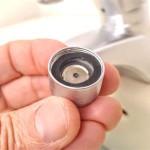
- Disassemble the cartridge and other components: Once the faucet body is removed, you can proceed to disassemble the internal components, such as the cartridge, aerator, and other seals. Refer to a Kohler service manual or online resources for specific instructions on how to disassemble these components for your particular faucet model.
Troubleshooting and Reassembly
Once you have disassembled the faucet, inspect the components for signs of wear or damage. If you are replacing the cartridge or cleaning mineral deposits, follow the instructions provided with the replacement cartridge or with your Kohler faucet’s maintenance manual. Remember to clean any parts that have been removed with a microfiber cloth and warm water.
To reassemble your Kohler bathroom faucet, follow the steps above in reverse order. Make sure to tighten all connections securely, but avoid overtightening, which can lead to damage. When connecting the supply lines, ensure they are properly aligned with the faucet body. After reassembly, turn on the water supply and check for leaks. If there are any leaks, carefully review your reassembly process to identify and correct the issue.
Antique Kitchen Sink Faucet Servicing

Kohler Wide Spread Taboret Lavatory Faucet Stems Replaced

How To Fix Leaky Bathroom Faucet Kohler Two Handle

How To Disassemble A Pfister Bathroom Faucet Bargain

How To Fix A Leaky Faucet Single Handle By Kohler Best Plumbing 206 633 1700

How To Remove Kohler Bathroom Faucet Handle Melted Stories

How To Remove A Single Stem Kohler Kitchen Faucets Infinity

Repair A Dripping Kohler Bathroom Faucet

Replacing A Bathroom Faucet Fine Homebuilding

Kohler Bathroom Faucet Cartridge Replacement
Related Posts


